Omni-Channel
Salesforce Omni-Channel integration combines calls and work items within the InGenius user interface, providing users with a consolidated view of all their tasks in a single window.
Note: This section is not applicable to Microsoft Dynamics 365 users.
Note: This section is not applicable to ServiceNow users.
Note: This section is not applicable to Service Cloud Voice users.
The Omni-Channel page in the Admin App allows you to enable Salesforce Omni-Channel integration with InGenius, import and manage presence statuses and map presence statuses to agent states. This gives users in your call center the ability to synchronize agent states and presence statuses seamlessly.
Select the Enable Omni-Channel integration checkbox to toggle InGenius Omni-Channel integration with Salesforce.
Omni-Channel configuration options appear on the Admin App page when the feature is enabled:

Note: Omni-Channel must also be enabled in Salesforce. For more information, consult the Salesforce documentation here.
Select the Show new Omni-Channel work items checkbox to toggle work items in the InGenius user interface:

When this option is selected, users can interact with work items in the InGenius user interface.
When this option is deselected, work items only appear in the Salesforce Omni-Channel widget and not in the InGenius user interface.
This section describes how to import presence statuses and configure the presence status table in the InGenius Admin App.
Import Presence Statuses
Import Salesforce presence statuses into the InGenius Admin App. This is the first step to mapping a presence status to an agent state.
Note: You must have a System Administrator role in Salesforce to import presence statuses in to the InGenius Admin App.
To import presence statuses from Salesforce:
- From the Omni-Channel page in the InGenius Admin App, select the Import button:

- Your presence statuses created in Salesforce are automatically imported into the InGenius Admin App.
Imported presence statuses appear in a table with the following information:
- Status Name: The name of the presence status as defined in Salesforce.
- Developer Name: This is an internal name that is required when creating the presence status in Salesforce.
- Availability Status: In Salesforce, choose whether the user is online or busy when they use a presence status. Online statuses let users receive new work items, while Busy statuses make agents appear as away and they are unable to receive work items.
Note: The Offline status name appears in the table by default and cannot be removed.
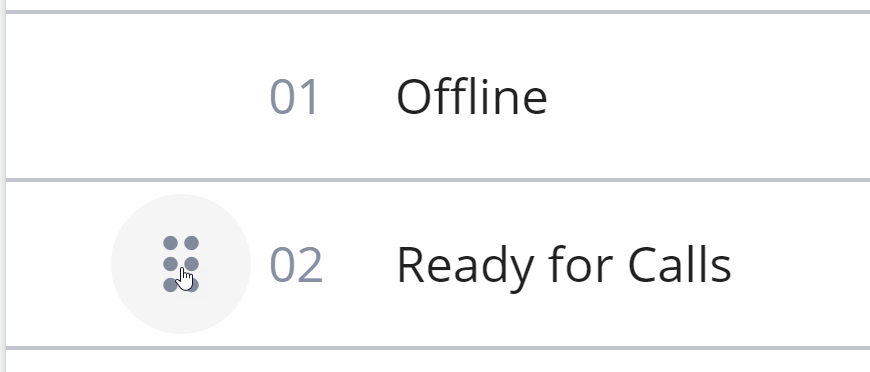
Reorder Presence Statuses
To change the order of presence statuses in the table:
- Select the
 icon displayed to the left of a selected presence status.
 - Click and hold the icon to drag a presence status and move it to the desired location in the table.
Show in UI
Select the "eye" icon next to a presence status to toggle whether it appears in the InGenius user interface.
 = = |
Presence status appears in the InGenius UI. |
 = = |
Presence status does not appear in the InGenius UI. |
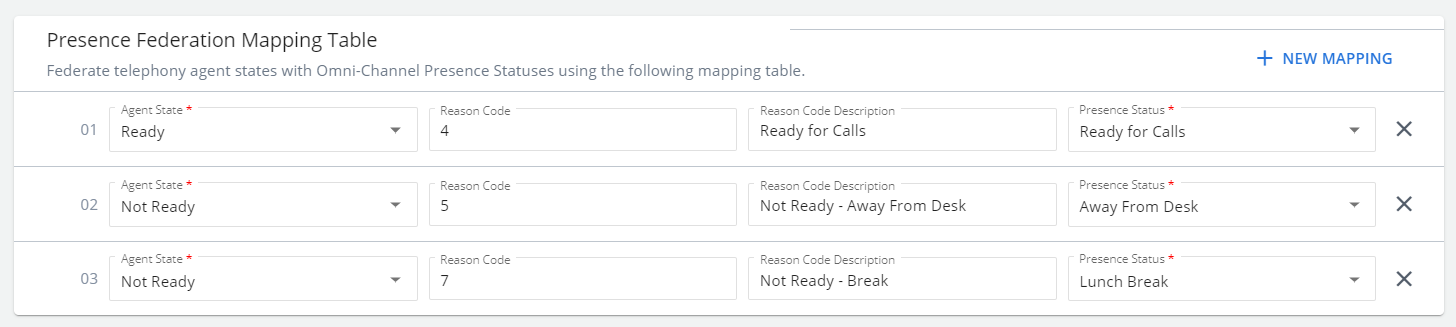
The Presence Federation Mapping Table allows you to map InGenius agent states to Salesforce presence statuses. This means when an InGenius user selects an agent state, the mapped presence status is also selected automatically.
An example of a completed mapping table is shown in the image below:
Add New Mapping
To add a new mapping:
- Select the + New Mapping button. A blank mapping is created.
- Use the dropdown menus to select an agent state and a presence status to map to eachother.
- (Optional) Type a reason code and reason code description in the empty fields.
An example of a completed mapping is shown in the image below:

The following fields in the mapping table are configurable:
- Agent State: Agent states are defined by your telephony system. Select an available agent state you want to map to a Salesforce presence status. Examples of agent states include: Ready, Not Ready, Busy, etc.
- Reason Code: These values must match what is defined by your telephony system and are typically numeric codes (for example, 0, 1, 12, etc.).
- Reason Code Description: This is for display purposes only, to help you identify different reason code values. For example: Not Ready - Reason Code 1 might have the label "Lunch."
- Presence Status: This is the Salesforce presence status you wish to map to the agent action.
Remove Mapping
To remove a mapping, select the  icon displayed next to a mapping.
Reorder Mappings
To change the order in which mapped agent states appear in the InGenius user interface:
- Select the icon displayed to the left of a mapping.
- Click and hold the icon to drag a mapping and move it to the desired location in the table.