FileBound stencil
The FileBound export stencil will send routed documents to a pre-configured FileBound site.
Available connections
There are two outgoing connections from a FileBound stencil: green if the export to FileBound was successful and red if the export to FileBound failed.
Configuration
- To access stencil properties, double-click a FileBound stencil. Or, right-click a FileBound stencil and select Properties.
-
Configure the stencil, then click Save.
General tab
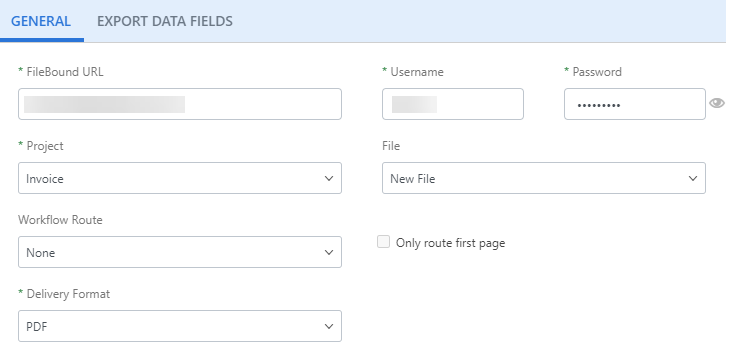
FileBound URL: The FileBound site URL.
Username: The username you use to log into the FileBound site.
Password: The password you use to log into the FileBound site.
Project: Once a valid FileBound URL, Username, and Password have been entered, the project list will populate with all projects you have access to on the FileBound site. Select the project you want to export documents to.
File: Currently, a new file will be created during a FileBound export. The default merge setting for the FileBound project will still apply when a new file is created.
Workflow Route: The workflow documents will follow when exported to FileBound. If a default process for automatic routing has been configured in FileBound project settings, both routes will be initiated when documents are exported to FileBound.
Only route first page: Routes only the first page of a document.
Delivery Format: The format the document will be converted to during export. The following options are available:
- PDF: A PDF document that is not text-searchable.
- Image+Text PDF: A PDF document that is text-searchable. The original look of the document will stay the same. The first layer of the PDF is an image maintaining the fidelity of the document, and the text is applied as a second layer.
- Text only PDF: A PDF document with no image layer. The OCR engine extracts the text from the document and puts it as the first layer of the PDF document. OCR imperfections can be seen when converting to this format type.
- TIF: An image in TIFF file format.
- OCR Word Document: The OCR engine extracts the text from the document and puts it in Microsoft Word file format.
Data Fields tab
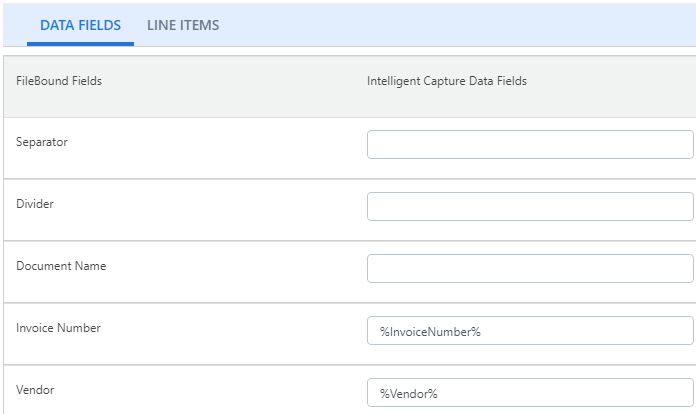
The Data Fields tab will list Separator (if enabled ), Divider, Document Name, and all index fields that are configured for the selected FileBound project. These fields can be matched with data fields available in Intelligent Capture to populate values when documents are sent to FileBound.
If Document Name is left blank, the name of the document in Intelligent Capture will be used.
These fields support data field substitution.
Note: If you are mapping from an Intelligent Capture currency type field to a numeric index field in FileBound, you must include %Total:remove($)% in order for the value to be saved without error.
Line Items tab
The Line Items tab will list Line Item and all index fields that are configured for the related project in FileBound. These fields can be matched with data fields available in Intelligent Capture to populate index field values when documents are sent to FileBound.
See the Data Fields Tab section above for information about populating values to pass to FileBound.
This tab will only be available if a file relationship has been established for the selected project in FileBound. See the FileBound online help for more information about file relationships.

Export Data Fields tab
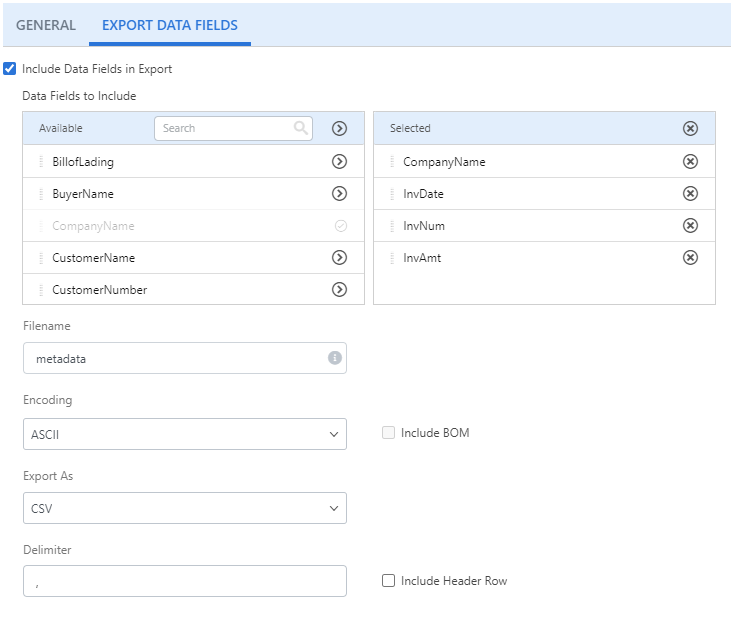
Include Data Fields in Export: Select this check box to export data fields associated with the document.
Data Fields to Include: Click Add (>) next to the data field(s) you want to include in the export. Or, move data fields from the Available box to the Selected box using a drag-and-drop operation. To remove a data field, click Remove (X) next to the data field in the Selected box.
Note: Line item type data fields are not supported when exporting in CSV format.
Filename: The name for the exported file. This field supports data field substitution.
Encoding: The type of encoding to use. Content can be encoded using the ASCII, UTF8, UTF16, or UTF32 character encoding schemes.
Include BOM: Select this check box to include the byte order mark.
Export As: The format for the export. Data can be exported in CSV, JSON, or XML format.
Delimiter: For CSV export, specify the character to use for the delimiter.
Include Header Row: For CSV export, select this check box to include a header row.
Apply XLT: For XML export format, select this check box to upload an XML transformation file (.xslt) to apply to the document. Click Choose File to select the .xslt file.