Contact lists allow users to send static or dynamics faxes to lists of contacts, rather than having to send single transactions to individual contacts one by one. Using contact lists, it is possible to send faxes to up to 20,000 contacts in a single transaction.
In any broadcast, two items are required, the fax to be broadcast, and a list of recipients. The sent fax can either be static (meaning each recipient in the list receives the same fax), or dynamic (meaning every recipient receives a personalized fax featuring merged fields).
To manage contact lists, in the Navigation Menu, click Settings, then click Contact Lists
Note: High-authentication (PCI) users will not have this option.
From the Contact Lists page, you can:
View or edit contact list properties
Add a contact list
-
Click New...

-
In the Name box, enter a name for the contact list.
-
Select the Private contact list check box to make the contact list private. If cleared, the contact list will be shared with other users under the same account.
- Click Save.
Add contacts to a list
Once you have created a list, you will need to add contacts. You can add and send to up to 20,000 contacts at a time. You can manually add contacts or upload a file of contacts to be imported.
-
Perform one of the following:
-
Right-click anywhere in the contact list row or click the three dots next to the contact list you want to add contacts to, then select Properties from the drop-down menu.
-
Or, click the name of the contact list you want to add contacts to.

-
-
Click Add to add contacts to the list.

- Enter contact information, then click OK.
-
Repeat Steps 2-3 to add additional contacts to the contact list.
-
Click Save.
-
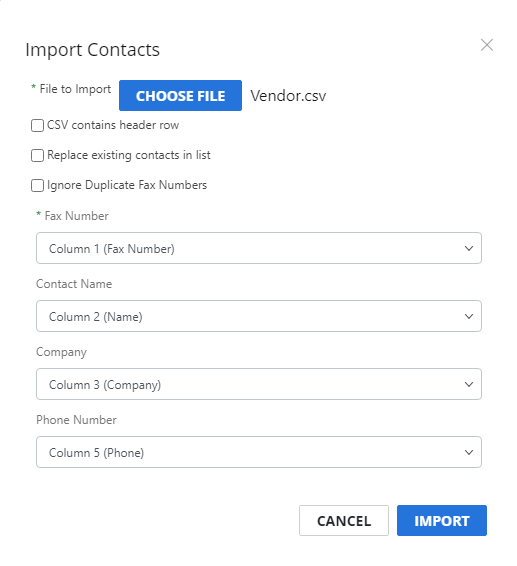
Right-click anywhere in the contact list row or click the three dots next to the contact list you want to import contacts into, then select Import from the drop-down menu.

-
Click Choose File to select the .csv file containing contact information.
-
Select the CSV contains header row check box if the .csv file contains a header row.
-
Select the Replace existing contacts in list check box to delete any existing contacts in the list and replace them with the newly imported contacts.
-
Select the Ignore Duplicate Fax Numbers check box to ignore duplicate entries in the Fax Number column.
-
Map the Fax Number, Contact Name, Company, and Phone Number to applicable columns in the .csv file.
-
Click Import.
Import a contact list
-
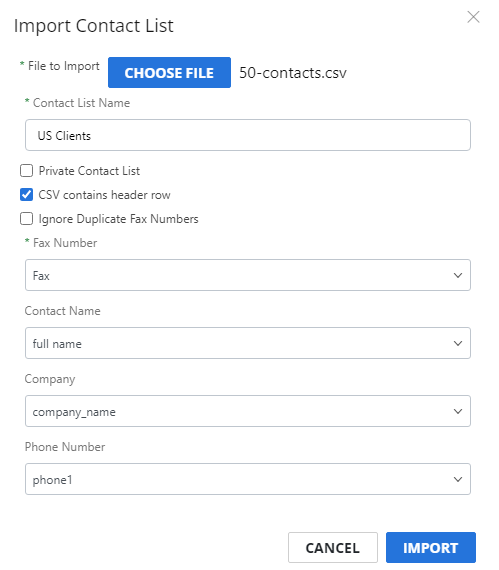
Click Import Contact List.

-
Click Choose File to select the .csv file containing contact list information.
-
In the Contact List Name box, enter a name for the contact list.
-
Select the Private Contact List check box to make the contact list private. If cleared, the contact list will be shared with other users under the same account.
-
Select the CSV contains header row check box if the .csv file contains a header row.
-
Select the Ignore Duplicate Fax Numbers check box to ignore duplicate entries in the Fax Number column.
-
Map the Fax Number, Contact Name, Company, and Phone Number to applicable columns in the .csv file.
-
Click Import.
View or edit contact list properties
In Contact List Properties, you can rename the contact list and add, edit, or remove contacts.
-
Perform one of the following:
-
Right-click anywhere in the contact list row or click the three dots next to the contact list you want to view properties for, then select Properties from the drop-down menu.
-
Or, click the name of the contact list you want to view properties for.
-
-
Modify contact list properties as needed, then click Save.
Export a contact list
You can export a list of contacts in CSV file format.
-
Right-click anywhere in the contact list row or click the three dots next to the contact list you want to export, then select Export from the drop-down menu.

-
In the Save As dialog box, navigate to the location where you want the file to be saved.
-
Edit the file name as necessary, then click Save.
Delete a contact list
-
Perform one of the following:
-
Right-click anywhere in the contact list row or click the three dots next to the contact list you want to delete, then select Delete from the drop-down menu.
-
Or, select the check box next to one or multiple contact lists, then click Delete.

-
-
Click Delete to confirm the deletion.
Search contact lists
When you have a large set of contacts, you can search for a contact by Name, Fax Number, or Company. This will perform a search across all of your contact lists.
-
Click Search.

-
Select the property you want to search for from the drop-down list, then enter the value you want to search for in the box to the right. Once you start typing, search results will appear.
