Groups
Account Managers can create groups of users to which faxes can be shared either individually or automatically, rather than having to define the sharing settings of each fax and user individually.
To manage groups, log into InterFAX as an Account Manager. In the Navigation Menu, click Account Management, then click Groups.
From the Groups page, you can:
Create a new group
If you have not yet created any groups, you will be taken straight to the add group window.
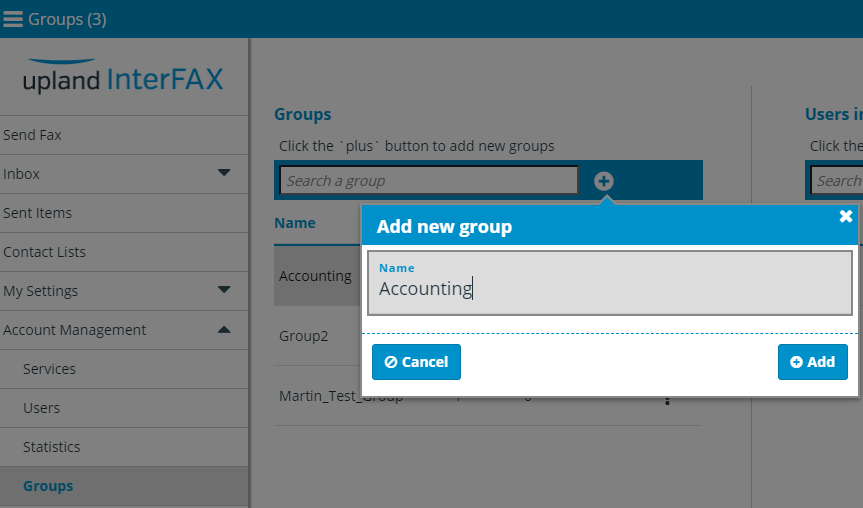
- Click the Add new group (+) icon.
-
In the Add new group window, enter a name for the group, then click Add.
Add users to a group
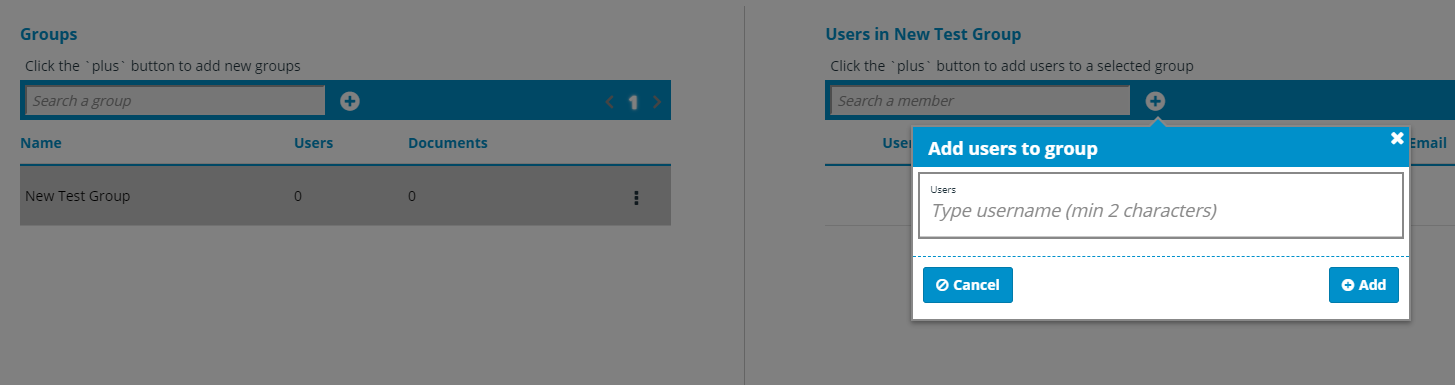
- In the Users in [group name] section, click the Add users to group (+) icon.
-
In the Add users to group window, type the username of the user you wish to add to the group. Once you type at least two characters a list of suggested users will be displayed and you can select from the list. You can add multiple users to a group at one time.
-
When you are happy with the users added to the group, click Add.
Remove a user from a group
-
In the Users in [group name] section, click the three dots next to the user you want to remove from the group, then select Remove from the drop-down menu.

Rename a group
- In the Groups section, click the three dots next to the group you want to rename, then select Rename group from the drop-down menu.
- In the Rename group window, enter the new group name and click Update.
Delete a group
Deleting a group will remove all shared users and close the group completely.
- In the Groups section, click the three dots next to the group you want to delete, then select Delete from the drop-down menu.