Integration with Airtable
Airtable is a cloud-based platform that combines spreadsheet features with database features so that you can interact with a database like a spreadsheet. Airtable is ideal for creating and managing complex data, as well as organizing and analyzing it. It also offers built-in support for sharing and exporting data, simplifying collaboration with other team members.
Generating Personal Access Token in Airtable
In order to connect to Airtable in Kapost, a personal access token needs to be generated in Airtable.
Follow the steps below:
-
Log into your Airtable application.
-
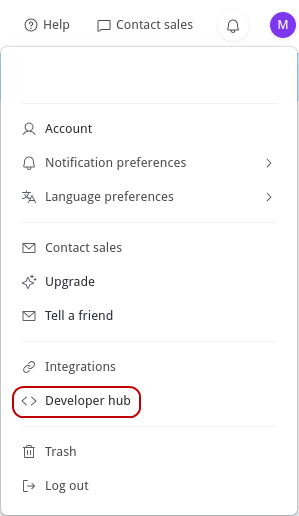
Click on your Profile in the top-right corner and select Developer Hub from the menu.
-
Select Personal Access Token from the left panel and click Create New Token button.
-
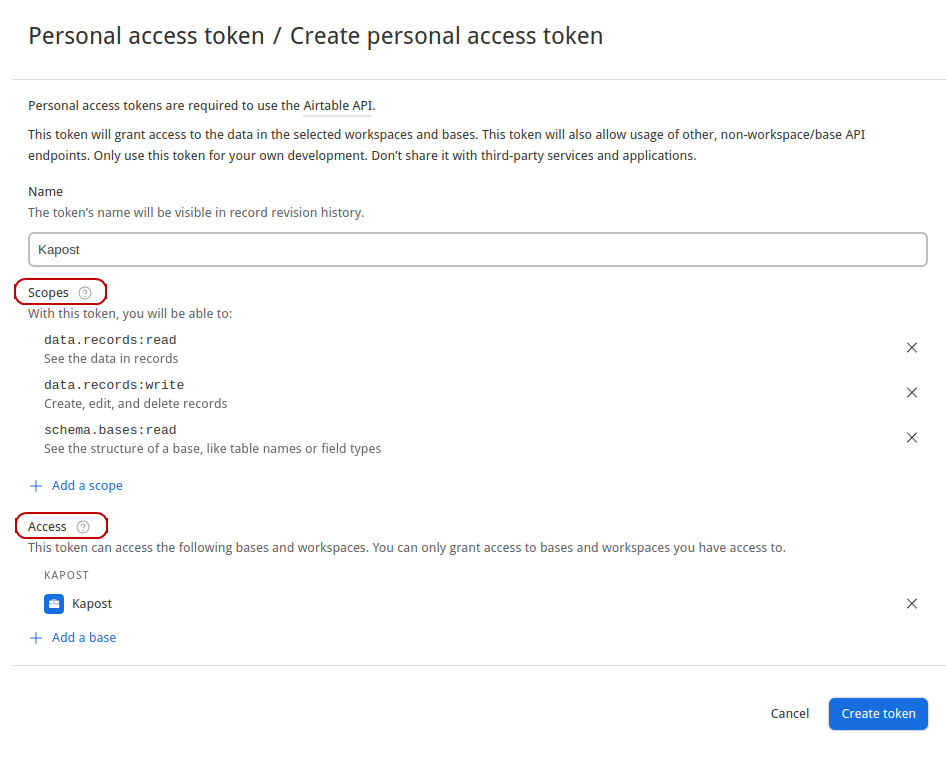
In the Create Personal Access Token dialog, enter the following information:
-
Name: Kapost
-
In the Scopes section, select the following:
-
data.records:read
-
data.records:write
-
schema.bases:read
-
-
In the Access section, select a Base that will be used by the integration and for which access is required.
-
-
Click Create Token to generate a personal access token.
Note: Make sure to copy the token as it disappears once you navigate away. This token can not be retrieved again.

To get the Base ID, click on the desired base you configured for the personal access token and then view the URL in the address bar. Copy the part that starts with "app" as highlighted in the below example:
Example: https://airtable.com/appxyz/tblIYNV0/viwbB5tPQyiz6Gk2w
The table is the name of the 'Table' from the base that you want your interaction to work with. In the example image below, it says 'Content'.

The Table Permalink is going to be the URL of the selected table. To get this, click on the desired table and then copy the URL. If there are any 'Query' parameters in the URL, you must remove them.
Example: When the query parameters are removed, the URL changes from https://airtable.com/appxyz/tblIYNV0/viwbB5tPQyiz6Gk2w?blocks=hide to https://airtable.com/appxyz/tblIYNV0/viwbB5tPQyiz6Gk2w
You will see an error message if there are any errors with your Personal Access Token and the integration will remain disconnected.
Once everything is ready, you can connect to Kapost.
Creating the Connection
- Log into the App Center Tab.
- Click the Install more apps button below the list of current connections.
- In the Kapost App Center, search for Airtable and click on the product tile.
- From the Select Instance drop-down menu near the bottom of the expanded tile, select your Kapost instance and click Install.
- You will see the Kapost App Center settings page once again, now with a connection panel open.
-
Enter the required details and click Save.

Note: The Personal Access Token, Base ID, Table, and Table Permalink generated in Airtable must be entered here.
Mapping Custom Fields
In order to map custom fields to fields in Airtable, users must use a special syntax when defining the field names in Kapost.
Field Name
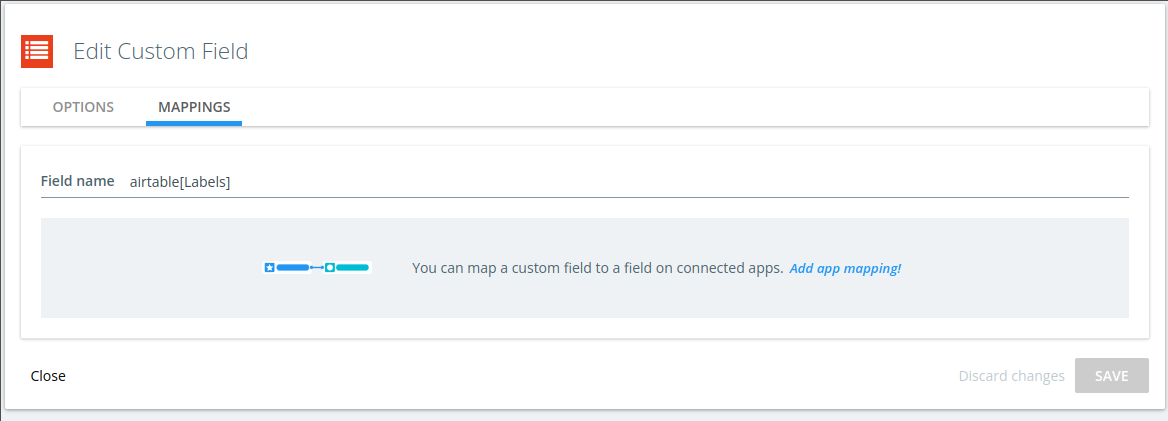
To make a select or multi-select custom field in Kapost to a select/multi-select field in Airtable, you must set the Field Name in Kapost using the following syntax:
airtable[Labels]
Where 'Labels' is the actual name of the field in Airtable.
Checkbox Fields
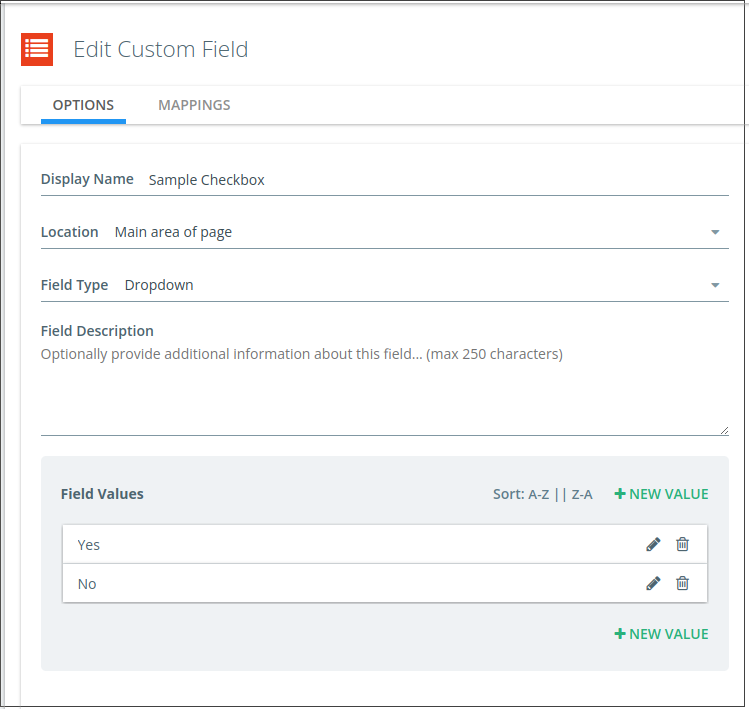
Kapost does not have checkbox custom fields. So, you must create a drop-down mapped to a checkbox field in Kapost with two values, “Yes” and “No” as shown below:
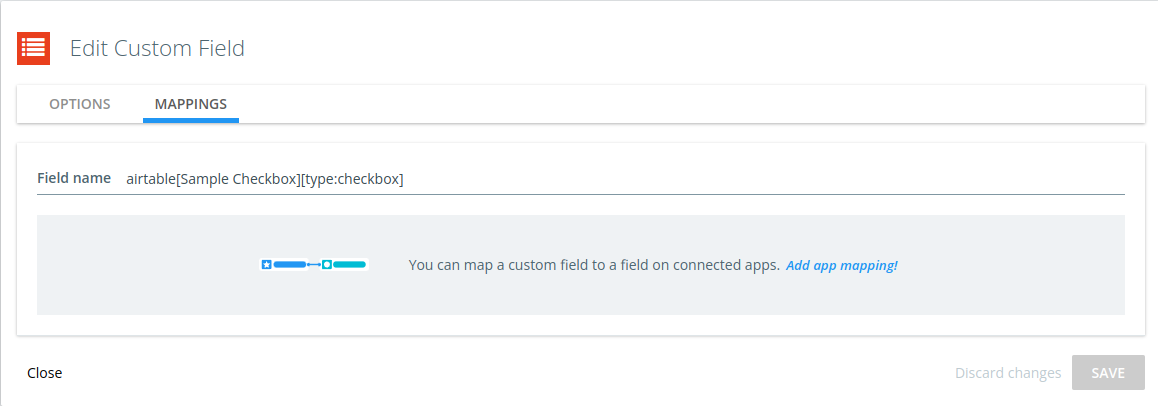
Set the field with the following special syntax:
airtable[Sample Checkbox][type:checkbox]
Where 'Sample Checkbox' is the actual name of the field in Airtable.
Push / Pull Fields
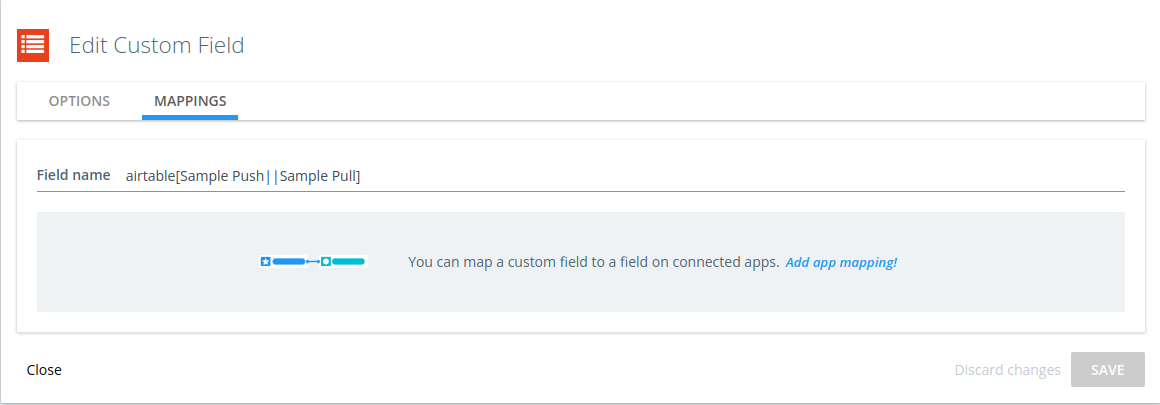
It is possible to map a custom field that pushes into one field in Airtable and pulls its value(s) from another.
This can be done by using the following special syntax:
airtable[Sample Push||Sample Pull]
Airtable Field Types
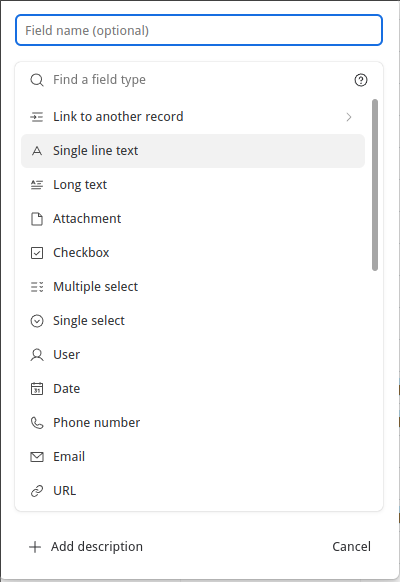
The following Airtable Field Types are officially supported for mapping:
-
Single line text
-
Long text
-
Checkbox
-
Multiple select
-
Single select
-
Date (only with time included)
Note: The integration will ignore any fields that are not explicitly mapped in this format.
Mapping Content Types
The purpose of mapping content types in this manner is to override the configured default status for completed and/or in progress content types. The integration will fall back to the default status for any content types that are not explicitly mapped and will continue to match content types based on their Title and Field Name.
To do this, find the content type that you want to customize in the Content Type & Workflow settings.
Then, copy the existing Field Name value and use the following syntax:
airtable[another_content_type][Another Status][Another in Progress]
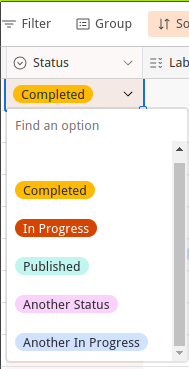
The 'another_content_type' is the previous Field Name and 'Another Status' is the desired status value from Airtable.

If you want to set a custom status for the in-progress state, then the mapping syntax must be:
airtable[another_content_type][Another Status||Another In Progress]
This mapping will be displayed in Airtable as shown below:
