Customize Your WordPress Integration
Kapost’s integration with WordPress enables you to publish blogs, web pages, or any type of HTML content you create in Kapost directly to WordPress.
- Supported Content Type: HTML
- Files can be sent to WordPress by implementing the XML-RPC files API, which you can find here
- Supported Analytics: total page views, click-throughs, inbound links, downloads, Facebook shares
- Kapost uses XML-RPC to interact with Wordpress
How It Helps
Kapost’s WordPress integration lets you publish content to WordPress, one of the most popular CMS sites that powers millions of websites and software applications, from personal blogs to the largest enterprises, media publishers, universities, and government agencies.
This integration enables you to sync WordPress categories with Kapost, preview HTML content in Kapost before publishing it to Wordpress, and send SEO information from Kapost to WordPress.
How It Works
There are many ways you can customize your Kapost-WordPress integration. If the following information doesn’t provide the answers you’re looking for, speak with your Kapost customer success manager.
The quickest way to find the information is to use Ctrl+F on a PC or Command+F on a Mac to search for a key term.
Images
Images from HTML content, as well as image attachments and custom fields, are uploaded into the Media Library section of WordPress.
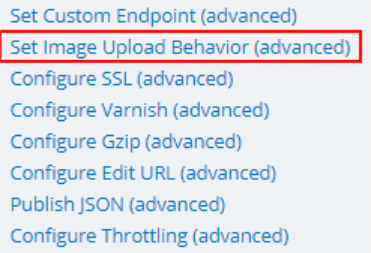
By default Kapost never overwrites any images pushed to WordPress during publishing. This setting can be changed with the Image Upload Behavior setting on your WordPress connection.
When you’ve turned on the Featured Image setting, you can designate an image attachment or an image within the content as featured by marking it with the yellow star icon that appears when you hover over the image. (This icon also appears on each attachment on content.)
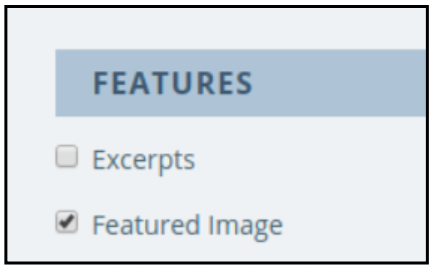
The designated featured image in Kapost will be pushed to WordPress and set, as long as your WordPress theme supports this.
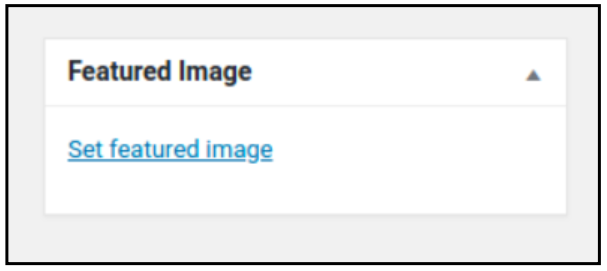
If you don’t want this feature, you can set up an image custom field with the field name set to kapost_featured_image, which will act in the same way.
Excerpts
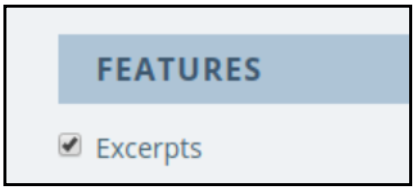
The Excerpts option in the settings area sends over the content excerpt and maps it to the standard excerpt in WordPress.
Extending the Kapost WordPress Plugin
You can extend the functionality of the Kapost Wordpress plugin by writing additional plugins that hook into the Kapost Wordpress plugin and perform various, specific tasks that can’t be abstracted or utilized for other Kapost instances.
For example, you might want to store your specific personas or buying stages metadata. While Kapost sends over that metadata, it will not store it anywhere. In this case, a small plugin can be written that hooks into the Kapost Wordpress plugin and stores the metadata on the post or elsewhere.
To learn more about extending the plugin, refer to the developer guide.
WPML Plugin
WPML is one of the most popular WordPress plugins used for translating and managing translated content within the confines of a Wordpress instance.
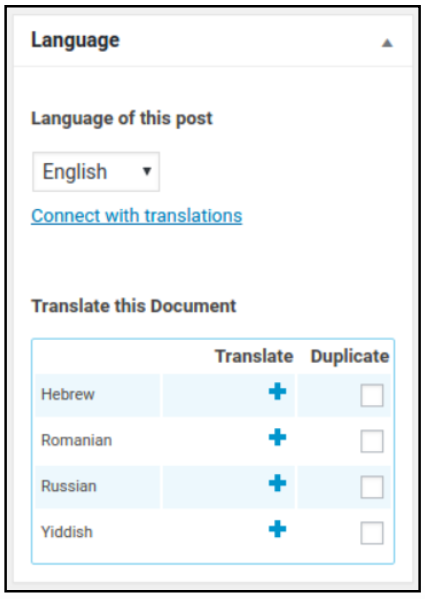
To set up this plugin, you’ll create two custom fields:
Label: WPML Translation ID
Field name: _wpml_trid
Type: text
Label: WPML Language
Field name: _wpml_language
Type: drop-down
Once you’ve added these custom fields, your WordPress connection in Kapost must be resaved in order for Kapost to detect the presence of WPML and populate the _wpml_language field with the available languages defined in WordPress.
After this is completed, when you create a piece of content, you can select a WPML language for publishing the content. After publishing the content, the WPML Translation ID field will automatically be filled in with an ID.
- To create a translation of this content in a different language, clone or duplicate the content and select a different WPML Language (while leaving the existing WPML Translation ID intact). This can be repeated as many times as necessary for all translations of the content.
WP SEO Plugin “Primary Term”
When you’re using the WP SEO plugin and the “Primary Term” functionality is enabled on taxonomies, then the first “value” in Kapost will be used and made into the “Primary Term.”
This applies to the built-in CMS tags and CMS categories, as well as any custom taxonomies.
SEO Plugins
Kapost can push SEO information to WordPress if one of the following SEO Wordpress plugins are used:
- Yoast (now called WordPress SEO)
- All in One SEO
- Genesis Theme SEO
- SEO Ultimate

Keep in mind that Meta Keywords and Focus Keywords differ.

Meta Keywords are a “free form” comma-separated list of keywords, similar to CMS tags.
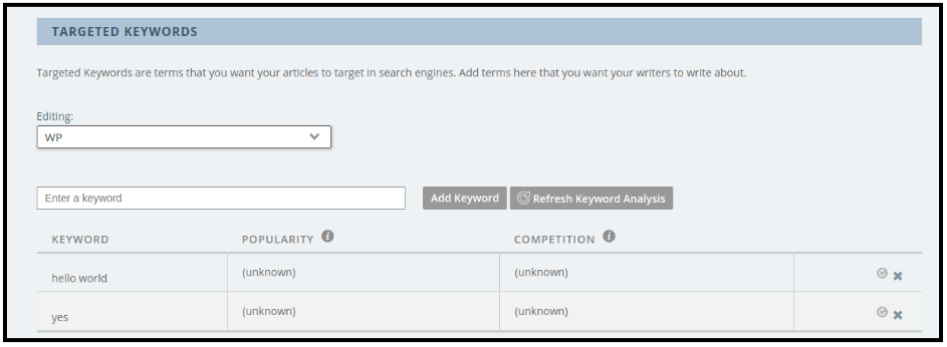
Focus Keywords (called Targeted Keywords in the SEO settings) are a predefined list of keywords that can be defined by an admin in the SEO settings.
Custom Taxonomies
You might have custom taxonomies in addition to the default categories and tags for your WordPress CMS. To identify this, first determine the name of the taxonomy by looking at the URL.
In the example below, the URL of the taxonomy index page is http://wp.example.com/wp-admin/edit-tags.php?taxonomy=droids. This tells you that your custom taxonomy name “droids.”
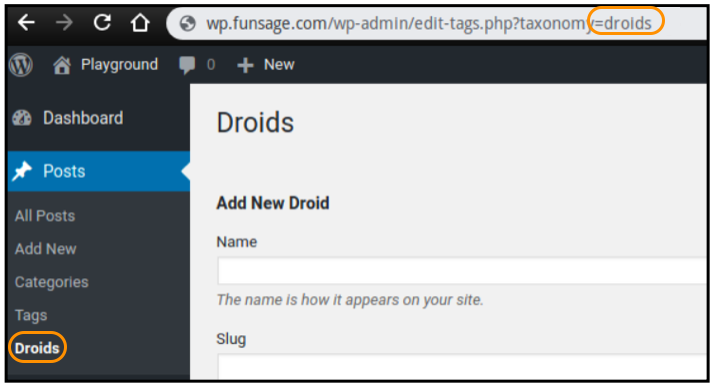
Set your custom taxonomy name as the Field Name of your selected custom field in Kapost.

Because the custom taxonomy mapping uses slugs and taxonomy term IDs, the values of the custom field in question have to use the bar notation and can be either a drop-down or a multi-select field. The slug of each term is used and put after the bar.
In this example, there are two terms, so the “droids” custom field values will look like this:
-
R2D2|r2d2
-
C3PO|c3po
Custom Post Types
By default, Kapost will create content using the built-in post content type in Wordpress. However, in some cases, you might want to create content in WordPress of a different content type that’s specific to your WordPress instance.
To do this, look at your WordPress Admin and find the content type you want to use: Look at its URL and extract the content from it. For example, if the URL of the content type index page is http://wp.example.com/wp-admin/edit.php?post_type=page, then the content type is page.
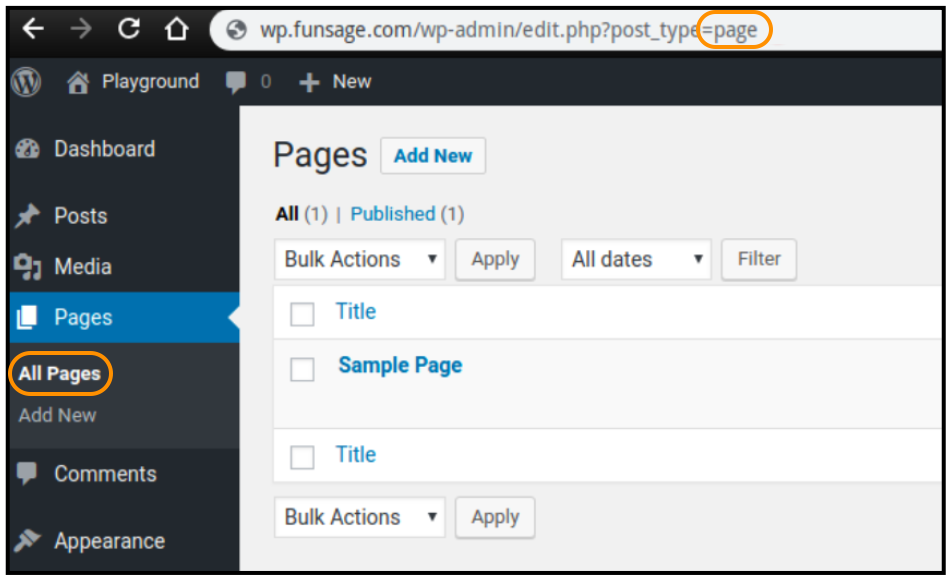
Once you determine that information, this can be set as the Field Name on the content type in Kapost.

WordPress Custom Fields
WordPress has two types of custom fields: regular and protected. These custom fields:
- Are always prefixed with an underscore
- Don’t show up as editable in the WordPress admin user interface
- Can’t be synced from Kapost without whitelisting in order to avoid accidental overwriting of critical WordPress-specific custom fields
For example: _yoast_wpseo_title
Kapost has an internal hard-coded whitelist of protected custom fields you can write to. Most Kapost users have their own custom fields, which can be whitelisted in the Kapost plugin settings area.
Syncing WordPress Custom Fields
To sync a custom field in Kapost, Kapost needs to know a few pieces of information from your WordPress instance.
- MetaField Name (e.g. resource_priority_)
- The Type (e.g. Text Box, Taxonomy Dropdown, etc.)
- The Values of the Custom Field
For example, this is what it look likes to sync a custom filed with the MetaField Name resource_priority of field type drop down, with the field values 1, 2, 3, 4, 5. This custom field would be set up in Kapost in the Custom Fields area in your Settings.
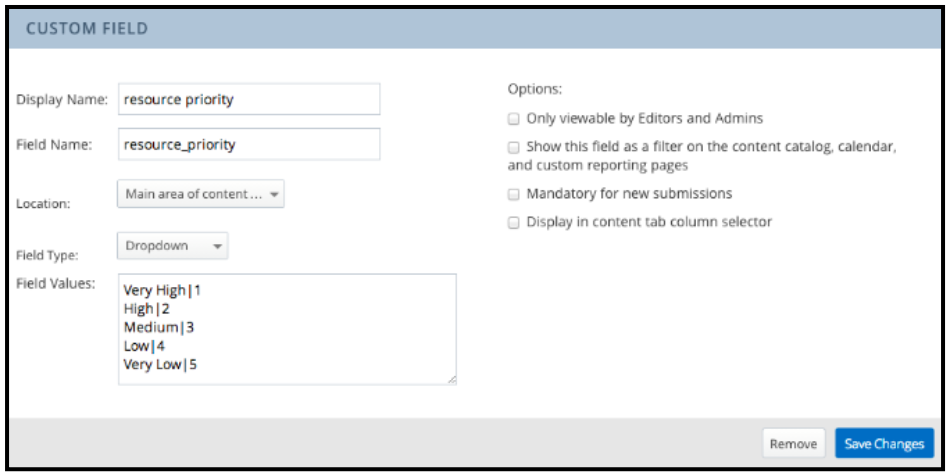
The 1-5 field values are mapped to the words Very Low (5) through Very High (1). The syntax for that mapping is using the '|' key. When you click Save Changes, your Kapost custom field is capable of writing to your WordPress custom field.
Custom Fields Settings
- The Image Custom Fields setting can be toggled if your WordPress instance stores certain image custom fields by their image ID.
- The Kapost WordPress plugin will not write any “private” or “protected” custom fields by default. This avoids overwriting internal values that could create issues in WordPress.
- The Whitelisted Protected Custom Fields field can be used to whitelist any number of protected custom fields, separated by semicolons (such as: _buying_stages;_personas).
- The Unix Timestamp Custom Fields field can be used to whitelist your specific date custom fields that expect your value to be a Unix timestamp (such as: task_date;annoucement_date). This means that the value will be turned into the number of seconds elapsed since the epoch 1970.
Array Custom Fields and Hash Custom Fields
Array Custom Fields: By default custom fields map to a single value in WordPress. In some cases, you might want to store the multiple values for a single field, like for multi-select fields. To manage this, choose Publish as array on the custom field.
Hash Custom Fields: By default custom fields map to a single value in Wordpress. In some cases, you might want to store the multiple values for a field in a serialized format, like for multi-select fields. To manage this, choose Publish as hash on the custom field.

Merged Custom Fields
Any custom fields sharing the same field name will be merged together and persisted in WordPress as if the “Publish as array” option is selected. This is ideal for multiple drop-down or text custom fields.
There’s another form of merged custom fields where the field name is prefixed with “_kapost_array_kapost_merged_” and becomes something like “_kapost_array_kapost_merged_my_field”
This allows text, drop-down, and multi-select custom fields to be merged into a single field. This could also be used to merge multiple taxonomy values into a single field and set any “Custom Taxonomies.”
Post Format
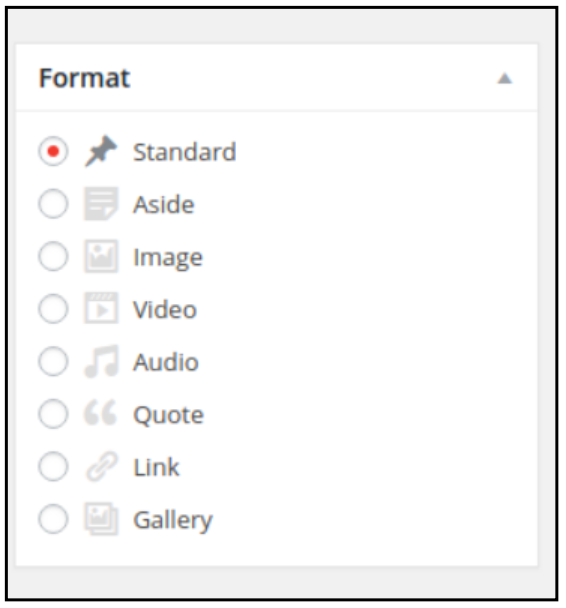
Set your post format by creating a drop-down custom field with the field name set to kapost_wp_post_format and the following values:
-
Standard|0
-
Aside|aside
-
Image|image
-
Video|video
-
Audio|audio
-
Quote|quote
-
Link|link
-
Gallery|gallery
CMS Tags
If CMS Tags are turned off in settings, the CMS Tags field will not show up on the content page.
The CMS Tags field expects comma-separated values, and it will push to the built-in Wordpress tags taxonomy.
If you don’t want to use this field, perhaps because it’s free-form, then a custom field with the field name set to kapost_custom_tags can be used in its place.
If both this custom field and the CMS Tags are filled in, then their values will be merged together.
CMS Categories
CMS Categories push to the built-in WordPress categories taxonomy.
If the Use CMS categories option is turned off in settings, the categories field won’t show up on the content details page.
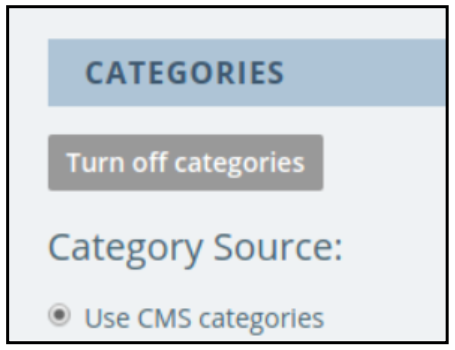
CMS categories can be synced from WordPress into Kapost. This isn’t the default behavior but it can be set up by an Admin user in the categories section of the content instance settings.

If more than one WordPress connection is synced, then the Categories drop-down menu will display the categories grouped by connection.
- Categories should have unique names. Kapost uses the name of the categories, not the IDs. Therefore, if two categories have the same name, Kapost will only know to set up one connection based on that name.
It’s also possible to auto-add a category on publish, regardless of the select categories on the piece of content. Set this up by turning on the Always publish with category option and then selecting a category. This isn’t the default behavior but it can be set up by an Admin user in the categories section of the content instance settings.

If you don’t want to use the CMS Categories field, you can add one or more custom fields with the field name set to kapost_custom_category.
- If more than one field exists, then the values will be merged together and used as categories.
- The custom field can be a text, drop-down, or multi-select field. If it’s a text field, then the values are expected to be separated by commas, similar to the CMS Tags field. If both this custom field and the CMS Categories are filled in then their values will be merged together.
Bylining Custom Fields
Kapost’s bylining feature determines the author of the WordPress post based on the assignee of the content.
If not all the assignees on content are Kapost users (e.g., external contributors) then you can override the email of the assignee by creating a custom field called: kapost_author_email.
This custom field can be a text or a drop-down value.
When you make it a drop-down selection, then the bar notation can be used to provide proper “name|email” mapping, which looks like:
-
John Doe|john@kapost.com
-
Mary Jane|mary@kapost.com
Custom Field Customizations
Slug
- You can set a custom slug by creating a text custom field with the field name set to kapost_wp_slug.
- This will override the default slug generation and the provided value will be used instead. This might not map to WordPress in some cases, such as if the provided value doesn’t isn’t unique.
Page Template
- You can set the Page Template for Page content types in WordPress by creating a text or drop-down custom field with the field name mapped to kapost_page_template and then use the custom field value mapping to map the correct values.
Example of mapped value:
| Selected Value | Mapped Value |
|---|---|
| Sample Template | sample-template.php |
| Sample Advanced Template | templates/sample-advanced-template.php |
-
If your template is nested within one or more directories, then make sure to include that in the mapped value. For example, templates/beautiful-template/template.php.
-
You can retrieve the "mapped value" with the help of a WordPress admin or developer.
Parent ID
- You can set the post parent ID for Page (or certain Post) content types in WordPress by creating a text or drop-down custom field with the field name set to kapost_parent_id.
- When using a drop-down, the bar notation should be used for defining the values.
Menu Order
- You can set the menu order of Page or Post content types in WordPress by creating a text or drop-down custom field with the field name set to kapost_menu_order.
- When using a drop-down, the bar notation should be used for defining the values.
Sticky
- You can control the control sticky state of a post by creating a drop-down custom field with the field name set to kapost_wp_sticky and with two values set to Yes and No.
Pass Additional Query Parameters
If you want to pass additional query parameters to your WordPress endpoint as an optional security measure, use the custom endpoint option to create an additional layer of security between Kapost and your CMS.
The custom endpoint feature allows you to create an endpoint that is unique to Kapost. Once this is created, you can configure your CMS to only accept requests that come through this endpoint and ignore requests that come from unknown endpoints.
To create a custom endpoint, you'll need to pass extra query parameters to your XML-RPC endpoint, xmlrpc.php. Do this by setting the advanced field in Distribution Settings (Set Custom Endpoint) to the full canonical URL including any parameters.
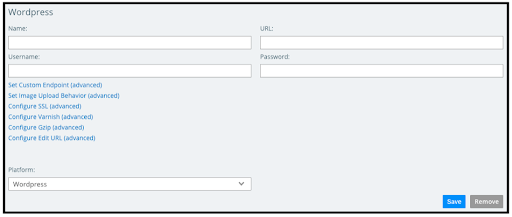
You can also use a security key and enter a custom endpoint in Kapost. The endpoint URL that you define includes parameters that you look up and validate on WordPress’s server. This prevents things outside of Kapost from calling the endpoint.
Advanced Customization Options
The following advanced customization options are available in the App Center below your WordPress connection username and password field.
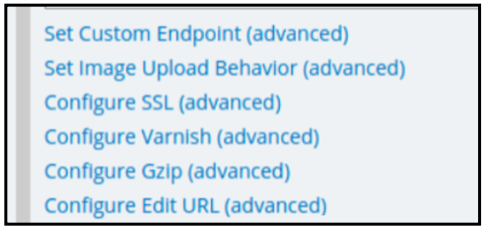
Varnish: If your WordPress instance uses Varnish and you can’t exclude the XML-RPC endpoint from being cashed, then it’s possible to turn on the Varnish workaround. This will add a query parameter containing a random timestamp to the XML-RPC endpoint, thus preventing Varnish from caching it.
Gzip: If your WordPress instance has a misconfigured HTTP server, it could Gzip the HTTP response in a way that’s invalid, which Kapost can’t decompress. To address this, disable Gzip compression by turning Gzip off.
Custom Edit URL: If your WordPress instance is set up with a back-end instance and a front-end instance, it’s possible to configure a custom edit URL to use when you construct the URL for the Edit in WordPressbutton. If you define a custom URL, when you click the Edit in WordPress button on a piece of content, Kapost will append the WordPress post ID to your custom URL rather than the default URL (e.g., http//wp.example.com/?p=xyz).
Image Upload: By default, Kapost never overwrites any images pushed to WordPress during publishing. You can change this with the Image Upload Behavior setting.
SSL: If your WordPress instance has SSL but the certificate is expired or otherwise invalid, then it’s possible to disable SSL verification. This should only be done for staging or testing Kapost instances.