Integrate With Drupal
Note: This is for legacy purposes only. Drupal 9 or later versions are the recommended to integrate well with Kapost.
Drupal is an open-source content management software. It provides a framework for websites, ranging from personal blogs to corporate and government sites. Drupal’s modules and tools enable users to build versatile, structured content for dynamic web experiences.
Note: Drupal is highly customizable. We recommend that you speak with your Kapost Implementation Manager or Customer Success Manager to discuss the best way to set up this integration.
Kapost’s integration with Drupal enables you to publish content you create in Kapost directly to Drupal.
- Supported content types: HTML
- Files can be sent to Drupal by implementing the XML-RPC files API, which you can find here.
- Supported versions: Kapost supports Drupal 7 and Drupal 8
- Supported analytics: total page views, click-throughs, inbound links, downloads, Facebook shares
- Kapost uses XML-RPC to interact with Drupal
Establishing a Connection
For this section, you will need:
Whether you use Drupal 7 or Drupal 8, both require installing and enabling the latest versions of the XML-RPC and Kapost modules.
These modules are free to install. They must be up to date and you must have access to your Drupal server to install these modules.
The XML-RPC endpoint must be publicly available to connect to your Drupal instance.
- Kapost will try to construct the XML-RPC endpoint URL based on the URL of the Drupal instance. If the URL is http://testdrupal3.example.com, then Kapost will assume the XML-RPC endpoint URL is http://testdrupal3.example.com/xmlrpc.php.
Along with the XML-RPC endpoint URL, to connect to Drupal you’ll need a current Drupal account that you can access with a Drupal username and password. This user needs to be able to create and update nodes, and it’ll be the user account that connects to Drupal from Kapost.
Example: We recommend you create and use a Kapost-specific Drupal user account with the desired role/permissions for this integration rather than using an existing user to avoid any disruption if the user is suspended or removed from Kapost (in which case their access will be revoked).
Note: If the Drupal module is installed after a connection has been established in Kapost, you’ll need to resave the connection in order for Kapost to detect the module’s presence as well as other features and capabilities.
Creating the Connection
- Log into the App Center Tab.
- Click the Install more apps button below the list of current connections.
- In the Kapost App Center, click on the product tile.
- From the “Select Instance” dropdown menu near the bottom of the expanded tile, select your Kapost instance.
- You will see the Kapost App Center settings page once again, now with a connection panel open.
- Supported content types: HTML
- Files can be sent to Drupal by implementing the XML-RPC files API, which you can find here.
- Supported versions: Kapost supports Drupal 7 and Drupal 8
- Supported analytics: total page views, click-throughs, inbound links, downloads, Facebook shares
- Kapost uses XML-RPC to interact with Drupal
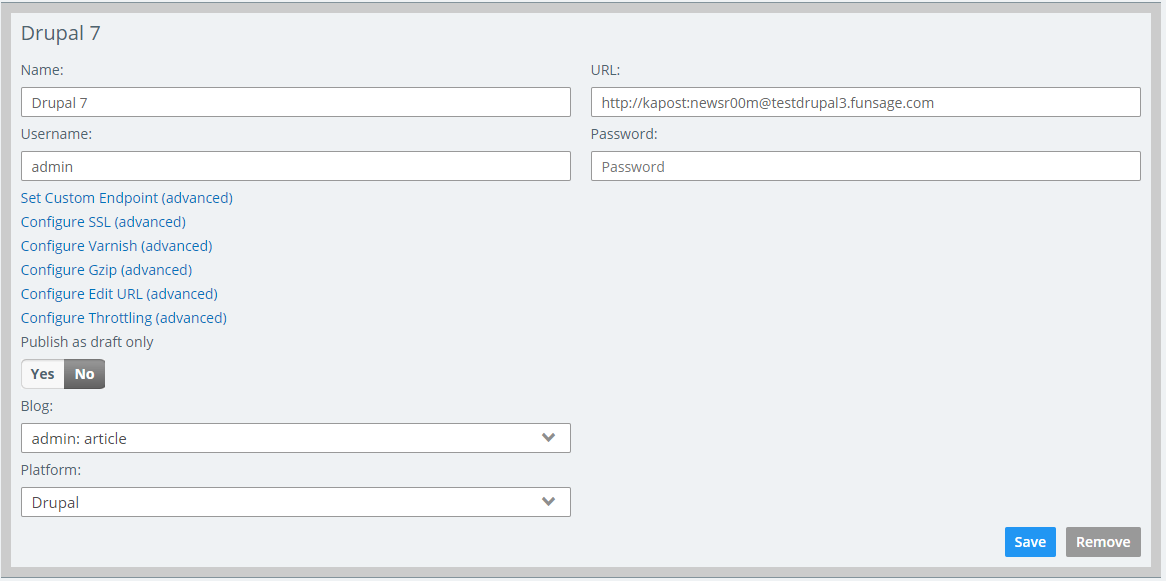
Once you click Install, you’ll be directed back to your instance’s App Center settings area where you’ll see your new Drupal integration. Enter the authentication credentials for the Drupal user you’re connecting.
When you click Connect, a pop-up will appear asking you which blogs you’d like to publish to Drupal from Kapost. In Drupal, these are called content types or nodes. Find them in Drupal by going to Content Types in the Structure area. Select the blog/node you’d like the connection to publish to.
Note: You can only connect to one blog/node per Drupal connection. To publish to more than one node, you need to create another Drupal connection. You may use the same user for multiple connection with Drupal, but each connection must have a different node.

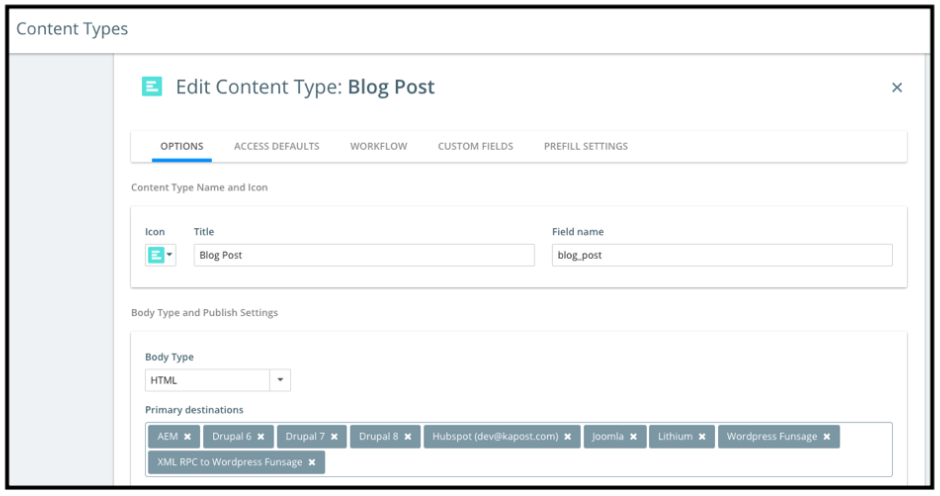
Admins will add Drupal as primary publish destination for the content type you want to publish content from Kapost to Drupal.
- Go to the Content Types & Workflow in settings area in Kapost
- Choose the Drupal instance(s) you want to set as a primary destination.
- Click save to record your updates.

Note: You can use prefills to set a default value for the custom fields. To learn about configuring prefills, refer to Prefills On Content For Admins.
When you’ve completed these steps, you’re ready to publish content directly from Kapost to Drupal.
Manage Settings
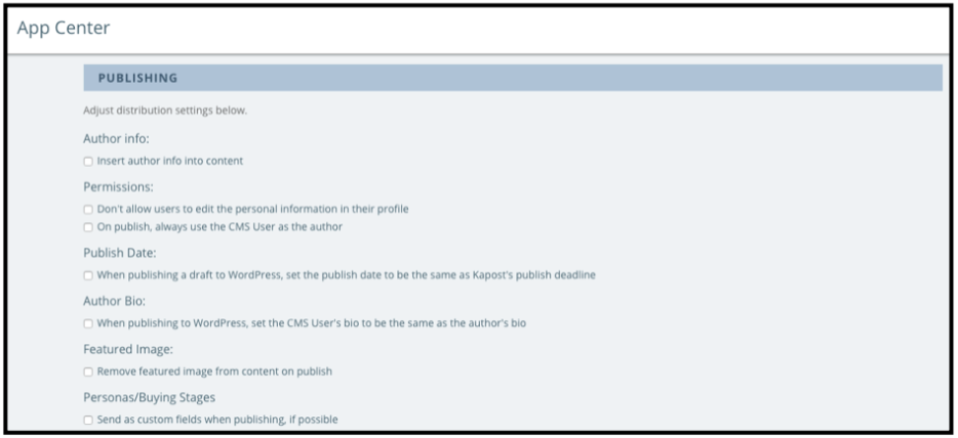
Manage your publish settings in the App Center in your Kapost instance. The Publishing section is found below your list of integrations, in the publishing section.

- Author info controls how the author info is appended to the content body on publish.
- Kapost’s bylining feature consists of appending information about the content assignee at the end of HTML post body. Its most basic form is: “Post Author: Name of Assignee.”
- Under Permissions, Don't allow people to edit their info on their profile locks down the user profiles on the user profile page.
- Under Permissions, On publish, always use CMS User as author means that, on publish, instead of creating a user based on the author's email within your CMS, the user who is connected in the App Center as the author is set as the content author.
- Publish Date sets the publish date to be whatever the publish task deadline in the workflow is.
- Featured Image is a workaround for Drupal themes that duplicates the featured image.
Live or Draft: When publishing content, you can publish it as “live” or “draft.”
- Publishing content as a draft means the post you create will have its state set to draft.
- If the same post is re-published a second time in draft state, the already existing draft will be updated and no new posts will be created.
- If the same post is re-published again as live, the existing draft is transitioned into the published state, and no new posts will be created.
- When publishing live, the date the content is published will be set as the publish date in Drupal
- Publishing content as live means the content will be live on your site. Subsequent republishes will update existing live content, and no new posts will be created.
Preview a Drupal Post in Kapost
When the ability to preview is turned on, Kapost Admins and Editors can preview Drupal content in Kapost.
- By default the ability to preview a Drupal post is turned off. Previewing can be enabled in the Kapost Module Settings. Once previewing is enabled, refresh your connection in your instance’s App Center by re-saving the connection.
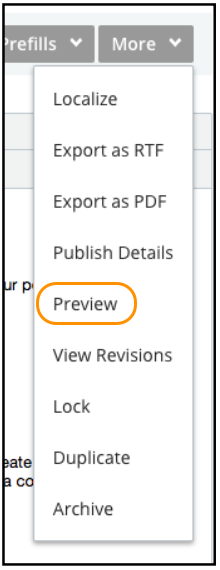
When this is set up, you’ll see a Preview option in the More drop-down menu on the content details page for your Drupal content. Click Preview in this menu to preview your content during the creation process.
- If you have more than one Drupal destination set up, a pop-up will appear to prompt you to select the right destination for the preview.
- Previews will create draft versions of your content in your Drupal instance. The draft versions will be removed once the content is ultimately published from Kapost.
- Previewing content that’s already published will show the content as it is currently; it won’t update the content based on changes made in Kapost after the content is published.
- The generated preview URL is valid for six hours if you’re connected to Drupal 7, and five minutes if you’re connected to Drupal 8. This URL can be shared externally of Kapost.
