This article will explains how to connect your Kapost instance with Marketo. Once connected, you can easily manage Marketo landing pages and emails from within the Kapost platform.
Note: To access the Settings link, you must have the Admin user role.
Using Kapost and Marketo together allows you to include emails and landing pages in your planning process, workflows and collaboration.
Once integrated, users will be able to:
- Pull view-only Marketo emails and landing pages into Kapost during the content creation/approval process.
- Send themselves test emails.
- Add Marketo emails and landing pages to the Kapost Gallery.
Establishing a Connection
- Log into the App Center Tab.
-
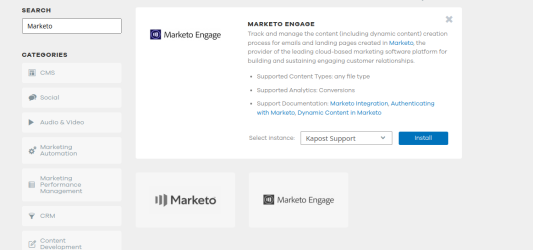
Click the Install more apps button below the list of current connections and click on the Marketo Engage tile.
-
From the “Select Instance” drop-down menu near the bottom of the expanded tile, select your Kapost instance and click Install.
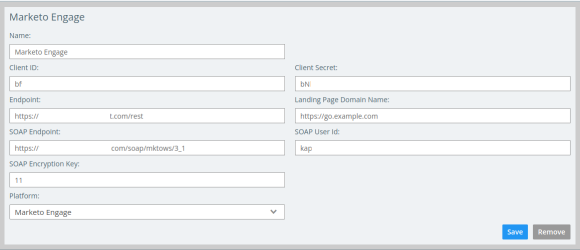
Tip: Before filling out the details, make sure to log on to the Marketo Admin.
- To get the Client ID and Client Secret, do the following steps in Marketo:
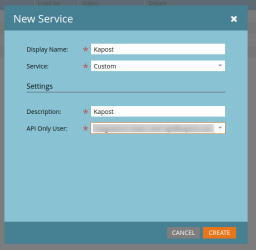
- Navigate to Integration > LaunchPoint on the left panel and select New Service from the New drop-down menu.
- Enter the details to create a Kapost Integration custom LaunchPoint that uses the previously created Kapost Integration 'API only user'.
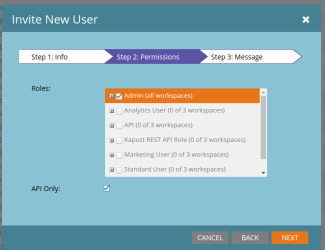
- Navigate to Security > Users and Roles on the left panel and select Invite New User.
- Enter the Info, Permissions and Message steps and submit the request. This new user will be created as a row in the LaunchPoint page.
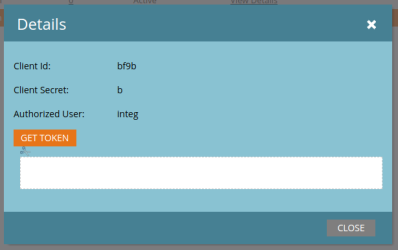
- Go the LaunchPoint page and click View Details against the newly created user. The Client ID and Client Secret will be displayed here.
- To get the Endpoint, do the following steps in Marketo:
-
If the Client ID, Client Secret and Endpoint are correct, then you will be authenticated. Otherwise an error message will be shown.
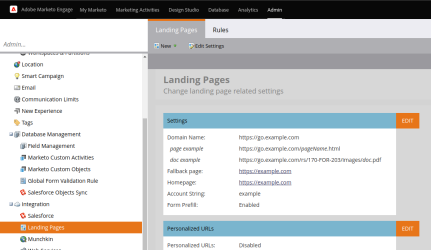
- To get the Landing Page Domain Name, do the following steps in Marketo:
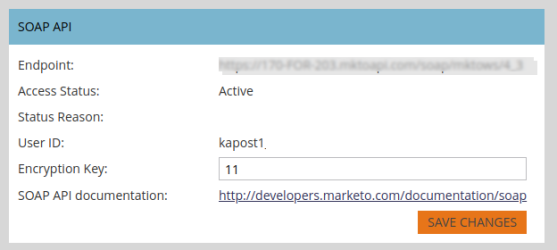
- If you want Kapost to attempt to collect "Marketo Lead" analytics, then it is necessary to fill out the SOAP credentials. To fill the SOAP details, do the following steps:
-
Once all the details are entered in the Kapost connection panel, click Connect.
Configure a Content Type
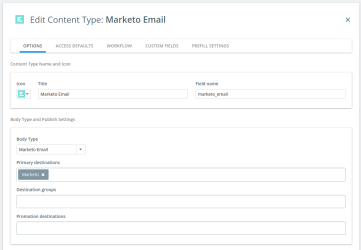
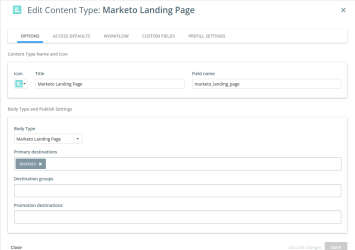
First, create a Marketo content type in your Content Types and Workflows Settings menu. The Title and Field Name can be anything, but make sure you select Marketo Email as your body type.
Add your Marketo email as your Primary Destination for this content type.
Note: You can use prefills to set a default value for the custom fields. To learn about configuring prefills, refer to Prefills On Content For Admins.
Creating an Email
-
Create a new content from the + Create menu with Marketo Email as its content type.
-
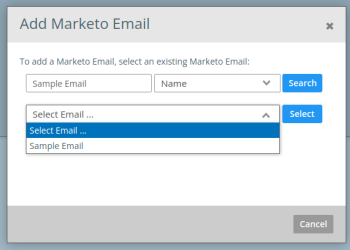
Click on the Add Marketo Email button. A pop-up will appear that will allow you to enter search parameters for the email you want to add. First, choose whether you want to search by Name or by Program Name. Type in your search keywords - this will open up the drop-down menu below it.
-
Once you click Select, Kapost will pull in the selected email from Marketo directly into your instance.
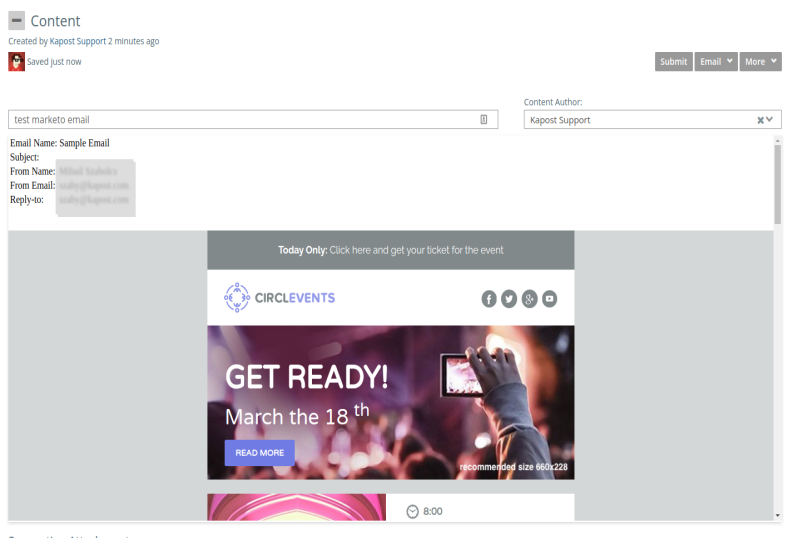
You can now work with the email in Kapost using the various functions on the "Email" drop-down menu.
-
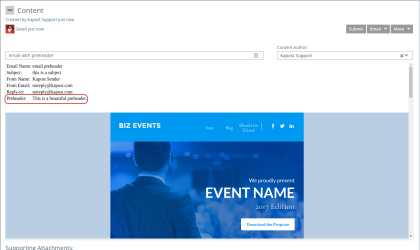
(Optional) If you have defined a “Preheader” in the Marketo Email, then it will be displayed in the Kapost preview.
Here is a breakdown of what each of these functions do:
-
Change: This function allows you to change the Marketo Email by displaying the search option.
-
Approve: Selecting Approve from the Email drop-down will approve the email that is housed in Marketo, thus enabling you to move Marketo emails out of the draft phase from within your Kapost instance.
-
Edit in Marketo: This function will open up your Marketo instance so that you can edit it in Marketo. You cannot edit a Marketo email within Kapost, but this function gives you easy access.
Note: Best practice for editing Marketo emails in Kapost is for one team member to build the email via custom fields in Kapost, have another team member use those fields to build the email in Marketo, and then pull the finished Marketo email back into Kapost for approval.
-
Send Test Email: This function allows you to send a test email from Kapost. When you select it, a pop-up will appear prompting you to fill in an email address of your choosing. Choose where you want to send the test email, and click 'send.'
Note: Emails or landing pages with dynamic content will only show the default segmentation without the ability to choose and preview the other segmentation. This is due to the limitations of the Marketo API.
Begin Using Marketo Integration in Kapost
Now you can work on your Marketo assets within Kapost. The linked help article will explain how to:
- Pull view-only Marketo emails and landing pages into Kapost
- Send test emails
- Approve your assets when they are completed
If you have any questions or feedback about editing Marketo emails in Kapost, feel free to email us at kapost-support@uplandsoftware.com.
