Integrate with Showpad
Showpad combines training and coaching software with innovative content solutions to enable sales. By providing better visibility, direct feedback, and actionable insights, this platform creates a curated one-stop-shop to find, manage, and distribute high-impact content at scale.
Showpad aligns Sales and Marketing teams around high-impact buyer interactions, unleashing your organization's ability to accelerate revenue growth.
In this article, you will learn how to set up a connection and publish to Showpad via the Kapost App Center.
Creating OAuth Client in Showpad
In order to connect to Showpad, an OAuth Client needs to be created in the Showpad.
Follow the steps below:
-
Navigate to Settings > Admin Settings in the Showpad application.
-
On the left sidebar, click on API under the 'Integrations' section.
-
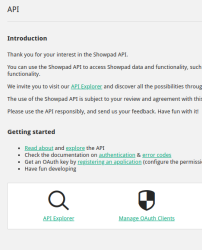
Click on Manage OAuth Clients and select the
 icon to open the pop-up dialog.
 -
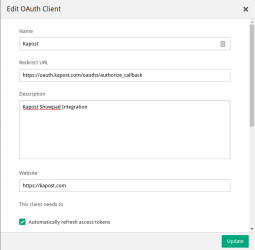
In the Edit OAuth Client dialog, enter the following information:
-
Name: Kapost
-
Redirect URL: https://oauth.kapost.com/oauths/authorize_callback
-
Description: Kapost Showpad Integration
-
Website: https://kapost.com
-
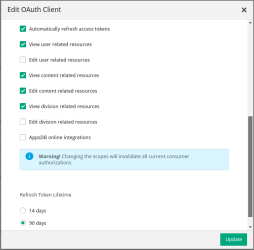
Select the following checkboxes:
-
Automatically refresh access tokens
-
View user related resources
-
View content related resources
-
Edit content related resources
-
View division related resources
-
-
Refresh Token Lifetime: 90 days
-
-
Click Update to create the new OAuth Client.
Tip: Note down Client ID and Secret information to use it later.

Creating the Connection
- Log into the App Center Tab.
- Click the Install more apps button below the list of current connections.
- In the Kapost App Center, search for Showpad and click on the product tile.
- From the Select Instance drop-down menu near the bottom of the expanded tile, select your Kapost instance and click Install.
- You will see the Kapost App Center settings page once again, now with a connection panel open.
-
Enter the required details and click Connect.

Note:
-
The subdomain is the subdomain of your Showpad instance. For example, if your Showpad instance is "mycompany.showpad.biz", then the subdomain is "mycompany".
-
The Client ID and Secret noted after creating OAuth Client must be entered here.
-
Upon clicking Connect, the OAuth authorization flow with Showpad is triggered and you will be redirected back into the App Center and the below dialog is displayed.
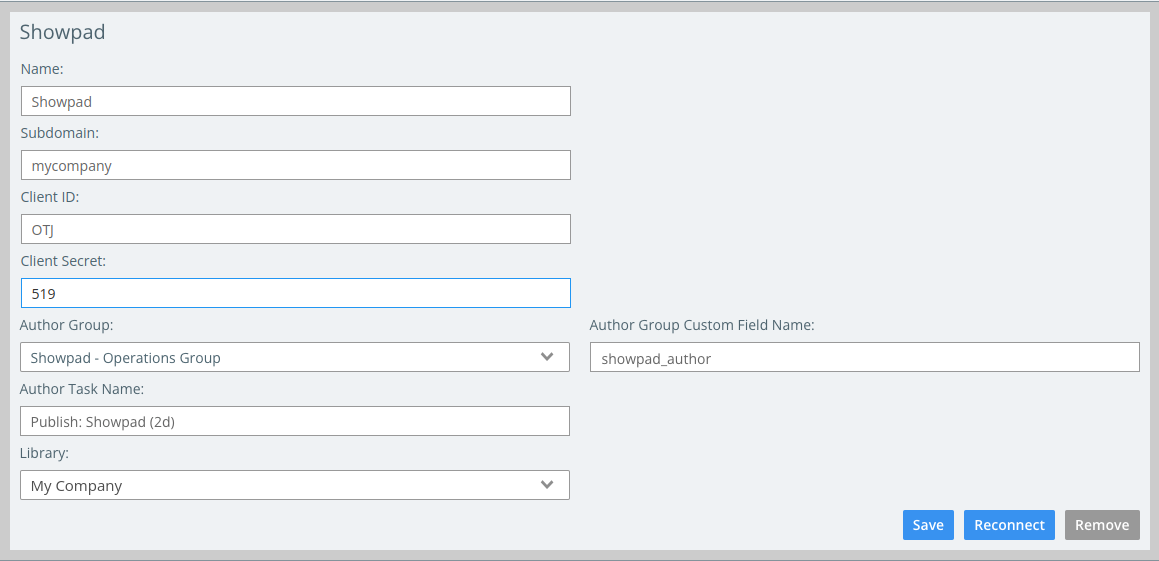
The fields Author Group, Author Group Custom Field Name, and Author Task Name appears. This allows you to have a fixed set of authors for all the contents published to Showpad. You can then select the author group from the App Center.
A new field called Library appears. This allows you to select which Showpad Library (Division) the integration will publish the assets into. Select an appropriate option from the drop-down and click Save.
Setting Up Authors For Specific Content
If different authors are required for various content pieces, follow the steps below:
-
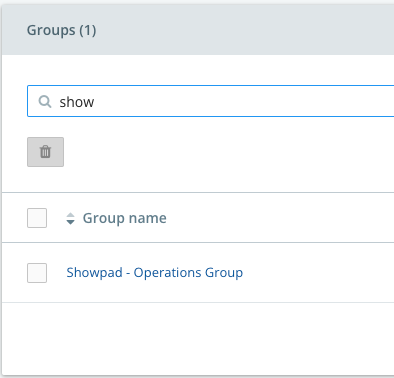
Create a member group with "Showpad -" prefix and add members who also have access to Showpad using the same email address.
-
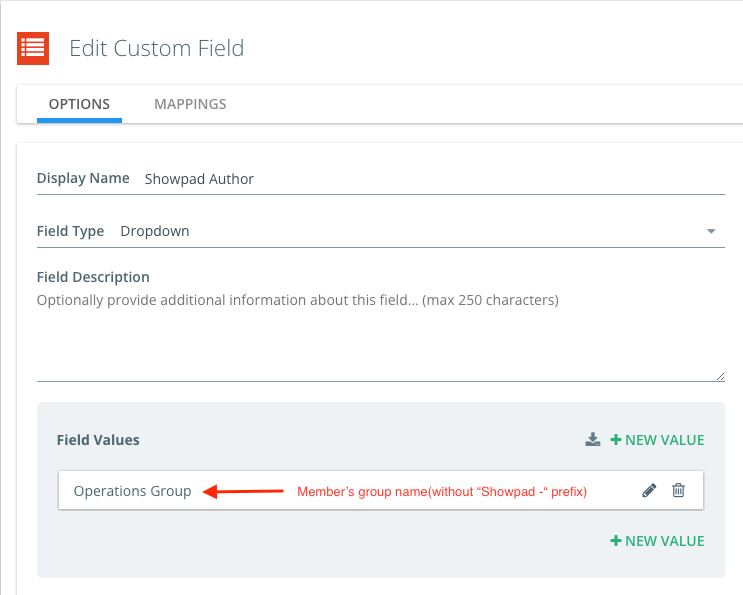
Create a Dropdown or Multiple Select custom field (or use an existing custom field), add the group as an option (without "Showpad -" prefix), and add the custom field to the content type for Showpad.
-
In the Author Group Custom Field Name, enter the field name of the custom field you created.
Once this is done, then selecting the group from the custom field before publishing will ensure that the authors are set correctly on the Showpad side.
Setting Up Authors via Task Assignees
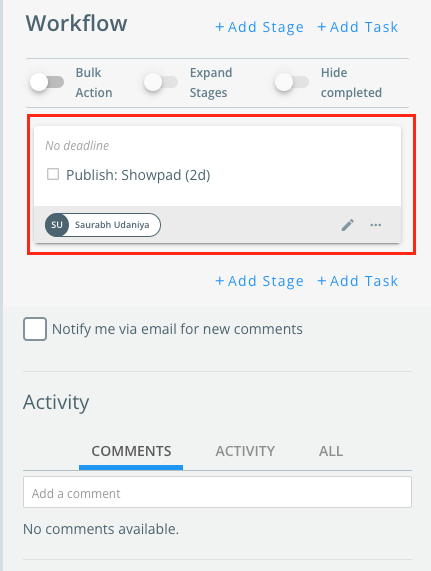
In the Showpad connection, specify the task name whose assignee(s) should be used as author(s) for the published Showpad content.
Once configured, create a task with the specified name, and assign the task to one or more users or groups who need to be listed as the author(s) on the Showpad side.
It is recommended that you create an integration specific service user in Kapost and authorize that instead of a regular user. This will prevent the integration from breaking if the user is ever deactivated due to leaving the company, etc.
Before leaving the App Center, ensure to setup publish access to the newly established Showpad destination by clicking on "manage publish access".

If you want to allow your Kapost users to publish to more than one library, repeat the Install more apps procedure the desired number of times. Make sure to select the proper library and set up the necessary publish access so that only people who are authorized to publish to the respective Showpad libraries can do so.
Setting up Content Types
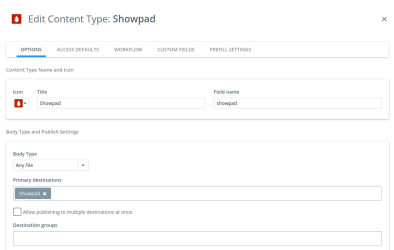
Once the integration has been set up in the App Center, it is necessary to add Showpad as a Primary Destination for one or more of the desired content types.
Note: Only Content Types with body type set to Any File or Document are supported.
Note: You can use prefills to set a default value for the custom fields. To learn about configuring prefills, refer to Prefills On Content For Admins.
Tags Management
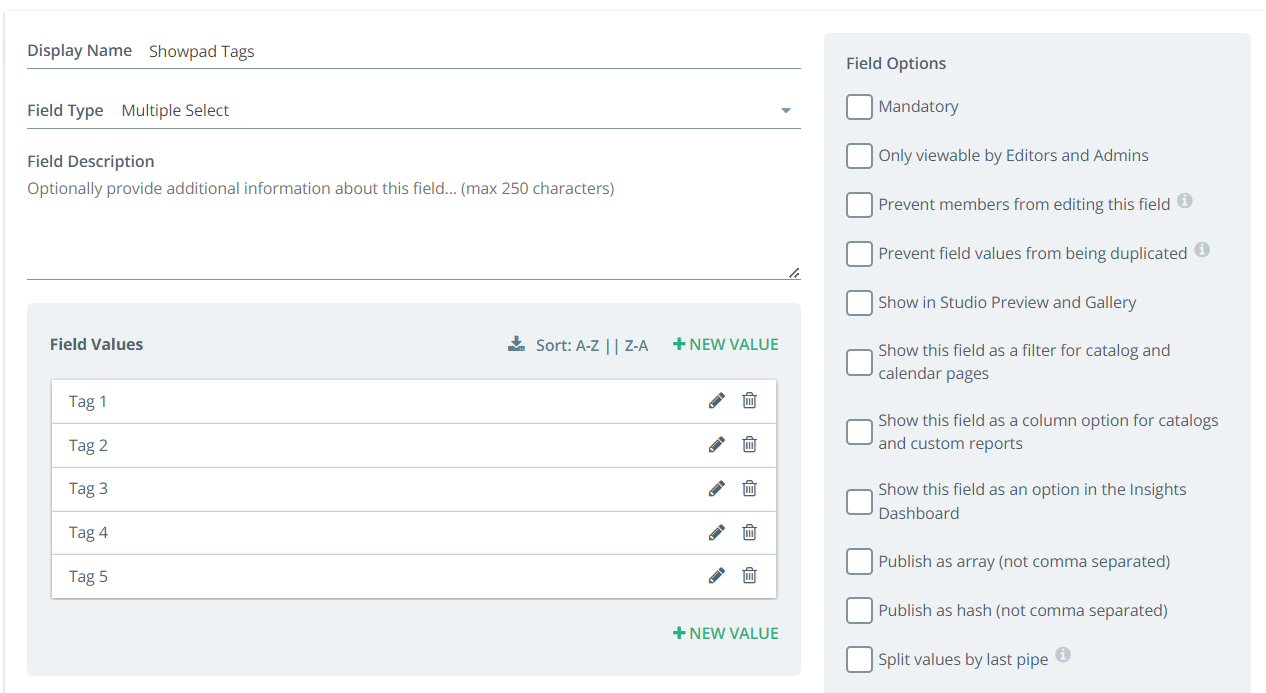
Locating Tags Field
To find the tags custom field and search for the "Tag" field. You will be able to see the tags field, click on the Edit icon  and you will be able to see all the tags as shown below:
Creating a Tag
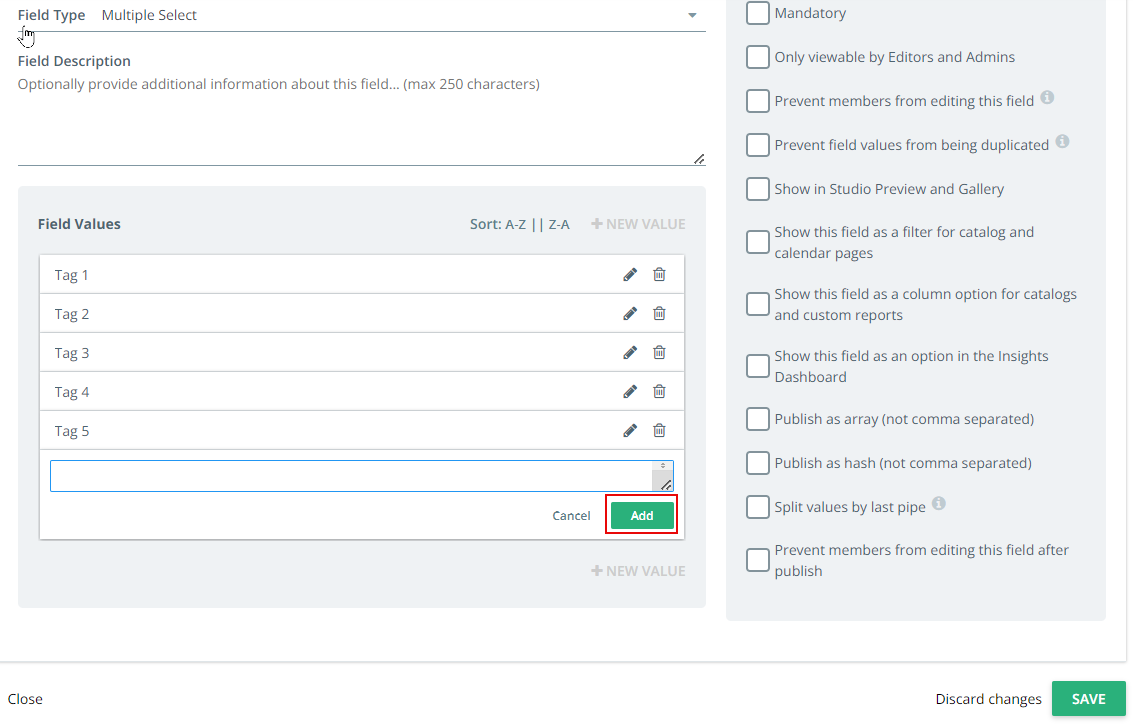
Follow the steps to create a tag:
-
Open a custom field and click on + New Value button.
-
Enter the tag value and click Add.
-
Click Save to save the changes.
Creating Mappings
Follow the steps to add the mapping:
-
Go to the Mappings tab and expand the Showpad mapping.

-
Click on + Add Value Mapping button and select the newly created tag from the dropdown.
-
Enter the Showpad Tag ID in the input field on the right. To obtain the Tag ID from Showpad:
-
Go to Tags in Showpad (e.g: https://help.showpad.com/hc/en-us/articles/115004160233-Manage-and-categorize-your-tags)
-
Click on the desired Tag and copy the ID from the URL (the ID will be in the following format: 507f1f77bcf86cd799439011)
-
-
Click Save to save the changes.

-
To update the existing mapping, locate the desired tag and enter the new ID. Click Save.
Updating the Tag
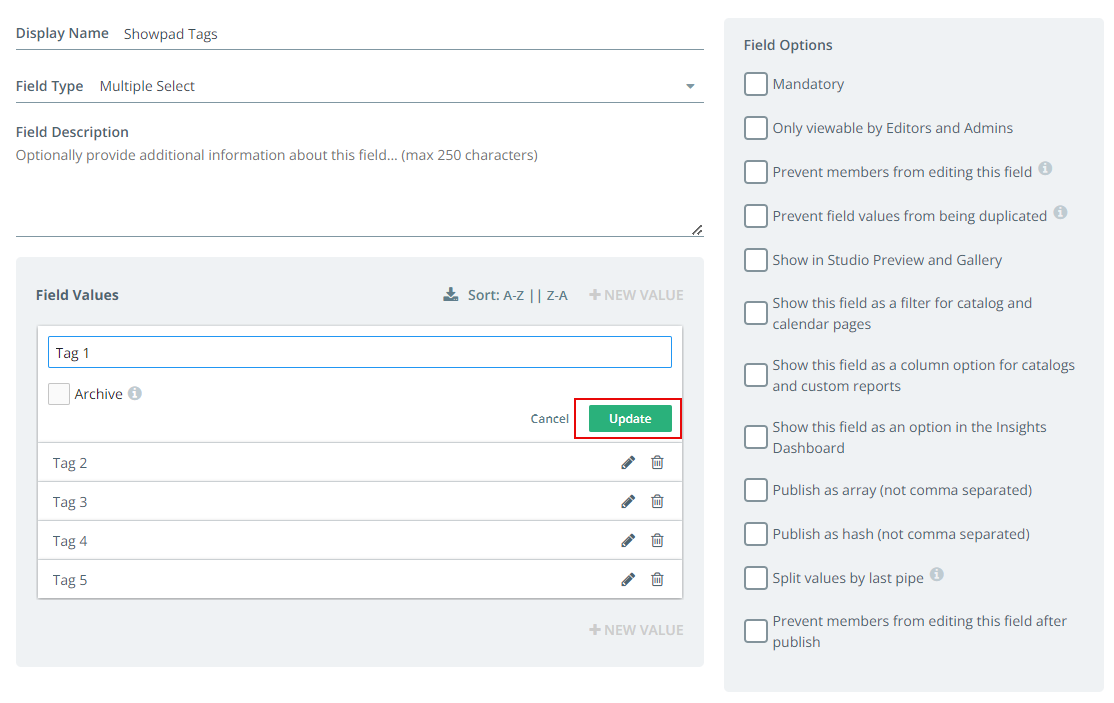
To update the tag name, follow the steps below:
-
In the Options tab, click on the Edit icon
 next to the tag name that needs to be updated.
 -
Enter the updated tag name and click Update.
-
Click Save to save the changes.
Note: You do not need to go to the Mappings tab to map the updated tag; it is done automatically.
Removing a Tag
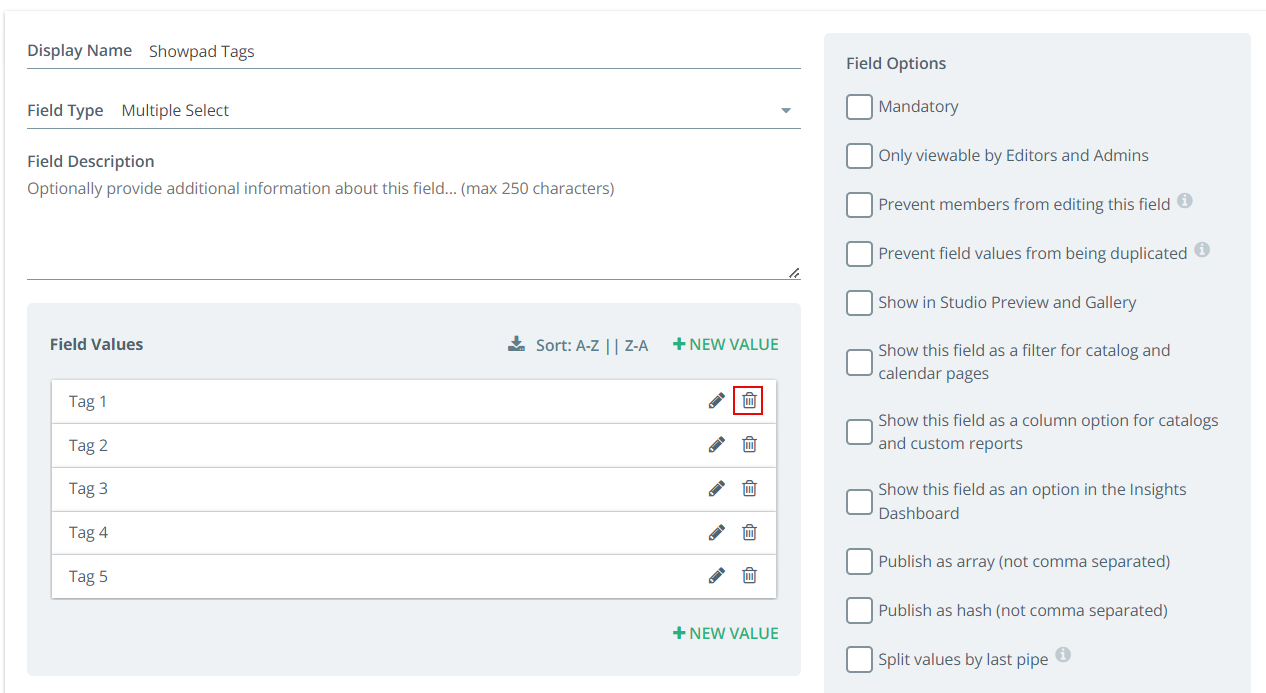
To remove an existing tag (and mapping), follow the steps below:
-
In the Options tab, click on the Delete icon
 next to the tag name.
 -
Click Save to save the changes. A confirmation modal appears.
-
Click Delete to remove the tag.
Note: The above steps will also delete the associated mapping with Showpad.
Publishing
To publish the content to Showpad, follow the steps below:
-
Create a new piece of content with the Showpad Content Type and click Add File to upload a document.
-
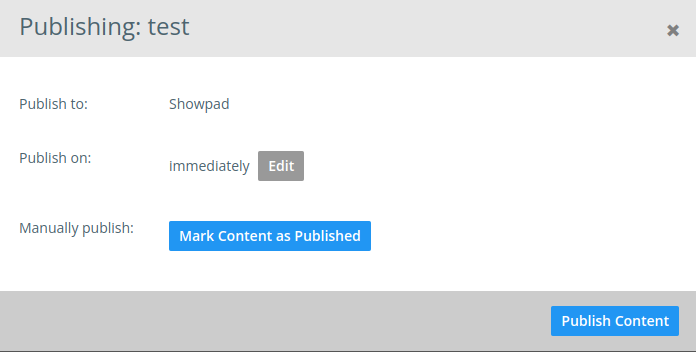
Click Publish. This opens a pop-up dialog.
-
Click Publish Content.
Once the content is published, the Published URL is displayed on the top of the page. This link redirects you to the asset inside Showpad.
Note: While the initial asset is still processing in Showpad during the first publish, this URL will lead nowhere. However, once the processing has been finished it will work as expected.
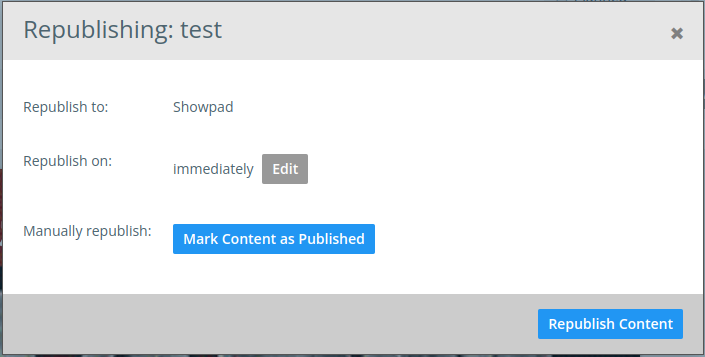
When a new revision has been added to the content, the same publish process can be repeated to add the new revision onto the same asset in Showpad.
The filename of the revision in Kapost will become the name of the asset in Showpad and by default, the author/assignee of the content in Kapost will become the “Author” in Showpad, if the integration can look up and find a user with the same email. If there is no such user, then the integration user setup in the App Center will become the Author.

In addition to the name and the author, the “Content ID” in Kapost will automatically map to the “External ID” of the asset in Showpad.
Manual Publishing
To link an existing asset in Showpad to content in Kapost using the manual publishing feature, follow the steps below:
-
Navigate to the content that belongs to a content type eligible for publishing to Showpad, and click the Publish button.

-
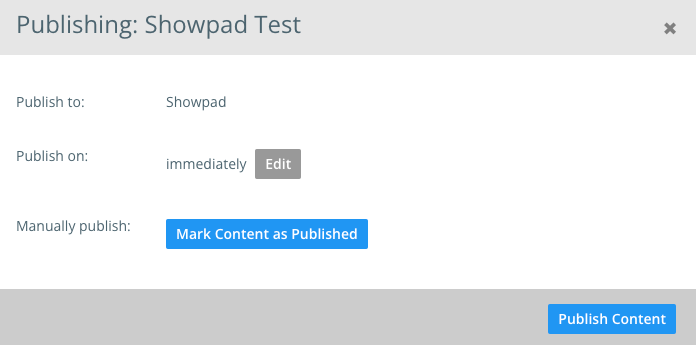
In the modal that appears, select the Mark Content as Published option.
-
At the top of the screen, an empty publishing section will appear. Click the Update URL button.

-
Enter the published URL from Showpad into the input field and click Save.

After saving, refresh the page. The content will now be marked as published to Showpad. Upon republishing, Kapost will attempt to update the associated asset in Showpad rather than creating a new one.
Unpublishing
To unpublish the content that was published to Showpad:
-
Log in as an Admin.
-
Click on the Unpublish button. A confirmation modal appears.

-
Select the checkbox and click on the Unpublish button.
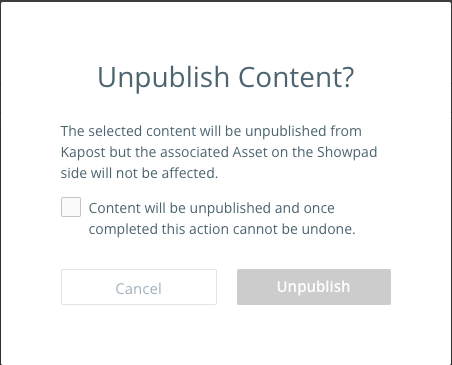
Caution: This will only mark the content as unpublished in Kapost, without impacting the associated asset in Showpad.
