Integrate With WordPress
Kapost’s integration with WordPress enables you to publish blogs, web pages, or any type of HTML content you create in Kapost directly to WordPress.
- Supported Content Type: HTML.
- Files can be sent to WordPress by implementing the XML-RPC files API, which you can find here.
- Supported Analytics: total page views, click-throughs, inbound links, downloads, Facebook shares.
- Kapost uses XML-RPC to interact with Wordpress.
- Kapost’s WordPress integration lets you publish content to WordPress, one of the most popular CMS sites that powers millions of websites and software applications, from personal blogs to the largest enterprises, media publishers, universities, and government agencies.
- Within Kapost, make sure that the post is assigned to the person who will ultimately be the author in Wordpress. This ensures that the correct author bio, byline, and other key details are shared from Kapost to WordPress when the blog is published.

- If you're using the Yoast plugin, be sure to fill out the SEO data within the content in Kapost that it publishes to Wordpress and Yoast as you want it to. Fill out the SEO preview and metadata for the right search preview to appear when your audience searches for your content.
- Include any images that’ll appear in your blog in Kapost when you’re creating the content either in-line, in the HTML body, or as an attachment so that your images publish to WordPress and also live in Kapost.
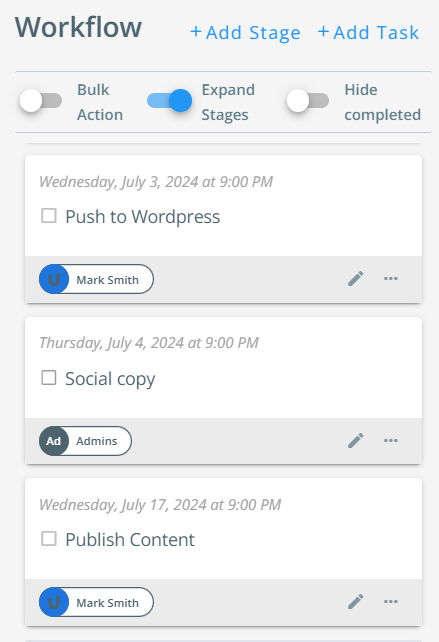
- Here at Kapost, our workflow strategy for WordPress content is to have our publish task preceded by a push to WordPress task. We have a workflow task called “Push to WordPress” that has a smart deadline for 10 business days before the deadline of the “Publish Content” task in the workflow. Our “Push to WordPress” task is marked as complete by publishing the content. This minimizes rushed publishing and allows published URLs to be checked prior to when the content goes live.
Establishing a Connection
For this section, you will need:
- Kapost supports WordPress 4.0 through the latest version.
Installing WordPress
First, install the Kapost WordPress plugin, which you can find and install in the WordPress Plugin Directory. We recommend installing this plugin so you can take advantage of the integration’s full functionality, such as:
- Associate posts with the correct author. The email addresses of the Kapost user and the WordPress user must match.
- Send images marked as "featured" inside Kapost to be recognized and marked as featured in WordPress.
- Work correctly with custom post types.
- Send the author’s bio (byline) from Kapost to WordPress. When publishing to WordPress, this option will set the CMS user's bio to be the same as the author's bio. This needs to be turned on both in Kapost (on by default in the App Center) and in the WordPress plugin.
- Send the user's social data from Kapost to WordPress.
Find more information about the plugin here.
- If the WordPress plugin is installed after a connection has been established in Kapost, then you’ll need to resave the connection in order for Kapost to detect the presence of the plugin (and certain other features and capabilities).
Find and install the plugin in the WordPress Plugin Directory. To install the plugin through your WordPress library, go to your WordPress admin area to complete the following steps:
- On the left-side menus in WordPress, go to the Plugin area and click on Add New.
- In the area to search for plugins, type in "Kapost" to find the Kapost plugin
- Click Install and then activate the plugin, and depending on your theme you’ll need to enter your FTP username and password.
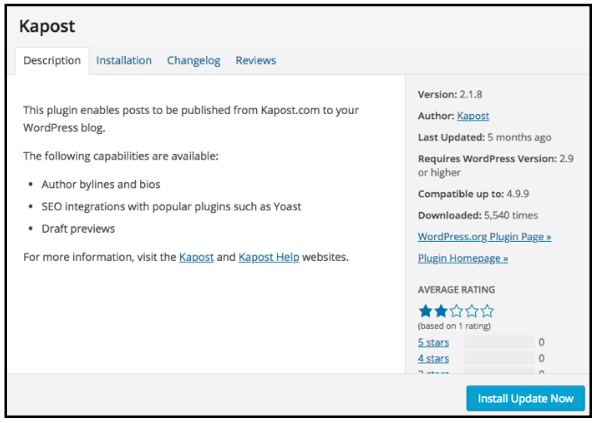
- Once the plugin is installed, adjust the plugin’s settings.
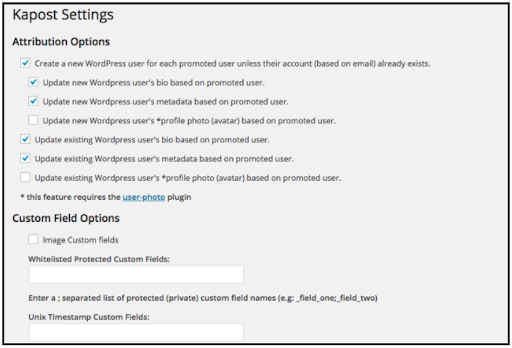
The plugin can be extended to set up highly custom configurations. See this page with information on how the plugin can be extended, and speak with your Kapost customer success manager about completing this extension.
Next, to connect to your WordPress instance, the XML-RPC endpoint needs to be publicly available.
- Kapost will try to construct the XML-RPC endpoint URL based on the URL of the Wordpress instance. If the URL is http://wp.example.com, then Kapost will assume the XML-RPC endpoint URL is http://wp.example.com/xmlrpc.php.
- If you need to debug the XML-RPC endpoint, refer to the instructions in this article.
Along with the XML-RPC endpoint URL, you’ll need a WordPress username and password belonging to a user with Editor or Admin permissions in WordPress.
- We recommend you create and use a Kapost-specific WordPress account with the desired permissions for this integration rather than using an existing user to avoid any disruption if the user is suspended or removed from Kapost (in which case their access will be revoked).
Now you’re ready to set up your integration with WordPress in Kapost.
Creating the connection
- Log into the App Center Tab.
- Click the Install more apps button below the list of current connections.
- In the Kapost App Center, click on the product tile.
- From the “Select Instance” dropdown menu near the bottom of the expanded tile, select your Kapost instance.
- You will see the Kapost App Center settings page once again, now with a connection panel open.
-
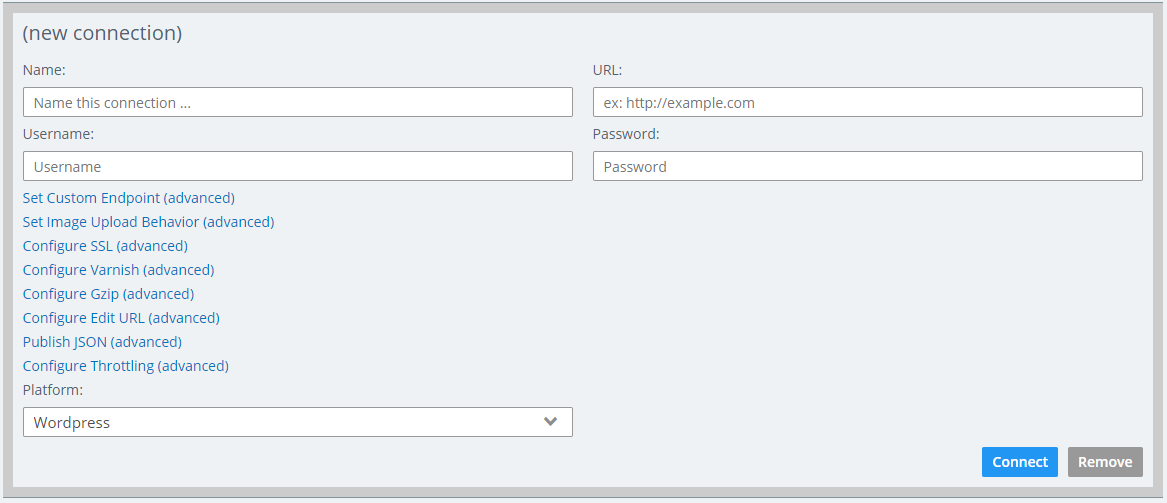
You’ll be asked to enter your authentication credentials:
- The connection name. This is what the connection will be called in Kapost.
- Your site’s URL, where your blog or CMS lives.
- Your username and password for your CMS. These credentials must be for a user with Admin or Editor permission in WordPress.
Click the Connect button, and Kapost will connect to your CMS. Find information on other WordPress settings options here.
Configure a Content Type
Once connected, the integration can be added as a promotion destination to the content types you’d like users to be able to promote.
- Navigate to Settings > Content Types & Workflow under Settings in the left navigation bar.
- Select edit next to the Content Type that you wish to publish.
- Select Body Type from the dropdown
- Click in the “Primary Destinations” field on that page. Select the connection from the list (listed by the name you provided). If the option is disabled in the dropdown menu, the most likely cause is that the Content Type does not have the Body Type. Check the “Body Type” field.
- If you’re not sure which content types will be used to publish with your integrations, speak with your Kapost admin or customer success manager.
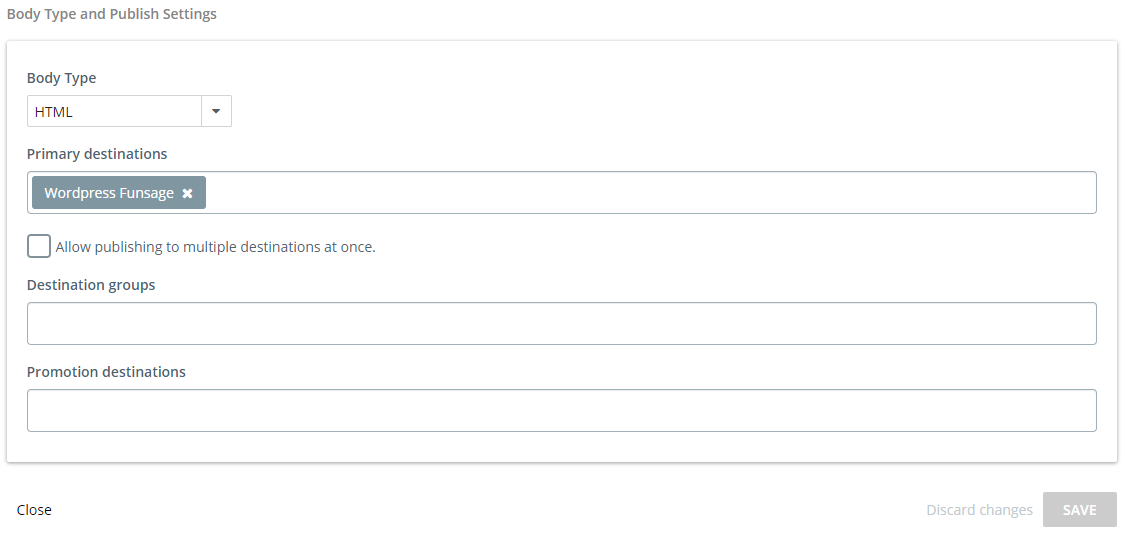
When you’ve completed these steps, you’re ready to publish content directly from Kapost to WordPress.
Publish
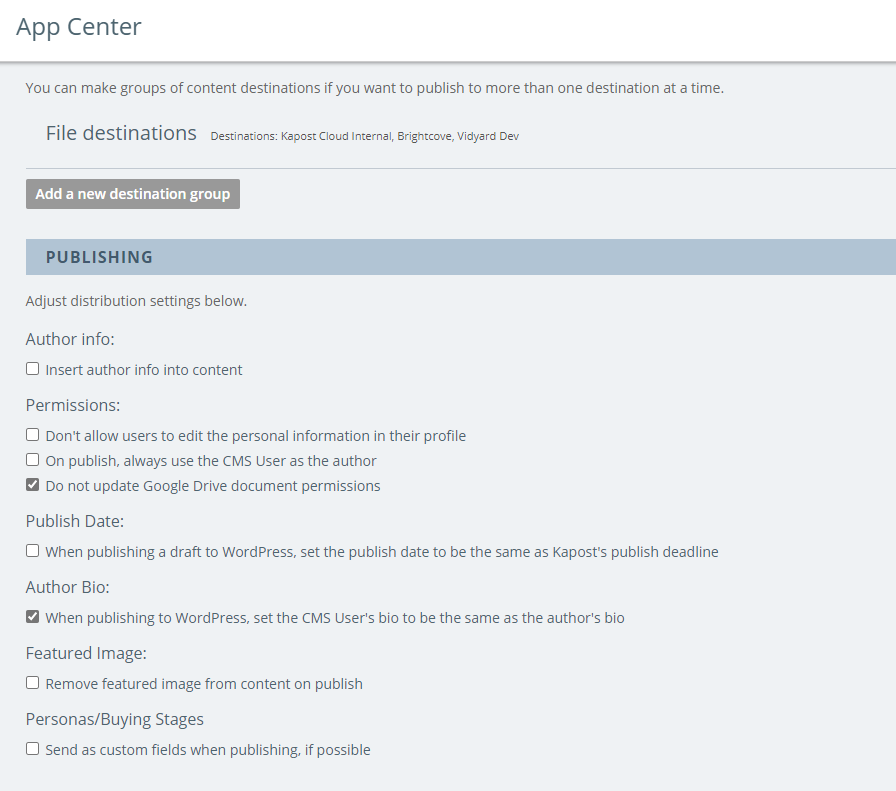
Manage your publish settings in the App Center in your Kapost instance. The Publishing section on this page, below your list of integrations, contains the publishing options.
Preview a WordPress Post in Kapost
Kapost Admins and Editors can preview WordPress posts in Kapost before publishing content to WordPress.
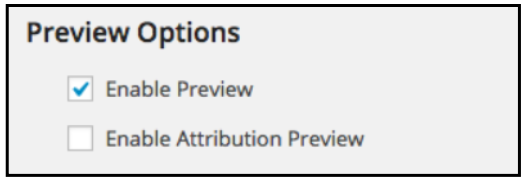
To do this, ensure that previews are enabled in the Kapost plugin in WordPress.
- If the preview option is enabled after the Wordpress connection has been configured in Kapost, refresh the connection in the App Center by clicking edit, then clicking save. (Otherwise, Kapost won’t be able to pick up that the option has been enabled.)
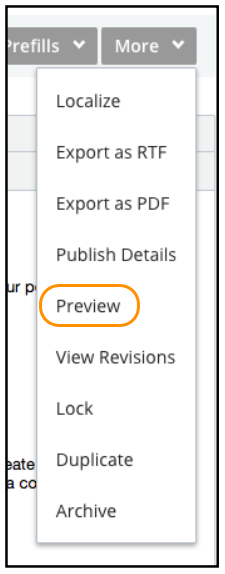
When this is set up, you’ll see a Preview option in the More drop-down menu on the content details page for your WordPress content. Click Preview in this menu to preview your content during the creation process.
A modal will appear to prompt you to pick the destination for the preview, if you have more than one post available. Choose the correct WordPress site for the preview, and a preview of your post will open in a new window.
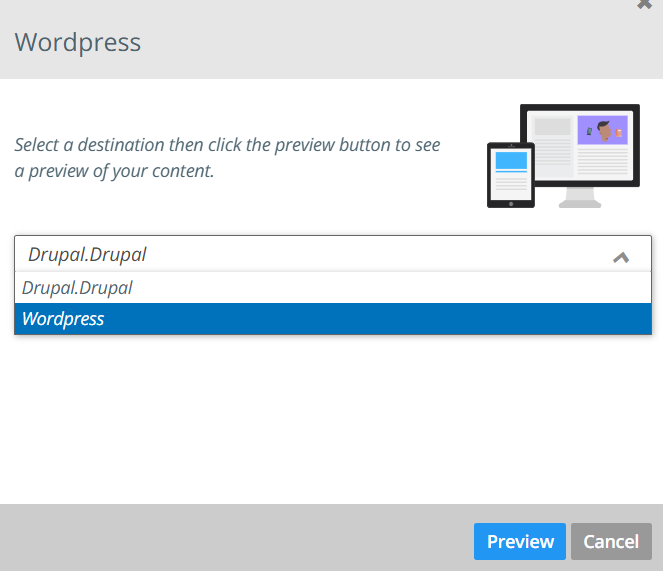
- These previews will create draft versions of your content in your WordPress instance. The draft versions will be removed once the content is ultimately published from Kapost.
- By default, preview won’t apply the bylining rules. To change this default behavior, you can turn on the Enable Attribution Preview option.
If you’d like to further configure your WordPress integration with mapping fields, images, excerpts, SEO, and more, read this help article on how to customize your integration.
If you have any questions, please contact the support team at kapost-support@uplandsoftware.com.