Content Types and Workflow Settings
Kapost Admins configure the settings for the content types their teams use in their content operation. Content type settings can be edited at any time by Kapost Admins.
Content type Powerpoint, Blog Post, Video, etc. Once a content asset is uploaded into Gallery it should be turned into the appropriate content type. The content type dropdown menu is a list of the different marketing assets you produce. Filter by content type to find content more easily. Content types can be adapted for your team. settings include the following sections to customize the content relevant to your organization:
If you have any questions about your team’s content type settings, ask your Kapost Admin or CSM for further information.
How It Helps
The configurations or settings for your content types in Kapost are what determine important characteristics for your content, like custom fields and workflow.
Each type of content your Kapost Admin(s) create in Kapost—from eBooks to webinars to blog posts—is unique to how your business teams operate and is designed to enable efficient execution.
Best Practices
- Since content type settings can be edited at any time, Kapost recommends you review your settings twice a year by running an instance audit in order to ensure that they are always configured optimally for your team. For example, your standard task workflows should include current team members in Kapost only.
- To help eliminate confusion when it comes to tagging content, create sections to organize related custom fields that should be grouped together. For example, you can specify which teams or groups in Kapost should be responsible for applying specific custom fields on certain types of content.
How It Works
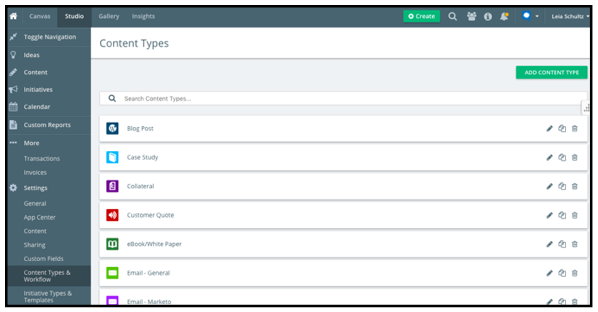
Navigate to the content type settings area via the Content Types & Workflow link in the left navigation bar.
HTML Body Type
For assets with an HTML body type the thumbnail is generated from images in the body in Kapost. If there is an image marked as "Featured," that is the image that will be used. If there is no Featured image, the first image in the body will be used. If there is no image in the body in Kapost, no thumbnail will be generated.
Document Body Type
For assets with a Document body type, the gallery can generate thumbnails for PDFs but not for other document types (e.g., Microsoft Word, Microsoft Powerpoint). If there is a PDF at the Publish URL, the thumbnail is generated from that published document. If there is no PDF at the publish URL, no thumbnail will be generated. Please note, a new thumbnail is triggered only when a new URL is generated, and it only generates from a primary URL.
Video Body Type
For assets with a Video body type, content will only show a thumbnail if (1) its publishing URL is on YouTube, and (2) its publishing destination is either YouTube or "Unknown" (meaning no publishing destination was set at the time when the content was marked as published). All other videos (e.g., an mp4 uploaded to Kapost but not published to YouTube or published to Brightcove) will not show a thumbnail.
Social Media Body Type
Social Media body type can be used to migrate all legacy social media body types and it allows user to select any of the social channels such as Facebook, Instagram, X (formerly Twitter), Pintrest, LinkedIn, and Youtube in a single body type. As a result, users can publish content from one piece of content to multiple social channels at the same time.
In order to publish to these social channels, it is necessary to configure integration with each of them. Refer to the following documents to learn more about integration:
Integrate With Facebook
Integrate and Publish to YouTube
Some of the additional options include:
-
The preview is generated for the attached media and the videos will take preference over images except when the selected social channel is Pinterest.
-
Users can also shorten the link using the Shorten a Link field.
All Other Body Types
All other assets with different body types will not have a thumbnail unless you upload an image for each asset.
Thumbnails are generated when a post is published or when the Publish URL is updated. To force the gallery to regenerate a thumbnail for an asset, you must update the Publish URL. For most posts that have been previously published, that means (1) updating the URL (and saving) to something fake just to trigger the thumbnail regeneration and (2) updating the URL back to the real Publish URL.
Configuring Content Type Settings
Click on the green Add Content Type button at the top right side of the page to create a new content type in Kapost.
If you’re editing an existing content type’s settings, click on the pencil icon  to expand the settings area.
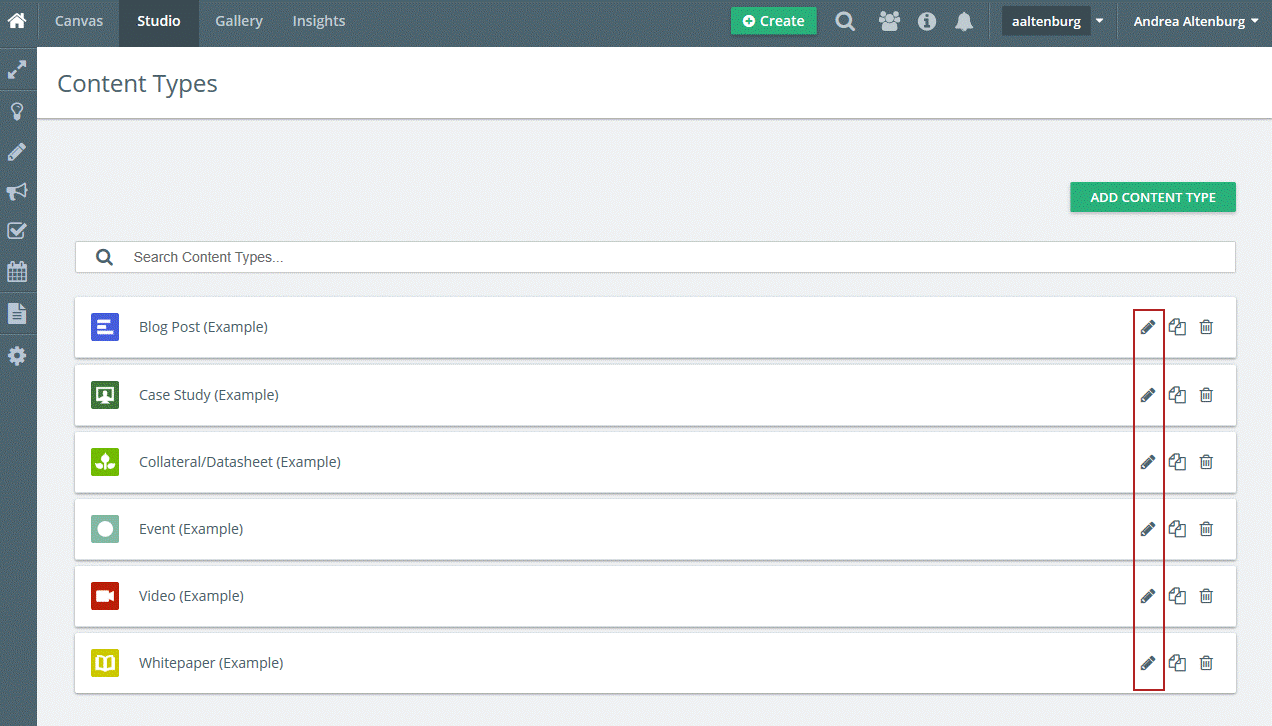
After selecting edit content type settings, tabs will appear along the top of the window. Each tab toggles to a configurable section.
Options
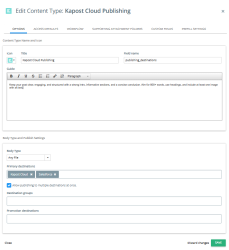
Configure the content type’s icon, title, field name, guide, body type, publish settings, primary destinations, destination groups, and promotions destinations.
Access Defaults
Configure the content type’s creation defaults here, that determine which users (individual, groups or everyone) in your Kapost instance are allowed to create this type of content.
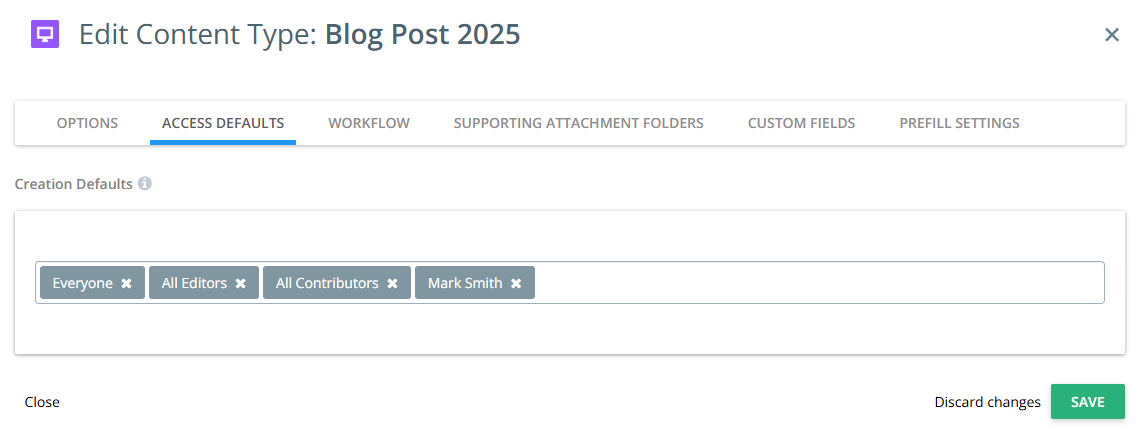
Remember:
-
Admins can view and change all content types within a content asset regardless of permission.
-
Users can only create content with content types that they have access to.
-
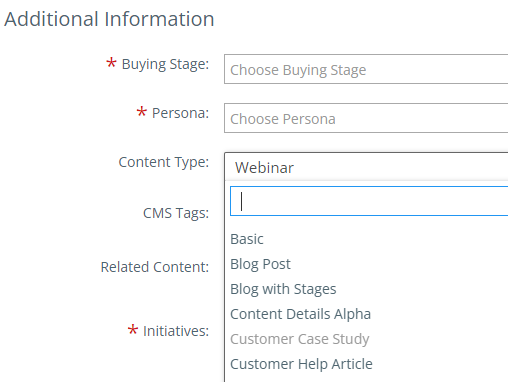
Users can change the content type to which they have access within the additional information section of the content asset. Content types to which the user does not have access will be grayed out.
Workflow
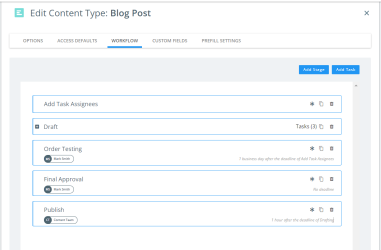
The Workflow tab is where Admins can add an existing Stage or create new Task workflows associated with a type of content, including task owners, smart deadlines, and task titles.
To add a stage to the Workflow:
-
Create a new Content Type or click on the
 icon to edit an existing Content Type.
 -
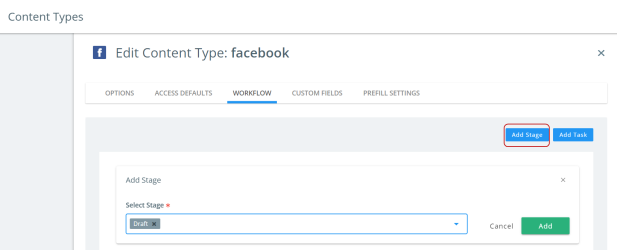
In the Workflow Tab, click Add Stage button.
-
Select your desired Content Stage from the drop-down list and click Add.
-
Click Save to save the Workflow.
To add a task to the Workflow:
-
Create a new Content Type or click on the
 icon to edit an existing Content Type.
 -
In the Workflow Tab, click Add Task button.
-
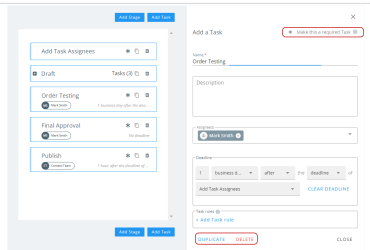
Fill in the Task details such as Task Title, Task Description, Task Assignees, Task Deadline, Task Rules and click Close.
-
Click Save to save the Workflow.
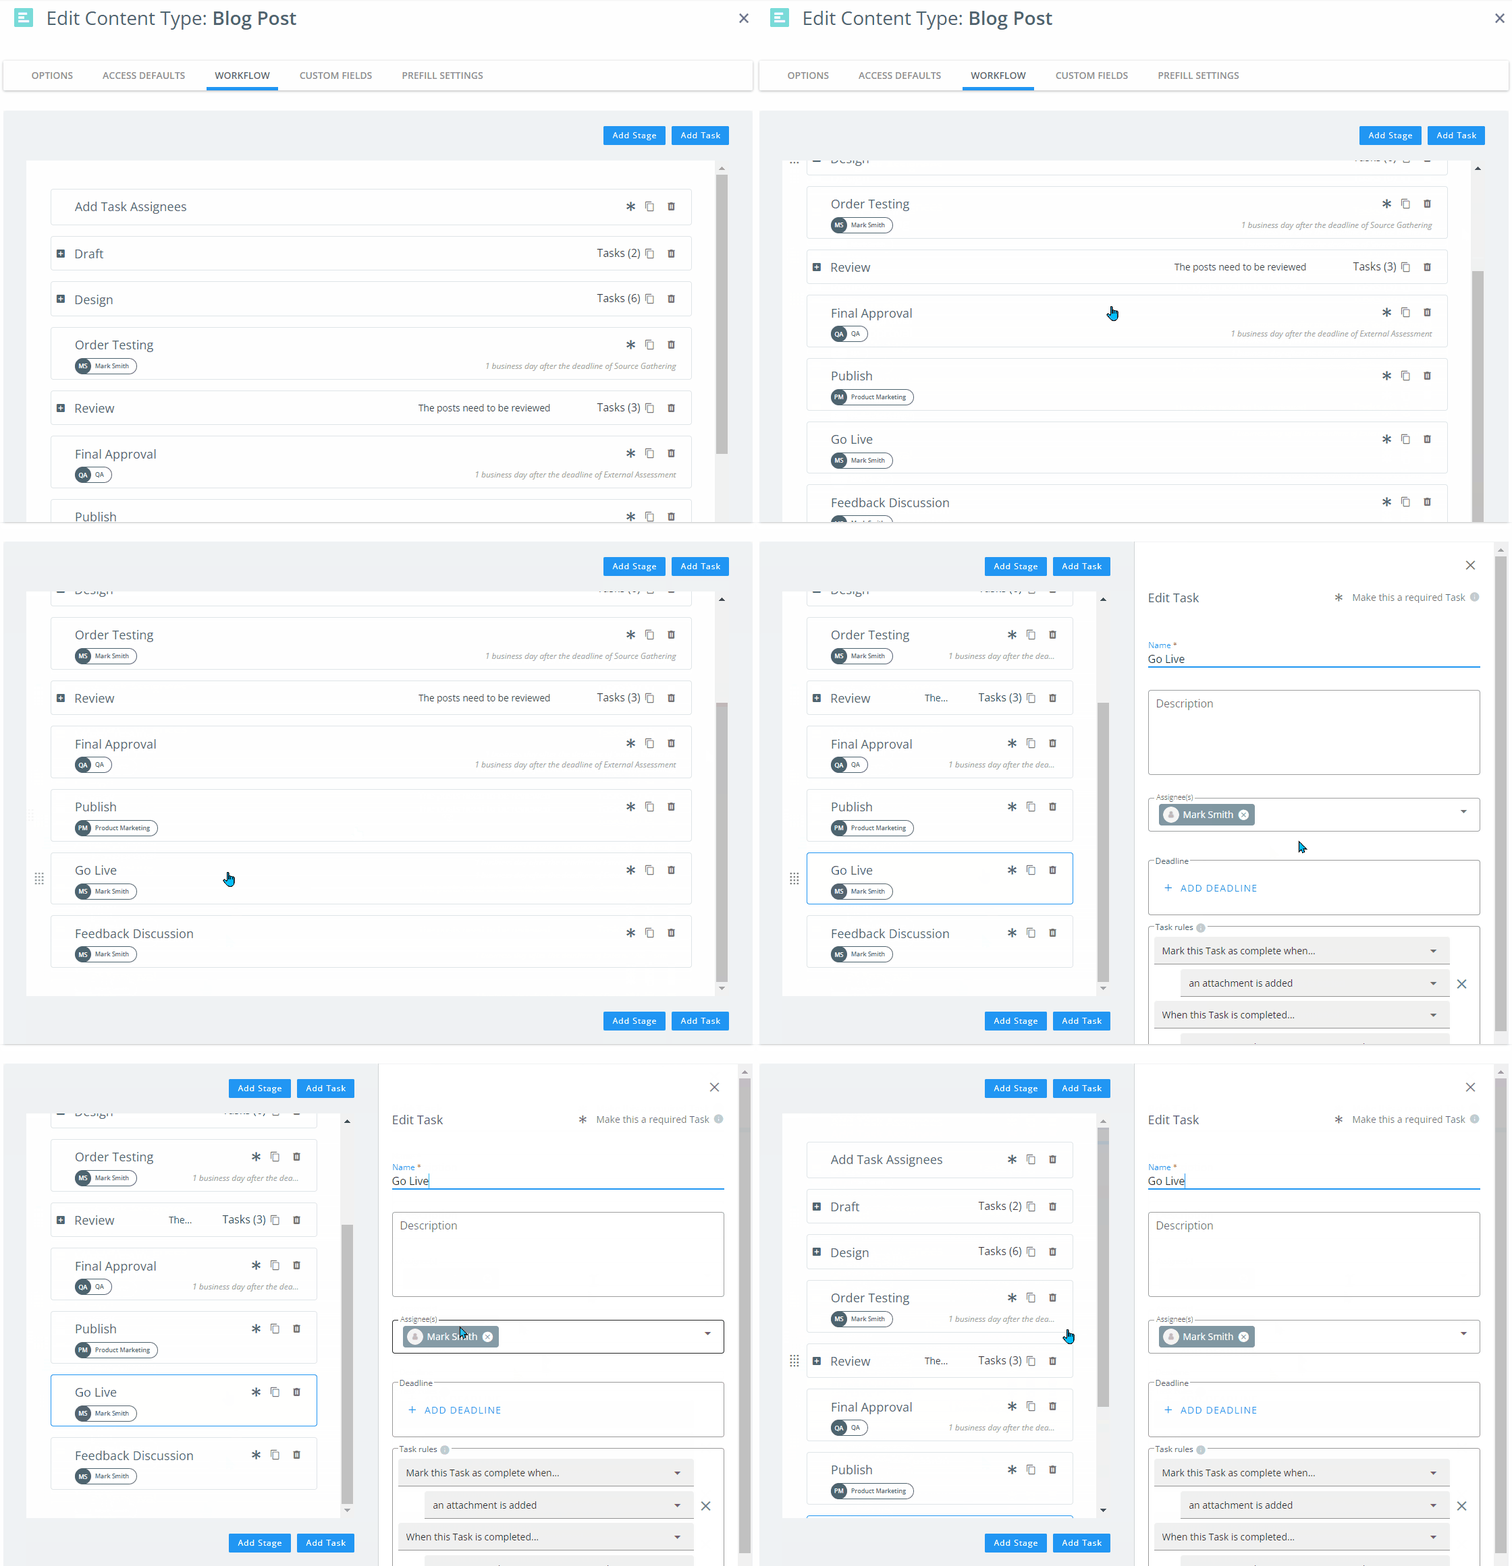
When you open a task or a stage in longer workflows, you can scroll both the screens independently. The selected task or stage is outlined in blue in the workflow for identification until the task or stage is saved. See the below demonstration:
Tip: To add deadlines, there must be more than one tasks created in the Workflow.
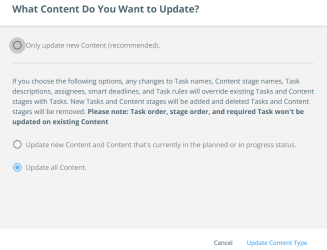
Once you save the workflow, a confirmation dialog is displayed with the following options:
-
Only update new Content - Updated workflow is only applied to newly created content
-
Update new Content and Content that's currently in the planned or in progress status - Updated workflow is applied to newly created content and existing content that are in the Planned or In Progress status
-
Update all Content - Updated workflow is applied to newly created content and all existing content
Upon clicking Update Content Type, a notification is displayed indicating that workflow updates are in progress. It is recommended that you do not make any further changes until the ongoing updates are completed because sometimes due to a large number of contents associated with the content type, it takes time for changes made in the content type workflow to be reflected across all the associated content.
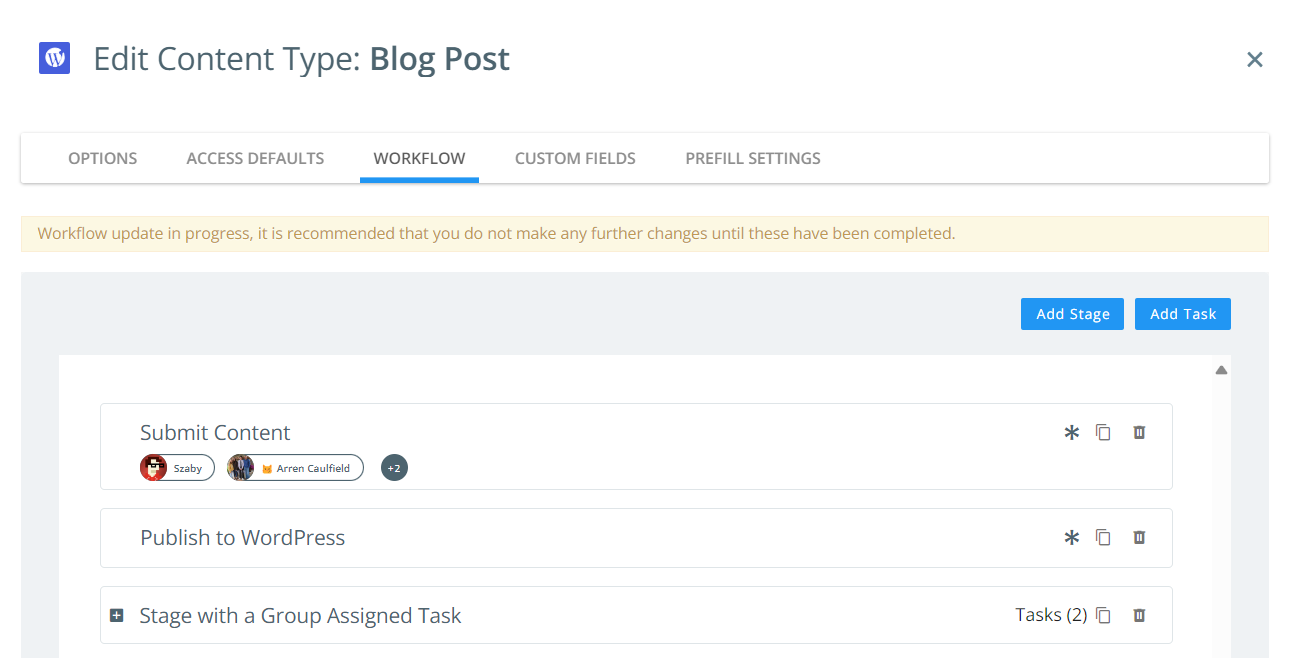
The notification can also be seen next to the content type name in the content types list. Once the update is completed, the notification will disappear automatically.

Points to remember:
Scenario 1: In the content type workflow, if a stage is removed and saved as Only update new Content, the stage will remain as it is in the existing content and will be removed only in the newly created content. Later, if the stage is added back to the workflow and saved as Update all Content, then the stage could appear twice in content that had already had the stage applied in previous edits to the content type workflow.
Scenario 2: If a new task is created with a deadline associated to a task in the content type workflow and saved as Update all Content, then upon updating, if the associated task has been removed in content details then the deadline will not be applied.
Scenario 3: In the content type workflow, if the assignee and deadline are applied to a task that is deleted in the content details and saved as Update all Content, then the updates will not be displayed in the content.
Scenario 4: Any ad-hoc tasks and stages in the content details will not be updated as a whole when you make changes to the content type workflow.
Note: Upon clicking Update Content Type, depending on the volume of updates, it can take some time for the workflow to reflect the changes in content details.
Important:
-
You can add more than one Task/Stages in the Workflow.
-
You can also duplicate, delete and mark the task a required while creating a task.
-
The task assignee and deadline details are displayed within the workflow list.
-
When working with longer workflows, Tasks/Stages can be added from the top or bottom of the workflow based on where the user has clicked the Add button.
-
Workflows on content can always be manually edited within the content asset as needed, but these one-off tasks are not available through reporting.
-
If the task rule is empty or incomplete when you click Close, then the task rule will not be retained upon saving the workflow.
For more on workflows in Kapost, watch this video tutorial on making workflows work for you.
Supporting Attachment Folders
Admins can create folders here so that users have predefined folders available when they create content using this content type and upload attachments to these folders. A maximum of 10 folders can be created.
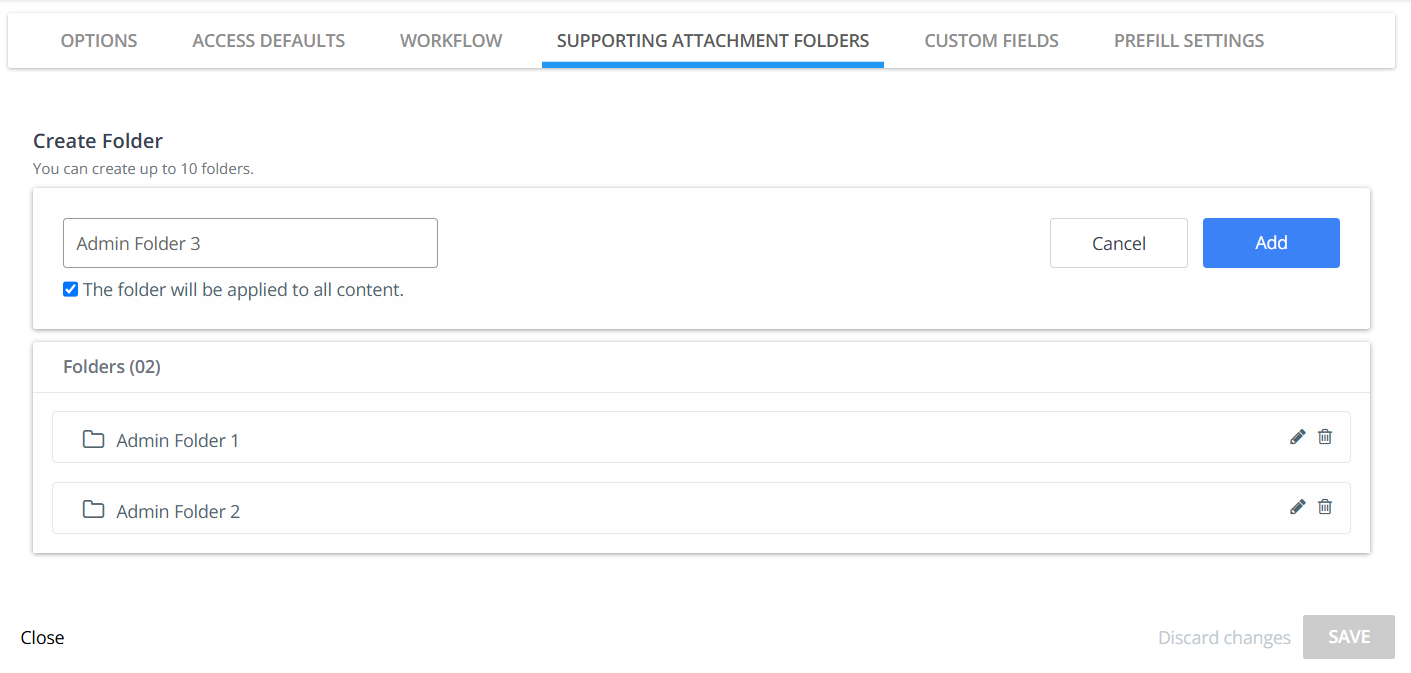
To create a folder:
-
Enter the title of the folder.
-
Select the The folder will be applied to all content checkbox. This means that any folder you add and save will be automatically applied to all existing and new content of this content type.
-
Click Add.
-
Repeat the above steps until up to 10 folders are created, if required.
-
Once added, folders can be edited or deleted.
-
Click Save.
To edit a folder:
-
Click the
 icon to edit the folder.
-
Update the folder name.
-
Select the The folder will be renamed in all content. checkbox. This means that the folder will be renamed and automatically applied to all existing and new content of this content type.
-
Click Save within the folder tile.
-
Click Save to complete the edit process.
To delete a folder:
-
Click the
 icon on its folder tile.
 -
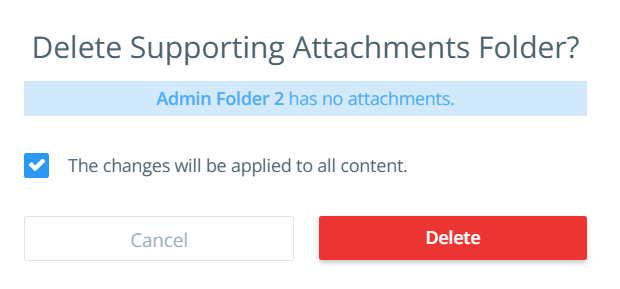
If the folder being deleted has no attachments in any content:
-
The 'Delete Folder' pop-up will notify that there are no attachments in the folder.
-
Select the The changes will be applied to all content checkbox. This means that once the folder is deleted and saved, it will be automatically removed from all existing content of this content type.
-
Click Delete.
-
-
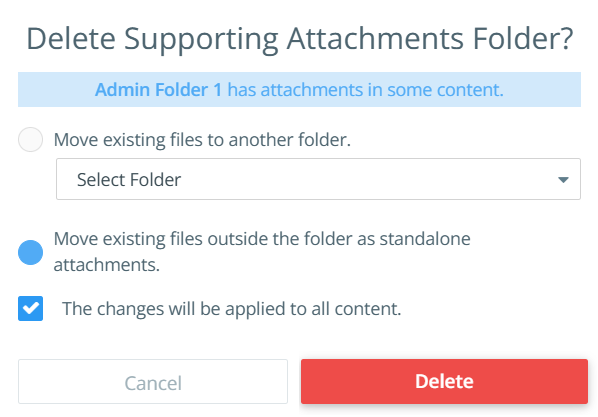
If the folder being deleted has one or more attachments in any content:
-
The 'Delete Folder' pop-up will notify that there are attachments in the folder within some content.
-
Select one of the following options:
-
Move existing files to another folder - Select a folder from the drop-down to move the attachments.
Note: The drop-down displays all other available folders within the content type.
-
Move existing files outside the folder as standalone attachments.
-
-
Select the The changes will be applied to all content checkbox. This means that once the folder is deleted and saved, it will be automatically removed from all existing content of this content type. Additionally, the attachments in the deleted folder will either be moved to the selected folder or converted into standalone attachments, based on your selection.
-
Click Delete.
-
-
Click Save to complete the deletion process.
To learn more on managing Supporting Attachments in content details, refer to Supporting Attachments.
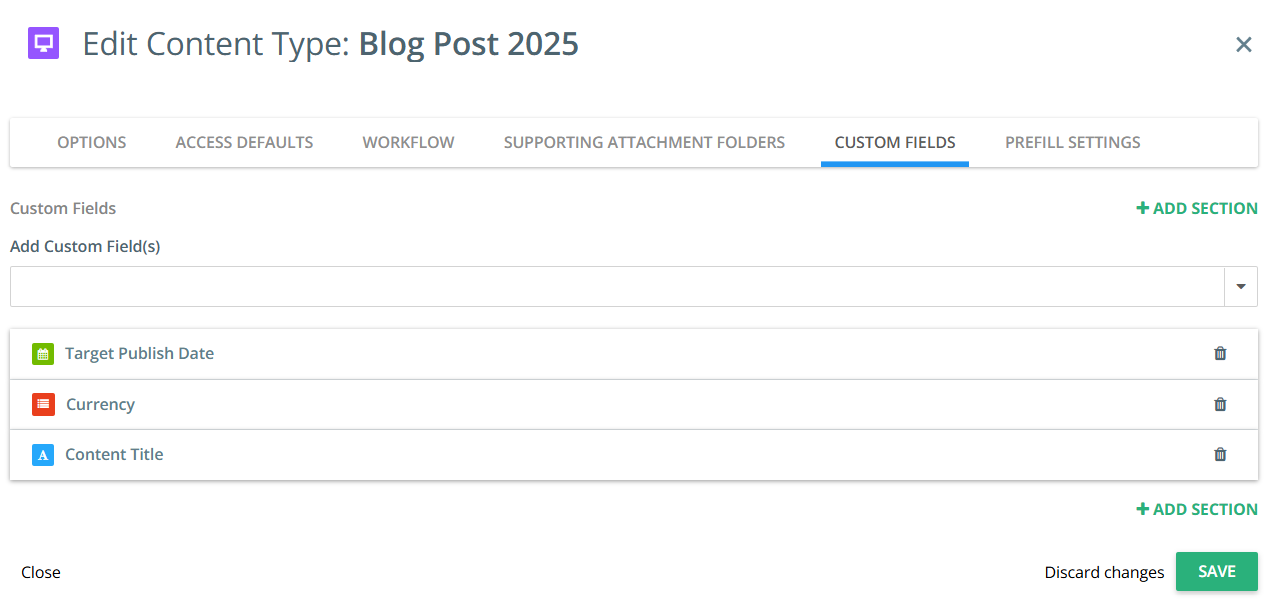
Custom Fields
Choose the custom fields, or metadata, that your team will be able to apply to your content and initiatives. For detailed instructions on configuring custom fields, read Managing Custom Fields.
If a custom field has been added from the custom field settings to this content type, it will automatically appear here. To learn more, refer to Bulk Apply Custom Field to Content Types.
Selecting the![]() icon will delete the Custom Field.
icon will delete the Custom Field.
Note: The custom fields selected can be dragged and dropped into any order.
Configuring Custom Field Sections
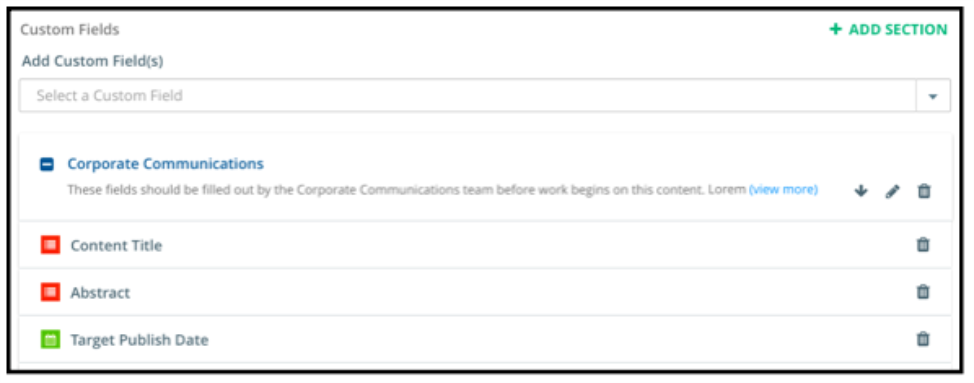
Click on the +Add Section button to create a new section for the content type and enter a title and description for the section.

You can add custom fields and drag and drop them under the relevant section. Each section can be assigned to a specific team or group responsible for applying certain custom fields to specific content types.
You can move sections up or down by clicking the upward or downward arrows.
To learn more about the impacts of deleting custom fields and content types, refer to Deleting Content Types and Custom Fields.
For specific instructions for the event content type, refer to The Event Content Type.
Prefill Settings
Refer to Prefills On Content For Admins for more details with how to manage prefill settings.
Top↑
