Mapping Custom Fields
The custom field mapping tool allows Kapost administrators to map a custom field and its values to fields and values in multiple integrated apps. In addition, using the mapping tool means that all your mappings are visible for every custom field.

To create a mapping for a custom field, do the following:
- Click the edit (pencil) icon for the relevant field.
-
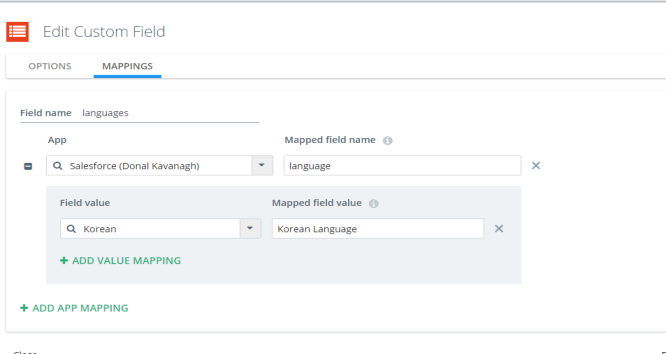
In the Edit Custom Field pane that is displayed, click the Mappings tab.

At this stage in the mapping process, you have the option of renaming and saving the back-end Field Name if you are mapping to just one other app and you do not need to map field values.
In the example below for instance, YouTube is the destination for a custom text field. The Field Name is renamed 'kapost_youtube_description' for the text to be pushed to YouTube when the video is published there. In this scenario, the Field Name must exactly match the data in your destination to sync. (The system admin for this corresponding destination can also assist with this.)
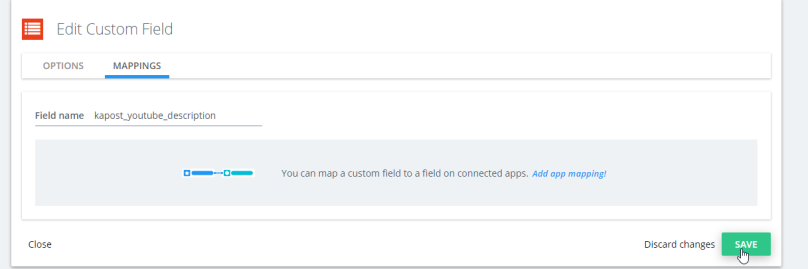
Note: The Kapost team recommend that you leave the Field Name as is and use the mapping function (as described in the following steps) instead of the above method. Using the mapping function provides oversight of current custom field mappings, allows mapping with multiple apps and enables the mapping of field values.
- Click the text Add app mapping! to proceed.
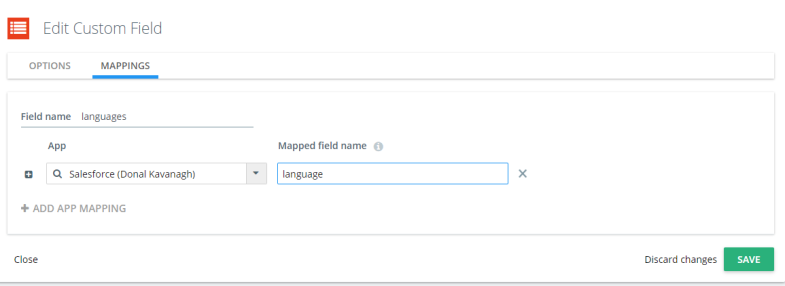
- Select the App that you are mapping to.
-
For the Mapped field name, enter the name of the field in the selected app this custom field will map to.
-
Click Save.
The custom field is now mapped to the relevant field in your selected app.
If the custom field is not a drop-down or multi-select field, you have completed the mapping. Click + Add App Mapping to start the process again and map the field to another app if required.
If the custom field is a drop-down or multi-select, you will see a plus icon (as indicated below) that allows you to map the field values. Proceed to step 7 if field values in Kapost are not aligned with the relevant field values in the selected application.
Note: Field values can be mapped for each selected app. For example, a custom field might be mapped to a field in Sprinklr and another field in WordPress. Field value mapping might be necessary, and can be applied, for one app and not the other.
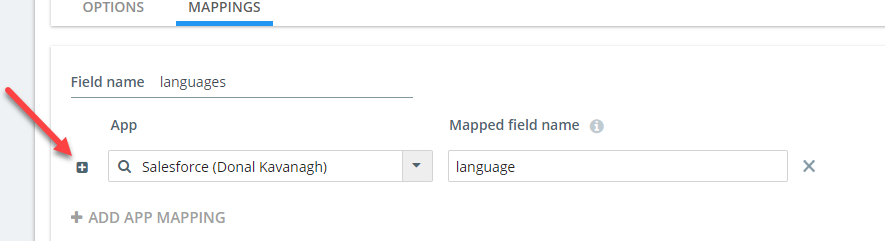
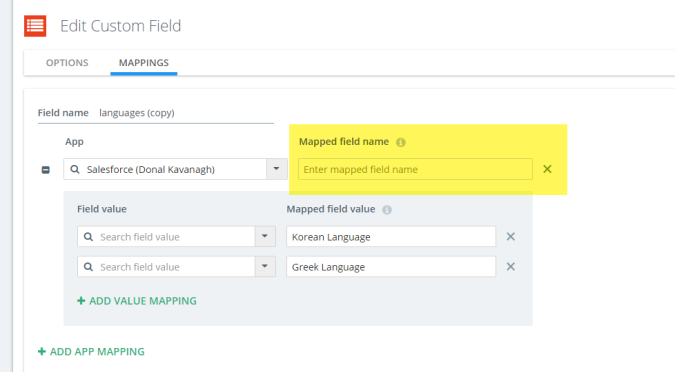
- To map your field values, click the plus icon followed by the prompt text Add value mapping!.
-
Select a Kapost Field value and enter the Mapped field value from the integrated app.
-
Click + Add Value Mapping and repeat the process (steps 7 and 8) for each value that you need to map.
- Click Save.
Cloning Custom Fields and Mappings
Kapost allows you to clone a custom field if required.

If you are cloning a custom field, existing field mappings are included by default in the newly created custom field. You should select the checkbox indicated below if you do not want to include mappings.
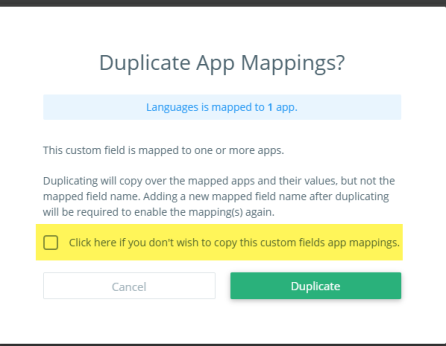
If you opt to include mappings, you should note that the Mapped field name is not cloned and requires updating, and the Mapped field values may also need to be revisited.