The Event Content Type is a bit of an exception to other Kapost content types, so this article is meant to give an overview of it's functionality and best use case.
This content type is less a type of content and more a means by which a team can announce, plan, and promote an event within the Kapost editorial calendar.
To create your Event Content Type, go to Settings > Content Types and Workflows and click Add Content Type. Enter the name and field name of your content type, and select Event as your body type.
You can add any custom fields you would like to have as part of your event content type, but please note that any content type with an Event Body will already include fields for location and date by default.
You shouldn't need to add a primary destination to your event type, as the idea behind this content type is that it doesn't have an online presence, however you can add promotion destinations so that you can promote your event through your various social channels.
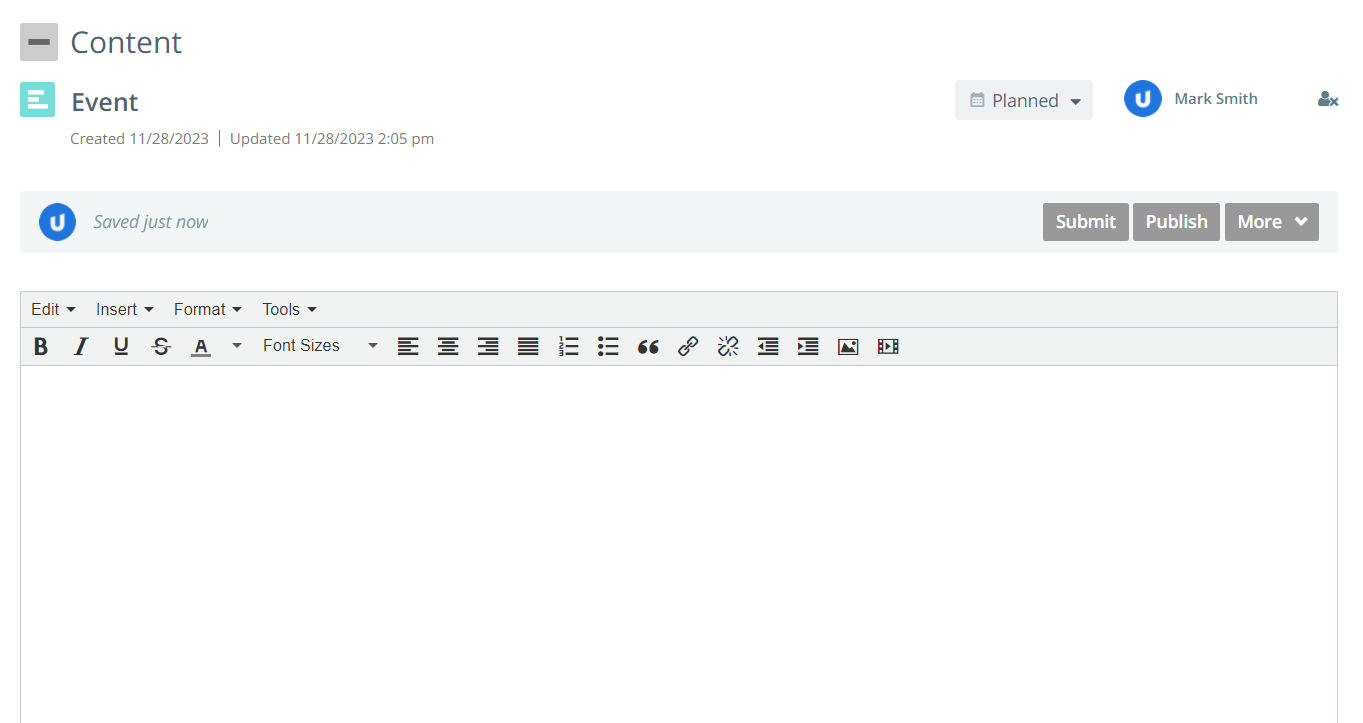
When you create your Event content type, it will have an HTML field where you can add any content relevant to the event.

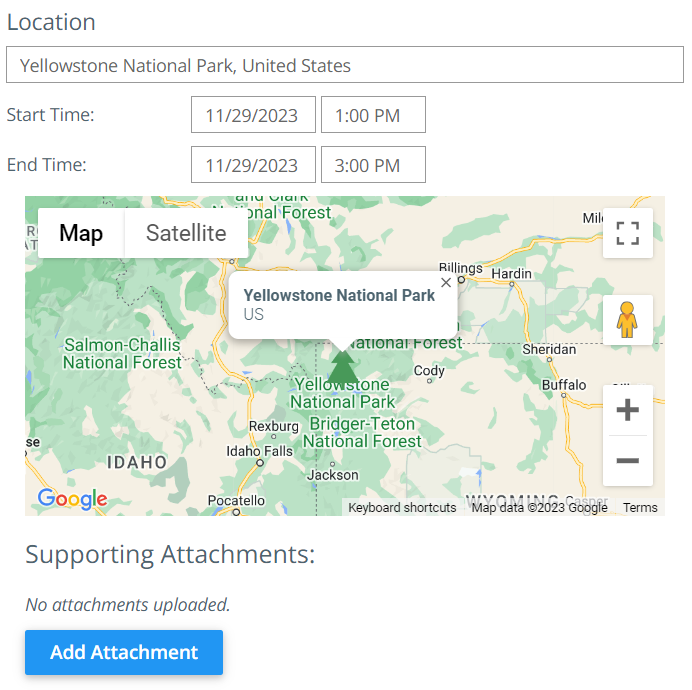
If you scroll down, you will see a section that includes the dates and the location of your event. The map will zoom in on the location you specify.

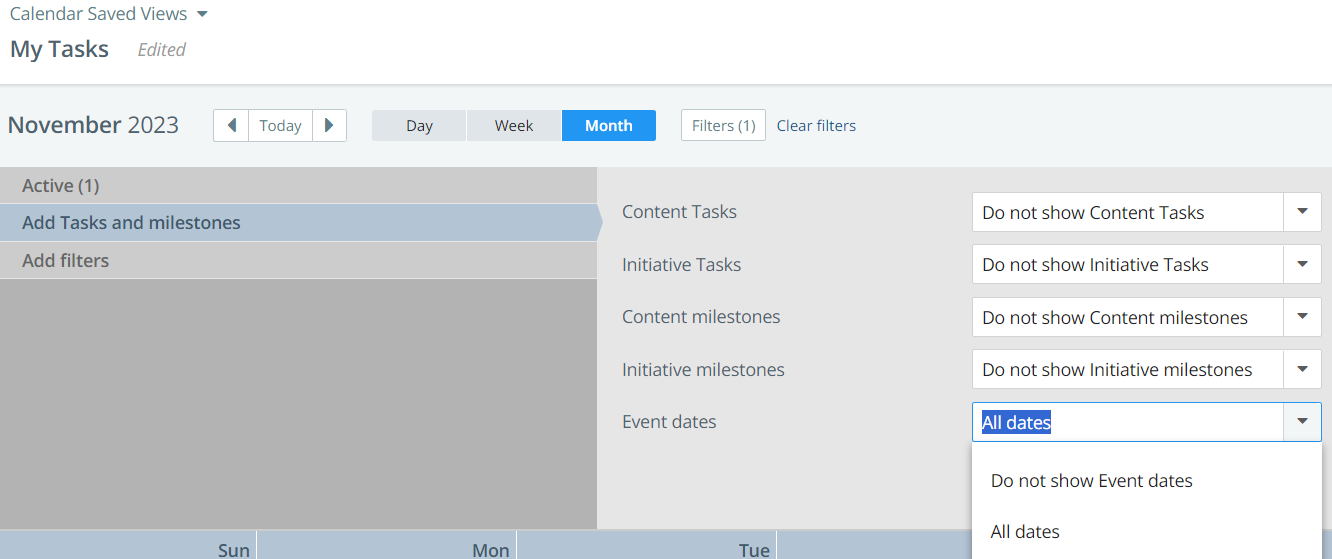
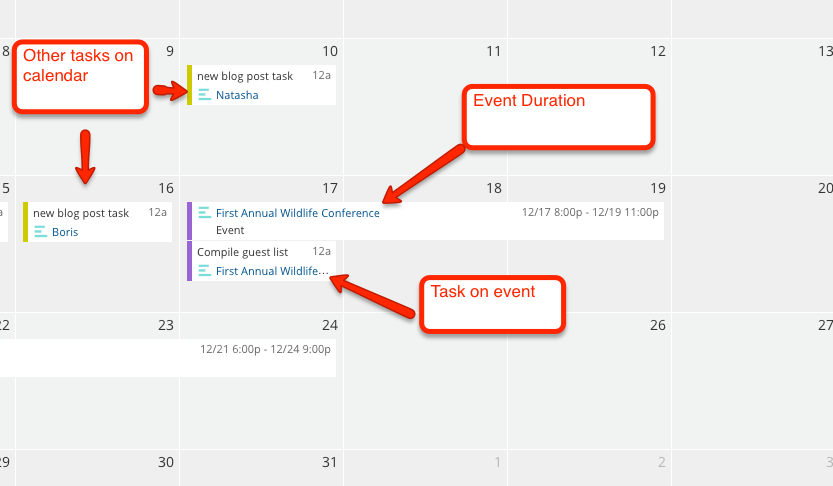
When you add the dates into this information section, the event will appear on the calendar spanning the dates that you specify. To make the event appear, make sure you first make events visible by going to your filter section on your calendar, going to Add Tasks and Milestones, and choosing to All Dates.

Once you can see events on your calendar, they will look like this:

Feel free to send a note to kapost-support@uplandsoftware.com for more information.