Create a startup flow
In many OL Connect Workflow projects, a Startup flow is used to initialize global variables. Global variables are shared between all processes and tasks. Instead of hardcoding these in a workflow configuration, they can be read from a configuration or manifest file. This approach simplifies relocating the solution.
This tutorial shows how create a Node-RED Startup flow and how to populate properties in the Global context using information from a manifest file.
The flow involves the following nodes:
-
Inject
-
read file
-
json
-
change
-
debug.
Create the startup trigger
This flow starts with the inject node. This node triggers the flow and can be setup so that it triggers a flow whenever it is deployed or when OL Connect Automate is started. To create the startup trigger:
-
Add an inject node to the flow.
-
Double click the node to view its Properties.
-
Check Inject once after. Leave the time at the default 0.1 seconds. This option is found at the bottom of the Properties screen.
-
Click Done.
Validate
To validate the setup, you add a debug node and connect this to the inject node (i.e. use your cursor to join the output port of the inject node with the input port of the debug node). Deploying the flow triggers the inject node which, by default, adds a timestamp to the payload. You can view the result in the Debug panel.
To view the Debug panel, click the menu at the right end of the title bar, and select View > Debug messages
Note: A suffix (1) is added to the name of the inject node, indicating that it has been triggered once.
The manifest file
For our project we created a folder containing a manifest file in JSON format. The manifest holds an email address and the URL to a customer specific API.
{
  "email": "Laura from OL Acme <laura@ol-acme.com>",
  "someApi": "http://localhost/myendpoint",
  "workspace": "C:\\workspace"
}
Load the manifest file:
-
Add a read file node after the inject node created earlier, and connect their ports.
-
Double-click the read filenode to view its Properties.
-
For the Filename property, select path.
-
Paste or enter the full path to the manifest file in the Filename property. For our example, this is:
C:\projects\project-a\resources\manifest.json -
For the Name property, enter a useful description such as:
Read manifest. -
Click
Done.
Note: When using Node-RED's project feature, the path is relative to the project location under NR's user directory (%userprofile%/.node-red/). For example: .node-red\projects\project-a\manifest.json
Working with JSON
At this stage, Node-RED treats the file as a text file containing a JSON string. In order to access its data, it needs to be parsed to its JavaScript Object representation. The JSON node can do this.
To parse the incoming JSON string:
-
Add a JSON node after the file read node, and connect their ports.
-
Connect the JSON node to the input port of debug node, so that the result can be viewed in the Debug panel. .
-
Deploy the flow.
-
The manifest file is read and the JavaScript representation of the data is logged in the Debug panel.To view the Debug panel, click the menu at the right end of the title bar, and select View > Debug messages.
Initialize a global variable
Variables stored in the Global context are visible to all nodes in all flows on all tabs. The following shows how to store the email address in a global variable using the change node:
-
Insert a change node after the JSON node, and connect their ports.
-
Double-click the change node to view its Properties.
-
Set the Name property to
Set globals. -
Under Rules, select the the Set rule.
-
For the Set rule, select global and enter
email. -
For to the value, select msg and enter
payload.email.
-
-
Click Done.
You can also hard code global properties in the change node, instead of using data from the manifest to set the variable to a specific value.
The change node is just one way of setting variables. Alternatively, you can use the function node to achieve the same via JavaScript.
Using globals
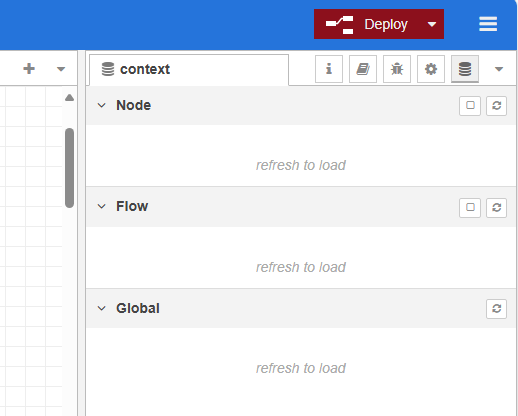
The Context sidebar displays the contents of the context data store and allows us to view the stored variables. The view consists of three sections one for each context: Node, Flow, and Global.
To view the Context panel, click the menu at the right end of the title bar, and select View. Check Show sidebar. Select the Context Data tab.
There are several ways to use the global variables in your flows. Below some common examples:
-
Use the change node to write the value to a property of the
msgobject or to a flow specific property. Many nodes take properties from themsgobject as their inputs. -
In a function node, you can use
global.get('email')to retrieve the value of a global property. -
When manipulating data with a JSONata expression, the data is fetched using
$globalContext('email'). For more information on JSONata see JSONata.
You can have multiple rules in a change node. For example, the first rule shows how the email global is set to a property of the msg object. The second rule can concatenate the someApi variable with a string to construct an URL using a JSONata expression that looks like this:
$globalContext('someApi') & '/jobs'
Summary
A startup flow is a perfect tool to prepopulate solution- or project-wide variables. It simplifies relocating a solution as customer or environment specific values are stored in a central location outside of the flows and OL Connect resources. When using global variables, there is no need to updates nodes in the solution in order to configure them for a new customer or different environment (DTAP). When implemented properly, it also simplifies updating the solution.
Various OL Connect Automate nodes for Node-RED support the runtime parameter concept. This means you can take information from the manifest and feed it into, for example, an OL Connect template, without having to modify the data source or having to hardcode the value in the template. A good example is the URL for submitting data in COTG forms.
A Startup flow can also be used to automatically deploy the resources for your solution. That's covered in ADD LINK TO TUTORIAL.