Preferences
The Preferences dialog is used to modify the general software preferences. Changes made in this dialog affect the software globally, not individual templates and data mapping configurations.
The Preferences dialog is separated into individual tabs, where each tab controls certain aspects of the software.
To open the Preferences dialog, select Window > Preferences.
The General preferences also provides you with buttons to :
- Reset all Warning Dialogs: This re-enables all warning dialogs that might have been previously disabled by selecting the "Don't show again" checkbox within the dialog.
- Restore Defaults. This option restores the preferences to Defaults. This applies to the current Preferences page only, but not other Preferences.
- Apply: This option applies the settings made within the current Preferences page, but does not close the Preferences dialog.
Clean-up Service preferences
The Clean-up Service defines how the Connect database and the temporary files created during Connect production runs are cleaned up after the production run has finished.
As part of the job production process OL Connect uses a database for intermediate storage and also creates various temporary "managed" files. These files include data extractions, configuration files and any intermediate files created during the production process. Connect keeps track of all these files through references held within the Connect database.
All the files created and the database references to them are stored for a set amount of time in order to allow Connect to reuse them. However, we do not want to store these indefinitely, because the database would run out of space. The solution is to use the "Clean-up Service" to remove the temporary data and files once they are no longer needed.
The more items that are present in the database, and the larger they are, the more time and processing power (CPU) that will be required for cleaning them up. Thus a regular Clean-up of the database (as often as possible) is recommended.
This is especially the case if items are not going to be retrieved from the database at a later date. i.e. If the Connect job is not going to be re-run.
The clean-up can always be set to run outside of business hours (see the Run according to the cron schedule: Enter the interval at which the Clean-up service runs. option below), to reduce impact upon Production systems.
The values below define when the specified targets are to be set as being ready for deletion, not when they are actually deleted. The actual deletion occurs only as per the cron job scheduling; or when OL Connect is started (if Run at application start up is selected); or when the Run Now button is pressed.
-
Enable clean-up service: Check to enable the Clean-up services. When checked, either or both of the Database clean-up and File clean-up services can be set individually.
If the box is not checked, then no Clean-up will occur. -
Run at application start up: Click to start the clean-up service when the Designer module is opened.
-
Run according to the cron schedule: Enter the interval at which the Clean-up service runs.
To understand how to write a cron job schedule, please refer to the Quartz Scheduler tutorial.
Note: If the Product managing the service is set to Designer, then the Designer must be running at the time that the cron job is scheduled, for the Clean-up to run.
-
Product managing the service: Select which of the applications will run the service.
Note: The Server Engine is set as the default as it is generally considered the best option.
This is particularly the case when using a scheduled cron job, as the Sever Engine is always running, whilst the Designer might well not be at the scheduled time (in which case the clean-up will fail to run). -
Database Clean-up Service:
-
Allow database clean-up service: Select this checkbox to enable the database Clean-up settings, and enable the actual clean-up.
-
Threads to use for database deletions: The number of Threads to be used in the clean-up. OL Connect is a multi-threaded application, and the clean-up is likewise.
Tip: The default number of threads is considered the best compromise for running both clean-up and production jobs simultaneously. If experience suggests that the clean-up is not running efficiently, then upping the number of threads here would be recommended. Conversely, if production appears to be suffering courtesy of the clean-up process, then reduce the number of threads here.
In general, higher end machines (those with multiple cores) will allow a higher numbers of threads, whilst low end machines will perform better with a lower number of threads. -
Number of entities in each deletion batch: The number of entities to be deleted at a time. This is done to break the clean-up into smaller chunks. This improves OL Connect clean-up responsiveness, whilst the clean-up is occurring.
The number selected here applies to all the following settings.
i.e. a selection of 1,000 would delete 1,000 data records within a Data Set, 1,000 content items within a Content Set, and so on. -
Minimum time to retain Data Sets: The minimum time a Data Set (and all the records it contains) is retained within the database before being set for deletion.
Tip: In order to prevent attempts at deleting database objects which might still be in use, it is recommended that all Minimum time retention values should always be set to at least the length of your longest job. Preferably with some extra time added, for good measure.
For example, if your longest job takes 45 to 50 minutes to run, then set the retention time to 55 minutes (or 1 hour) to ensure that all the database objects created during job processing survive for the duration of the job. -
Minimum time to retain Content Sets: The minimum time a Content Set (and all the content items it contains) is retained within the database before being set for deletion.
-
Minimum time to retain Job Sets: The minimum time a Job Set (and all the jobs information it contains) is retained within the database before being set for deletion.
-
Minimum time to retain Managed Files: The minimum time file references (to files such as data mapping configurations and templates) are retained within the database before being set for deletion.
-
Minimum time to retain other entities: The minimum time any orphaned data (such as Finishing tables, Media tables, DataModels and Properties tables) are retained within the database before being set for deletion.
-
-
-
Database Partition Settings:
-
Use Database Partitioning: Select to use Database Partitioning.
-
Empty partition count: The number of empty partitions that are created each clean-up run. This defaults to 24.
-
Partition Size: Enter the length of time before partitions are switched. This can be entered in minutes, hours, days, weeks or months.
-
-
-
File Clean-up Service:
-
Allow file clean-up service: Check to automatically detect orphan files and set them for deletion. Orphan files could be resources and internal files used by Connect, but which are not needed by any running job.
-
Minimum time to retain orphaned files: The minimum time during which orphaned files are kept in the database before being set for deletion.
-
-
The Clean-up Services preferences also provides you with buttons to :
- Run Now: This will run the clean-up service immediately.
- Restore Defaults. This option restores the preferences to Defaults. This applies to the current Preferences page only, but not other Preferences.
- Apply: This option applies the settings made within the current Preferences page, but does not close the Preferences dialog.
Note that this setting only impacts how dates are displayed in the Data Model. It does not change how dates are stored in the Connect database, nor how they are displayed in a template.
Database Connection preferences
Dialog used to change the OL Connect back-end Database.
This dialog supports the swapping of the back-end database between various vendor databases. Note, however, that the alternate vendor database(s) must already be installed and available in order to swap to them.
This is not a migration tool. It is a simple connection tool, that enables shifting to a different back-end database. Any existing data will not be transferred/ migrated between the databases, and any existing File Stores will be cleansed by the Clean-up Service after the swap.
When shifting to a different back-end database, the changes won't be applied until OL Connect is restarted. Including the Connect services. A full machine restart is recommended, as this provides the cleanest restart of all the services.
- Basic Connection Settings selections:
- Database vendor: Select the database type from the drop down list.
Note: Moving from one vendor database to another will reset all screen selections to defaults, regardless of what may have been previously selected.
- Database URL: This is a read-only summation of the current database connection settings.
Tip: If the Test Connection button shows that the database cannot be successfully connected to using the selected settings, then the contents of this field could be used to try to connect to the database outside of OL Connect. This should help in determining and refining the acceptable connection options.
- Hostname: Enter the IP Address or alias of the server where database resides.
- Database Instance Name: Enter an existing Microsoft SQL Server's instance name.
This option only applies to existing Microsoft SQL Server instances, and not for MariaDB or MySQL.
Note that the MS SQL Server instance name must meet Microsoft's requirements. - Port: Enter Port number. The defaults are those which the vendors use by default.
- Schema: The individual database schema, within the vendor database.
Note: If a previously non-existent schema were chosen here, then a new schema of that name will be created within the database when the back-end database swap is applied. The tables within that schema, though, will not be created until Connect is restarted.
- Username: Enter the database login username.
Tip: It is considered best practice for this user to have root privileges.
- Password: Enter the password associated with selected username.
- Database vendor: Select the database type from the drop down list.
- Advanced Connection Settings selections:
- Maximum concurrent threads: This option sets the maximum database threads.
The maximum setting is determined by the specific capabilities of the machine Connect is installed upon (CPU speed and the amount of cores being the major determinants).Tip: Leaving this value set to the default maximum should be the best option in most circumstances.
We recommended this entry be left at the default value. - Custom database parameters table: These are extra parameters which are appended to the database connection URL. The default values are those which have been determined to be useful in connecting to specific vendor databases.
For example, in order to use Integrated Authentication with Windows, specify the propertyintegratedAuthenticationwith the valuetrue, which addsintegratedAuthentication=trueto the URL.- Property: These are free field text fields.
Note: These fields and their associated values get appended to the JDBC connection and therefore must follow all rules regarding acceptable URL addresses for such.
- Value: The value applied to the associated Property.
 Add: Used to add extra Property values to the table.
 Delete: Used to remove existing Property values from the table.
- Property: These are free field text fields.
- Test Connection: Use to test if current connection settings will connect to the specified database.
If successful, this will display the version of the database at the top of the Preferences page.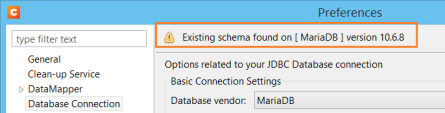
- Restore Defaults: Will restore the settings to OL Connect HyperSQL standard defaults.
- Apply: When a database connection is confirmed as correct this button becomes active, and is used to actually apply the database swap.
- Maximum concurrent threads: This option sets the maximum database threads.
The Database Connection preferences also provides you with buttons to :
- Test Connection: This will run a test on the current Database Connection settings.
- Restore Defaults. This option restores the preferences to Defaults. This applies to the current Preferences page only, but not other Preferences.
- Apply: This option applies the settings made within the current Preferences page, but does not close the Preferences dialog.
Editing preferences
These preferences define different editing options in the Designer module.
- Object Resizing for <div> elements: This defines in which contexts to enable the resizing of <div> elements (including Positioned and Inline boxes). Resizing <div> elements may cause layouts to produce undesirable results especially when using Foundation templates.
- Enable for Print Context: Check to enable <div> resizing in the Print context.
- Detail tables preview limit
- Maximum number of records to show in preview: This setting limits the number of records to show in detail tables in the Designer (Preview tab). The lower this number, the shorter the time before the preview or the next record will appear.
- Dragging data fields to the editor. When you drag-and-drop a data field into a template, a placeholder appears in the template and a script is added (see Inserting placeholders via drag-and-drop / double-click). This option specifies what to use as the script's selector.
- New scripts use a class selector (recommended): The placeholder is wrapped in a Span element, and the Span's class is used as selector. This is recommended because it is faster (see: Optimizing scripts).
- New scripts perform a search and replace: The placeholder text is used as selector.
Tip: Hold the ALT key while dragging to change this behavior on the fly.
Note: If the option Evaluate Handlebars expressions is enabled for a section, dragging data fields to the editor will insert expressions instead of placeholders and scripts. See Section properties dialogs.
CSS options
A CSS preprocessor is a CSS extension language that allows you to enhance CSS with code (variables, for example) and then compile it into plain CSS. CSS Preprocessor Sass is integrated in Connect.
For more information about Sass, see: https://sass-lang.com/.
The CSS options relate to the way Sass (.scss) files are compiled in Connect. See also: Using a Sass file.
- Output style: This setting determines the use of spaces and indentation in the compiled CSS file. For examples of the available output styles, see: https://sass-lang.com/documentation/file.SASS_REFERENCE.html#output_style.
- Compact: Each CSS rule takes up only one line, with every property defined on that line. Nested rules are placed next to each other with no new line, while separate groups of rules have new lines between them.
- Compressed: This output style minifies the output. It has no whitespace except that necessary to separate selectors and a new line at the end of the file. It also includes some other minor compressions, such as choosing the smallest representation for colors. It's not meant to be human-readable.
- Expanded: This is the default output style. Each property and rule take up one line. Properties are indented within the rules, but the rules aren't indented in any special way.
- Nested: Each property has its own line, but the indentation isn't constant. Each rule is indented based on how deeply an element is nested in the HTML and CSS structure.
- Auto compile on saving .scss files: When this option is checked, a .scss file is compiled into a .css file whenever you save it, overwriting any previously compiled version of the .css file. Also, when a partial .scss file is saved all .scss files are recompiled. (A partial .scss file is meant to be imported in another .scss file. Its name starts with an underscore.)
By default this option is enabled.
Note:
-
Re-compiling a .scss file overwrites any manual changes made to the .css file.
-
Partial .scss files cannot be compiled.
-
Single line comments (//...) are not added to the compiled .css file, whereas multi-line comments (/* ... */) are maintained. Multi-line comments should be added within the brackets of the definition they apply to, to make sure they appear in the correct place in the compiled css.
Color options
Many of the colors in the user interface of Connect Designer can be adjusted. Click the small colored square next to the field that holds the default color value, to open the Color dialog and pick a color (see Color Picker).
- Edges: The edges around elements in a section in the Workspace. Click the Show Edges icon
 to toggle the visibility of these edges.
- Box Objects: This color highlights positioned boxes, inline boxes and Div elements; see Boxes.
- Table: This color highlights tables, and the rows and columns in tables; see Table.
- Resizable Table: This color highlights tables for which the option Allow resizing has been checked when adding the table; see Table.
- Forms: This color highlights forms; see Forms.
- Shared Content: This color highlights shared content, such as shared snippets; see Snippets.
- Margin and guides: These settings only apply to Print sections.
- Guides: This is the color for rulers that can help position content correctly; see Guides.
- Margins: This color delineates the content area on a page; see Pages.
- Bleed box: This color delineates the printable area on a page; see Page settings: size, margins and bleed.
- Master pages: These edges are only visible on Master pages; see Master Pages.
- Header and Footer Margin: This color highlights the header and footer margin set for the Master page; see Adding a header and footer.
- Objects: This color highlights all elements on the Master page.
- Script Result Highlighter:
- Results: Hovering over a script in the Scripts pane highlights content that will be affected by the script; see Personalizing content.
Images preferences
- Transparent PDF image preview: Check this option so that PDF resources added to the template (including in the Master Page and Media) display using transparency. Note that this can affect display performance (showing transparent PDFs is slower) but will not affect output speed.
The Editing preferences also provides you with buttons to :
- Restore Defaults. This option restores the preferences to Defaults. This applies to the current Preferences page only, but not other Preferences.
- Apply: This option applies the settings made within the current Preferences page, but does not close the Preferences dialog.
Emmet preferences
Emmet is a framework that enables the lightning-fast creation of HTML code though the use of a simple and effective shortcut language resembling CSS Selectors (see Emmet Abbreviations: http://docs.emmet.io/abbreviations/syntax/). The Emmet functionality is available in the HTML and CSS source editors of Connect Designer. Emmet transforms abbreviations for HTML elements and CSS properties to the respective source code.
This is, for example, the abbreviation for a <div> element with the class row:
div.row
On pressing the Tab key, this abbreviation is transformed to:
<div class="row"></div>
To learn more about Emmet itself, please see their website Emmet.io and their documentation: http://docs.emmet.io/. Emmet is a plugin. All options listed below are Emmet's default options. They are not specifically adjusted for Connect.
Common Emmet preferences
-
Expand abbreviations by Tab key: Check to enable the Expand Abbreviation function.
-
... in files with extension: Enter a comma-separated list of all file extensions in which expand abbreviation will work.
-
Upgrade web editors: This option, inserted by the plugin that is used to integrate Emmet into Designer, does not affect how Emmet works in OL Connect.
-
Extensions Path: Choose a folder where to put json and js files to extend Emmet. This includes custom snippets, preferences and syntax profiles. For more information see http://docs.emmet.io/customization/.
Emmet Abbreviation preferences
This Preferences tab lets you add and manage custom abbreviations. All standard abbreviations can be found in Emmet's documentation: http://docs.emmet.io/abbreviations/syntax/.
If there is no need to transform the text while expanding it, create an Emmet snippet instead (see below).
-
New: Add a new abbreviation.
-
Name: The name of the abbreviation is also its trigger.
-
Context: The context in which the abbreviation is enabled (HTML, CSS, etc.).
-
Description: A short description of the abbreviation .
-
Pattern: This defines what an abbreviation expands to. Since Emmet is mostly used for writing HTML/XML tags, abbreviation definition uses XML format to describe elements; see http://docs.emmet.io/abbreviations/types/.
-
Automatically insert: This standard option doesn't affect how Emmet works in Connect Designer.
-
-
Edit: Edit the currently selected abbreviation.
-
Remove: Remove the currently selected abbreviation.
-
Import: Click to open a browse dialog to import an XML file containing exported abbreviations. The imported abbreviations are added to the current list.
-
Export: Click to open a Save as dialog to export all the abbreviations in an XML file that can be shared and re-imported.
-
Preview box: Shows what the selected abbreviation is expanded to.
-
Restore Defaults: clear all custom abbreviations.
-
To temporarily disable an abbreviation, uncheck the checkbox next to the name of the abbreviation in the list.
Emmet Output preferences
The Output Preferences dialog is used to control how the expanded (output) code behaves when expanding abbreviations and snippets. There are 6 different dialogs to control output and, while they all have identical options, they control different output types: CSS, HAML, HTML, XML, XSL and the "Default" one controlling the rest of the types.
These options are equivalent to Emmet's syntaxProfiles.json feature (http://docs.emmet.io/customization/syntax-profiles/).
Emmet Snippets preferences
Emmet Snippet are similar to abbreviations in that they are expanded when the Tab key is pressed, but they are just blocks of plain text. Anything in a snippet will be outputted “as is”, without any transformation.
-
New: Click to create a new snippet.
-
Name: The name of the abbreviation is also its trigger.
-
Context: The context in which the snippet is enabled (HTML, CSS, etc.).
-
Description: A short description of the snippet.
-
Pattern: The pattern defines what a snippet expands to.
-
Automatically insert: This option doesn't affect how Emmet works in Connect Designer.
-
-
Edit: Modify the currently selected snippet.
-
Remove: Remove the currently selected snippet from the list.
-
Import: Click to open a browse dialog to import an XML file containing exported snippets. The imported snippets are added to the current list.
-
Export: Click to open a Save as dialog to export all the snippets in an XML file that can be shared and re-imported.
-
Preview box: Shows what the selected snippet is expanded to.
-
To temporarily disable a snippet, uncheck the checkbox next to the name of the snippet in the list.
Emmet Variables preferences
Variables are placeholders used in Emmet snippets to output predefined data. For example, the html:5 snippet of HTML syntax has the following definition:
<!doctype html>\n<html lang="${lang}">...</body>\n</html>
In the example above, ${lang} is used to refer lang variable defined in variables below. If your primary language is, for example, Russian, you can simply override lang variable with ru value and keep the original snippets. Also, you can override variable values with inline abbreviation attributes: html:5[lang=ru].
-
Name: The name of the variable. This should be a single alphanumeric string with no spaces or special characters. For example, the myVar name is referred to as ${myVar}.
-
Value: The value of the variable when the snippet is expanded.
-
New: Click to create a new variable and define its name and value.
-
Edit: Click to modify the currently selected Variable.
-
Remove: Click to delete the currently selected Variable.
The Emmet preferences also provides you with buttons to :
- Reload Engine. This allows you to reload the Emmet engine based upon the current settings.
- Restore Defaults. This option restores the preferences to Defaults. This applies to the current Preferences page only, but not other Preferences.
- Apply: This option applies the settings made within the current Preferences page, but does not close the Preferences dialog.
Engines preferences
See Engines Preferences.
Hardware for Digital Signing preferences
Connect can access secure hardware devices (USB Tokens, Smart Cards, and Hardware Security Modules) through PKCS#11, for use in creating PDF digital signatures.
This Preferences page allows for the configuration of these secure hardware devices. It caters for the two conflicting needs of Connect users.
- Connect user wanting to create digital signatures using a secure device have to configure the DLL for using the secure device, so Connect can find the DLL when a digital signature is necessary.
- The Connect administrator wanting the configuration of DLLs loaded by Connect Server, Designer, and their engines to happen outside of Presets, Templates, or other resources. This so the administrator can control what DLLs are loaded instead of allowing user created configurations triggering third party DLLs at runtime.
This preferences page caters for both needs.
The PKCS#11 Modules and Tokens table contains a list of Hardware devices that can be used by Connect.
Hardware devices can be added, modified or deleted from the table using the following buttons:
-
 Add: Add a new hardware device to the list. This launches the Add/Edit PKCS#11 Module dialog.
 -
 Edit: Edit that information relating to an existing hardware device. This launches the Add/Edit PKCS#11 Module dialog.
 -
Delete: Remove an existing hardware device from the list.
The Hardware for Digital Signing preferences also provides you with buttons to :
- Restore Defaults. This option restores the preferences to Defaults. This applies to the current Preferences page only, but not other Preferences.
- Apply: This option applies the settings made within the current Preferences page, but does not close the Preferences dialog.
------------------------------------------------------------------------------------------
Language preferences
-
Display language: Select a language from the drop-down list to be used as the language of the User Interface (after the software is restarted).
-
Default Locale: The default locale sets the locale for new templates. By default this is the system's locale. The locale can be changed per template; see Locale.
-
Select System Locale to use the operating system's locale settings.
-
Select Explicit Locale to choose a static locale from the drop-down list.
-
Default Locale
The Default Locale preferences are only available in the Designer Preferences. This setting determines the locale for new templates. By default this is the system's locale. Select System Locale to use the operating system's locale settings. Select Explicit Locale to choose a specific locale from the drop-down Explicit Locale list. The Locale can be changed on a per template basis. See Locale.
The Language Settings and Default Locale preferences also provides you with buttons to :
- Restore Defaults. This option restores the preferences to Defaults. This applies to the current Preferences page only, but not other Preferences.
- Apply: This option applies the settings made within the current Preferences page, but does not close the Preferences dialog.
Logging preferences
OL Connect logs the activities it undertakes whilst running. New Connect logs are created daily and are held for a period before they are automatically deleted.
The settings on this page determine the level of logging and how long the log files should be retained.
These log files can be an essential resource when diagnosing issues with OL Support. The logging settings are global to all Connect applications and the Logging Preferences can be adjusted from within any of the Designer
The settings are:
- Overall Logging Level selection: Select the overall Connect Logging level. This controls how much logging Connect will do.
By default the logging level is set at the midpoint of Info, but it can be set higher to include more logging (All, Trace, Debug), or lower to reduce the amount of logging (Warning, Error).
The logging is hierarchical, with each Logging Level selection containing all of the Logging Levels below it. The default logging Info Level contains all Error and Warning entries plus informational log entries.
Caution: Higher logging settings will have an impact upon Connect production speeds, as well as leading to substantially larger log files.
We recommended leaving the logging level to Info and only using the higher levels of logging in conjunction with advice from OL support.
- Rollover policy selection: Chose whether to retain Connect log files for a certain number of days (Daily logs) or based upon some predetermined hard disk usage limitations (Size-based logs). The selection are as follows:
- Daily Logs: Use this setting to determine how many days Connect Logs are to be kept, before they are deleted.
- Number of days to retain logs: This value only impacts upon historic (closed) logs.
Chose between 1 and 99,999 days.
The default value is set to 10 days for a new installation and 99,999 days on existing installations (to preserve backward compatibility).
- Number of days to retain logs: This value only impacts upon historic (closed) logs.
- Size-based logs: Use this setting to restrict log file size, and to keep only a specified number of them.
By combining the maximize individual log file size with the amount of log files to retain, this effectively allows a hard disk space usage limitation to be placed upon the logging process.- Maximum size for log file: This sets the maximum size a log file can reach before the logging system creates a new file.
- Number of files to keep:This sets the maximum number of log files kept in the log folder. The default value is set to 50 for a new Connect installation and 99, 999 for an existing installation (to preserve backward compatibility).
- Daily Logs: Use this setting to determine how many days Connect Logs are to be kept, before they are deleted.
- Logging pattern edit box: This edit box determines the formatting of the individual log entries.
By default it is set to a date/time value which allows for simple searching within log files.Caution: We recommend leaving the Logging pattern to the default value.
If you do need to change the Logging pattern, please see the Pattern Formatting guide for help in doing so. - Log message preview display: This displays a real time example of the format and content of individual log file entries, based upon the Logging pattern setting.
Note: The language of the log files is determined by the Language preferences.
Advanced settings
The Advanced settings over-ride the Overall logging settings, and provide a greater level of logging granularity.
Caution: Higher logging settings will have an impact upon Connect production speeds, as well as leading to substantially larger log files.
The Advanced Log Settings should only be set in conjunction with advice from OL support, to ensure that only the most relevant settings are set to the higher logging levels.
This Preferences page allows you to add (![]() ) or remove (
) or remove (![]() ) individual Connect Packages, or change their logging settings (
) individual Connect Packages, or change their logging settings (![]() ).
).
The Log Setting and Advanced Log Setting preferences also provides you with buttons to :
- Restore Defaults. This option restores the preferences to Defaults. This applies to the current Preferences page only, but not other Preferences.
- Apply: This option applies the settings made within the current Preferences page, but does not close the Preferences dialog.
Parallel Processing preferences
See Parallel Processing preferences.
Print preferences
Available Printers preferences
The Available Printers preferences control which printer definitions are available when generating print output or creating Output Presets. Any printer that is unchecked in this dialog will not be visible in the "Model" drop-down of the Print Options dialog; see Print options and Adding print output models to the Print Wizard.
Available Printer Preferences:
-
Selected Printers: Lists the available Printer Definition Files in the system. Note that these are not installed Windows printers or printer queues, but OL Connect Printer Definition Files.
-
Printer checkbox: This checkbox selects/deselects all printers in the list. Click to check all, click again to uncheck all.
Print Measurements preferences
-
Units: Use the drop-down to specify the default measurements system used for dimensions of the template and boxes. In addition it defines the coordinates/position of box elements.
The default unit will be added automatically when geometry values are entered without a unit in the Attributes pane or in the Box Properties dialog. -
Flip insert guide axis: Check this option to flip the axis on which guides are inserted. Normally, dragging a guide from a horizontal ruler inserts a horizontal guide (see Guides). With this option checked, dragging a guide from a horizontal ruler inserts a vertical guide.
The Print preferences also provides you with buttons to :
- Test Print Server URL. This button is only available for the General Print Preferences. It tests the Print Server URL settings made within that Preferences page.
- Restore Defaults. This option restores the preferences to Defaults. This applies to the current Preferences page only, but not other Preferences.
- Apply: This option applies the settings made within the current Preferences page, but does not close the Preferences dialog.
Sample Projects preferences
Note: Sample projects are not available in the Desktop edition.
Sample Project deployment settings
- Workflow Configurations
- Encoding: By default, Sample Projects set the encoding of the Workflow configuration that they create to the encoding of the system on which the Designer runs (system default).
If Workflow runs on another machine, and that system has a different active code page, Workflow may be unable to correctly interpret all the characters that are used in the configuration file (in path or file names, for example). To prevent this, you may select an encoding from the list.
- Encoding: By default, Sample Projects set the encoding of the Workflow configuration that they create to the encoding of the system on which the Designer runs (system default).
------------------------------------------------------------------------------------------
Save preferences
The saving preferences are a way control if and how often OL Connect saves your work in the background, and if how many backup files it creates when you save the template or data mapping configuration. See also: Saving a template.
Auto Save
After a template or data mapping configuration has been saved for the first time, Connect Designer can auto save it with a regular interval.
-
Enable: activate the Auto Save function.
-
Interval (minutes): enter a number of minutes, e.g. 3 to auto-save the template or data mapping configuration every 3 minutes.
Auto Backup
Connect Designer can automatically create a backup file when you manually save a template or data mapping configuration. The Auto Save function does not cause backup files to be created.
-
Enable: activate the Auto Backup function.
-
Revisions to keep: Enter the maximum number of backup files. When the maximum is reached, Auto Backup will overwrite the oldest file.
-
Destination: Select the directory in which the backups should be stored.
-
Original: the directory in which the original file is stored.
-
Other directory: use the Browse button to select another directory.
-
Backup files have the same name as the original file with two underscores and a progressive number (without leading zeros) at the end: originalname__1.OL-template, originalname__2.OL-template, etc.
The Save preferences also provides you with buttons to :
- Restore Defaults. This option restores the preferences to Defaults. This applies to the current Preferences page only, but not other Preferences.
- Apply: This option applies the settings made within the current Preferences page, but does not close the Preferences dialog.
Scripting preferences
The Scripting preferences define different options related to scripting within OL Connect. See also: Testing scripts.
-
General:
-
Script timeout at design time (sec): In Preview mode or when running the Script Profiler (see the Profile Scripts dialog), a long running script is stopped after the amount of time set here. The default is 2 seconds, the minimum is 1 second.
-
Expanded script quotes style: When the Expand button in a Script Wizard is clicked, the expanded script will use either double (") or single (') quotation marks.
Tip: Using single quotation marks in a script simplifies adding HTML fragments, which typically use double quotes.
-
-
Designer scripting profiling group:
-
Number of iterations: Enter the number of times to run scripts when running the Profile Scripts dialog. The default is 1000. Accepted values are 1 to 1000000000. Yes, that's 1 billion - which would take a long time to run!
-
The Scripting preferences also provides you with buttons to :
- Restore Defaults. This option restores the preferences to Defaults. This applies to the current Preferences page only, but not other Preferences.
- Apply: This option applies the settings made within the current Preferences page, but does not close the Preferences dialog.
Versioning preferences
These preferences define the user information that will be used to identify changes in a versioned project and to access versioned projects in the cloud. See also Versioned projects and Versioned projects in the cloud.
-
Author information: The author and email address are required by Git. The name of the author appears in the history of a versioned project to show who made what change.
-
Remote repository: OL Connect needs this information to access versioned projects in the cloud.
-
Username: The user name of an account with a Git repository hosting service like GitHub or BitBucket.
-
Password: The password (also called a personal access token or an app password) created for OL Connect by a Git repository hosting service. This password is to be used by OL Connect together with the user name to get access to remote repositories.
-
Minutes between remote checks: When a cloud-based versioned project is open, this setting determines how often OL Connect will check the remote repository for changes. If set to 0 (zero), OL Connect does not automatically check for remote changes .
-
------------------------------------------------------------------------------------------