Creating the branch
Now we can create the branch that archives the invoices.
- Launch Workflow and open the advanced print process.
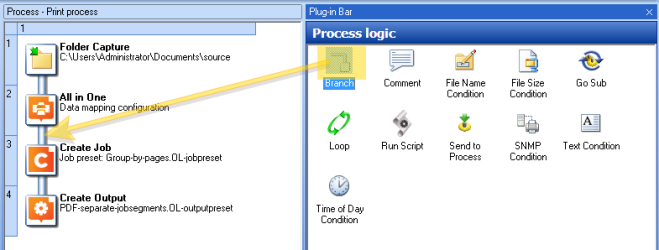
- In the Plug-in Bar, the Process logic tab, locate the Branch task and drag and drop it underneath the All In One task.
Tip: Dragging an output task - such as the Create Output task - between two tasks in a process and adding it as an Output task creates a new branch with the respective task at its end.
- In the Plug-in Bar, in the OL Connect tab, locate the Create Job task and drag and drop it on the new branch. The Create Job Properties window opens.
- Set the Create Job task to use the DocTags-InvNumber Job Preset.
- In the Plug-in Bar, in the OL Connect tab, locate the Create Output task and drag and drop it on the ‘Unknown’ output task.
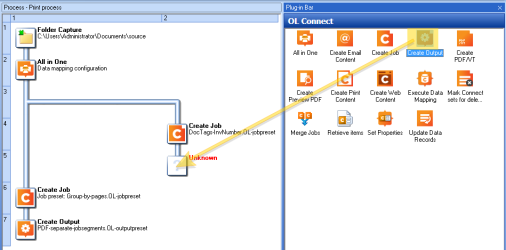
- Set the Create Output task to use the PDF-archive Output Preset. The final process looks like this:


Debugging the process
Before sending the configuration to the OL Connect Workflow service, debug the process using the Step button.
- Pay attention to the name of the job file and metadata file: they change once the process has entered the branch. The job file and metadata file get copied when the process enters a branch. When the main process resumes after the branch has completed, it does so with the original files.
- Note that branches are not executed simultaneously. When a process branches, steps in the branch are executed first.
- After the branch has been executed, the main process continues.
The process should now output one PDF per invoice in addition to the PDF files that contain the grouped invoices.