Creating a data mapping configuration
The first step towards a Data Mapping Configuration is to open a source file and help the DataMapper to identify records. In this exercise you will open an XML file and set the record boundaries.
1. Open the XML file
- Start OL Connect Designer and select File > New from the menu.
- Expand Data mapping configuration, then expand Files.
- Click XML file.
There is also a Wizard for XML files. Save trying that for later; it automates a number of the steps that this Walkthrough demonstrates. - Click Next and select the sample file: olsg-data.XML.
- Click Finish.
2. Identify records
Take a look at the Settings pane on the left. 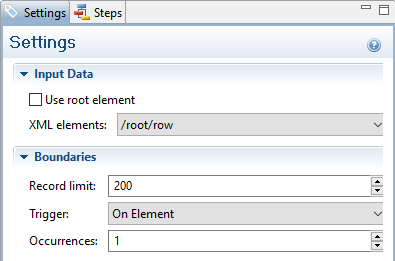
The Input Data and Boundaries settings determine what identifies a record in the source file.
For this file, the correct settings are:
- XML elements: /root/row.
- Trigger: On element
- Occurrences: 1
This means that every time a new <row> element occurs, the DataMapper is triggered to start a new record. Setting Occurrences to 2 would make two <row> elements go into one record.
The Record Limit limits the number of records that can be browsed in the Data model pane.
Note: The Record Limit does not limit the amount of records that can be extracted from an XML file using this data mapping configuration in OL Connect Workflow.
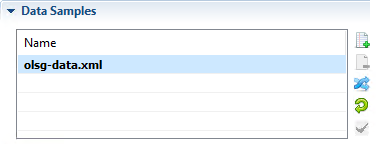
The XML file has been added to the Data Samples. Via the menu File > Add data you could add more samples if you’d need to. For this tutorial one sample is sufficient.
3. Set the default data format
By setting the default data format you are telling the DataMapper what format it can expect when it has to read a field as a date or a number from the source file.
- Below Data Samples on the Settings pane, there is a heading Default Data Format. Click this heading.
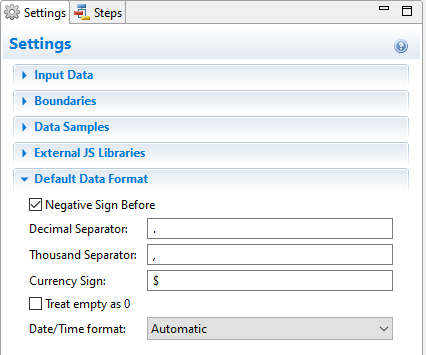 Note: The initial settings for the Default Data Format can be set via the menu: Window > Preferences > Datamapper > Default format.
 - Both separators look fine. Leave them as they are.
- In olsg-data.XML, amounts of money do not have a currency sign. Remove the currency sign.
- Next, we can set the default date/time format. The dates in the source data don’t look the same. <Date> has the format day/month/year (or rather, dd/mm/yyyy), while <DueDate> looks like this: yyyy-mm-dd. Leave the setting to Automatic, to let the DataMapper try and parse them automatically.
The other options can come in handy, for example when dates in a single source file belong to different time zones, or have different languages. See the Settings help page for an explanation of those options.
4. Save the file
The DataMapper does not automatically save the configuration, so now that the initial settings are done, it’s a good idea to save the file.
- Select File > Save as, and give the data mapping configuration a name.
- Press Ctrl + S every now and then to save the file while working on the data mapping configuration.
Tip: In the Save preferences (Window > Preferences > Save) you can configure auto-backup and auto-save.