Section background image clipping
For the help topics about data mapping, see The DataMapper and subsequent pages in the User Guide. For more information about Print sections, see Styling and formatting a Print section.
Originally published January 3, 2024 by Erik van den Heuvel
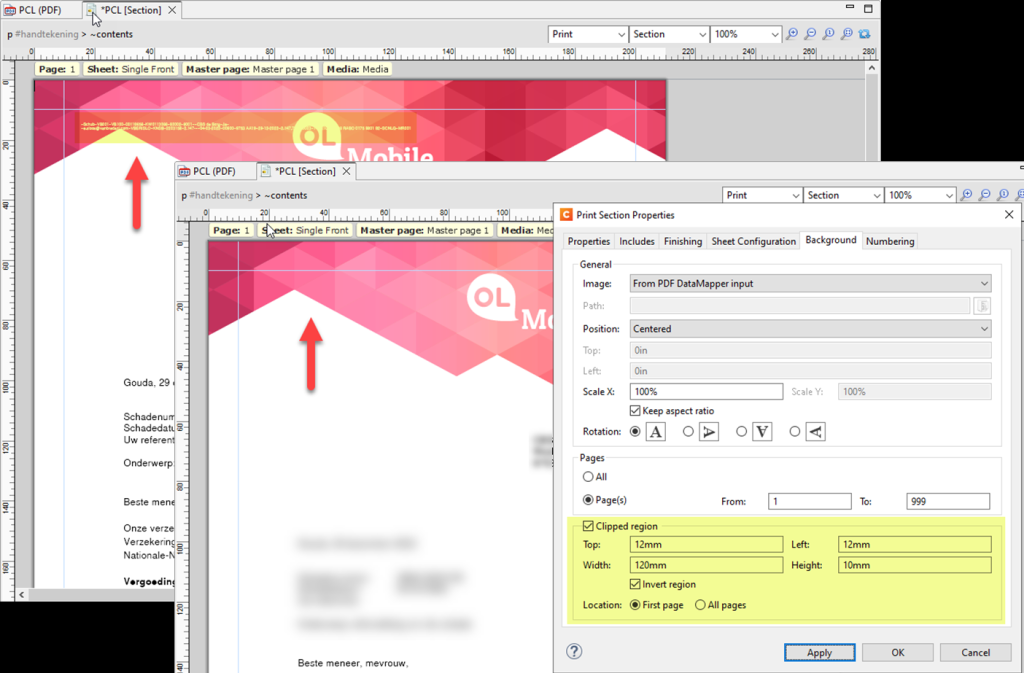
OL Connect 2023.2 introduces a new feature inspired by the image clipping functionality of the PlanetPress Suite. The Clipped region option for section backgrounds enables you to either hide a specific part or display it as needed.
Why section image clipping matters
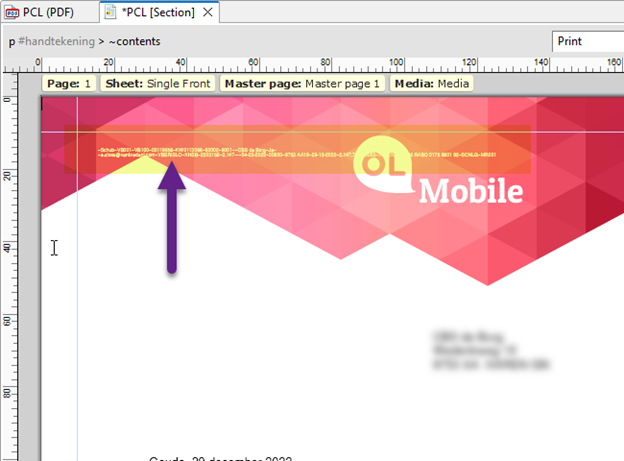
Imagine a scenario where you’re working with a DataMapper image, such as a PCL input stream, containing crucial meta-data used to drive design and output features. Often, this meta-data appears as small white text that needs to be extracted, but also hidden from view. Failing to conceal this text could lead to unwanted interference with for example stationery images.
How to use the Clipped region option
The instructions below demonstrate how to configure the background image of your print section to use the DataMapper input image and make use of the Clipped region feature to conceal a particular area.
-
Begin by creating a DataMapper configuration to extract the meta-data from your print input stream.
-
Create or open a print template.
-
Choose: Section (main menu) > Background…. The Print Section Properties dialog appears.
-
Open the Image drop-down and select From PDF DataMapper input. This creates a page for each page of the extracted document.
-
Enable Clipped region and define the boundaries for the region.
-
Select the Invert region option (if needed).
-
Click OK to apply these settings.