Print Using a Windows Driver
PlanetPress Design generates the job file and hands it over with the available print options to the Windows print driver, which takes the relay for the actual printing part.
When printing using a Windows Driver, PDF image resources will lose their transparency, because they are rasterized before being printed. If you place a PDF with transparency on top of another object, the object in the back may be partially or completely hidden in your output.
To print using a Windows driver:
-
From the PlanetPress Design Button, choose Print Using a Windows Driver.
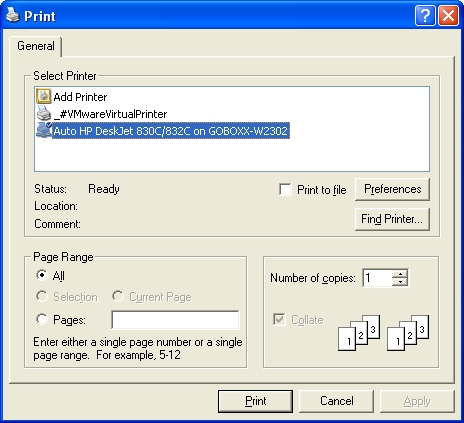
Windows displays the Print dialog box. Those options which are greyed out are not available when printing from PlanetPress Design. Any options, such as the paper size or media type, you may set by clicking the Preferences button are managed by the Windows print driver. Although PlanetPress Design provides available to the Windows print driver, it cannot ensure that these options will be correctly applied.
-
From the Select Printer box, select the printer to which you want to print.
-
To print to a file, select the Print to file option.
-
Select the data pages you want to use for the printout in the Page range group. Bear in mind that you are selecting data pages, so the number of actual pages being printed will vary based on such things as the number of data pages selected, the amount of data on each page, on the number of pages in the document, as well as page conditions.
All: Select to use all data pages (or in the case of a database emulation, all record sets) in the sample data file. It is important to understand that this refers to data pages and not document pages. The presence or absence of an individual document page in the printout depends on the condition, if any, set on the page.
Pages: Select to specify the range of data pages in the sample data file that you want to use for this printout. In the edit box to the right of the radio button, enter the number of the first data page followed by a hyphen and then by the number of the last data page in the range of data pages you want to use for the printout.
-
To print multiple copies, enter a value in the Number of copies edit box or use the spin buttons.
-
Click OK.
The dialog box is closed and the print job is sent to the selected printer
Because of the way in which Windows Driver Output works, if a partial job has already been sent to the printer and an error occurs that stops the output in PlanetPress Design, the partial job will continue to print. This is because PlanetPress has no way to tell Windows to stop its printing and remove the job from its printer queue.