Identify the mail piece boundaries
A step-by-step animation of this section is available online by clicking here.
Define Boundaries
Boundaries are the divisions between each of your mail piece (one mail piece being the contents of an envelope). When one mail piece ends and a new one starts, that is a boundary. Boundaries can be defined using a set of different rules depending on the type of job you are doing.
Variable number of pages
Select this option if you have a variable number of pages for each mail piece. You will need to know if the information necessary to determine when a mail piece starts or ends is on the first or the last page. Both of the options, The first page and The last page, can be used depending on the location of the information.
Fixed number of Pages
Select this option if your mail pieces always contain a fixed number of pages throughout your job. When selecting this option, the The rule will look for... selector disappears and an input box appears in its place. Enter the exact number of pages each document contains.
Condition Type
Paper type or orientation
Select this option if your mail pieces are separated by a specific paper type, for example by a blue cover sheet that is pulled from a different paper tray in the printer. When selecting this option, a drop-down appears with the supported media types. Click on the option that corresponds to the media type change you want to detect.
For all the selections except Orientation Change, an input box appears next to your selection, and should list the media types that are attached to the job. Enter the desired trigger or select one from the list. The exact wording here depends on the media calls in your printer driver. Please refer to your printer's documentation for more details on what options are available to you.
Some input methods may not support all media type selections. PDFs in particular may be affected by this limitation.
Text somewhere on the page
Select this option if your boundaries are defined depending on text on your page and whether this text has changed or is something specific. Then, create a region of text on the page by clicking and holding the mouse button in one corner of the region you want to create, then moving to the opposite corner and releasing the mouse button.
It is much more effective to select a single line of text if you can. This can make your process slightly faster if using a lot of conditions on a large job.
The Selected Region Condition box appears once you have created a region selection.
Select one of the options from the following:
- Is Equal To: The boundary is defined when the area on the page is exactly equal to the contents of the box.
- Is Not Equal To: The boundary is defined when the area on the page is different from the content of the box, even by one single character.
- Contains: The boundary is defined when the area on the page contains the exact content of the box, at any location in the area.
- Does Not Contain: The boundary is defined when the area on the page does not contain the content of the box.
- Changes: The boundary is defined when the selected region has changed when compared to the previous page.
- Is Greater Than: The boundary is defined when the selected region contains a numeric value that is larger than the number in the box.
- Is Less Than: The boundary is defined when the selected region contains a numeric value that is smaller than the number in the box.
Depending on the option you selected it may be necessary or appropriate to modify the content of the text box next to the selection since by default it contains the text within the region selection.
The contents of the region may change in height (for example because of an optional second address line) or width (larger names or addresses), so plan ahead and take a larger area if necessary. As long as no other text is included in your selection, the empty blank spaces are trimmed automatically.
Combining conditions
Creating a new condition
To create a new condition, click the  button. Define a new region selection in your preview for this new condition. Select the condition type and modify the content of the text box, if appropriate.
The changes condition should only be used as the last condition in the set. If it is not the last, it may not function correctly.
Deleting a condition
To delete a condition, go to the condition you want to delete and click the  button. The condition will be removed.
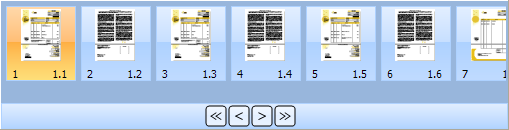
Navigating between conditions
To navigate between conditions, click the  and
and  buttons. The label between the buttons indicates the number of conditions and the currently visible one (for example, 1/2).
Selecting how conditions are combined
You can combine the conditions in two ways:
- All conditions are met: The condition will only become true if ALL the combined conditions are true.
- At least one condition is met: The condition will be true if ANY of the combined conditions is true.