The Data Selector
The Data Selector is the tool you use to choose your sample data and Metadata files, to select the appropriate emulation, to make data selections, and to stabilize your data.
For more information about sample data, Metadata and emulation types, see the chapter About data.
To open the Data Selector:
- Choose Debug > Select, on the menu.
- Right-click a task property that may contain variables (recognizable by the color of its field label, which is maroon by default) and choose one of the Get Data ... or Get Metadata ... options.
- Debug your configuration and step through it until the option Debug > View Metadata gets enabled. This happens when the Metadata file has been created by a task in the process.
The Data Selector does two things:
- It uses the current emulation (either the emulation chosen when the sample data file was selected, or the one chosen in the last Change Emulation action task appearing above the current task) to format the data.
- It displays the formatted data to let you make selections easily using the mouse pointer.
It is divided in two tabs: Data and Metadata.
The Data Selector is essentially the same as the one used in PlanetPress Design.
The File Viewer is like a Data Selector without any data related options, such as emulation settings. It is displayed when doing a data selection from the Generic Splitter task (see Generic Splitter) with the Use Emulation option unchecked. The only data formatting codes to which the File Viewer responds are line breaks.
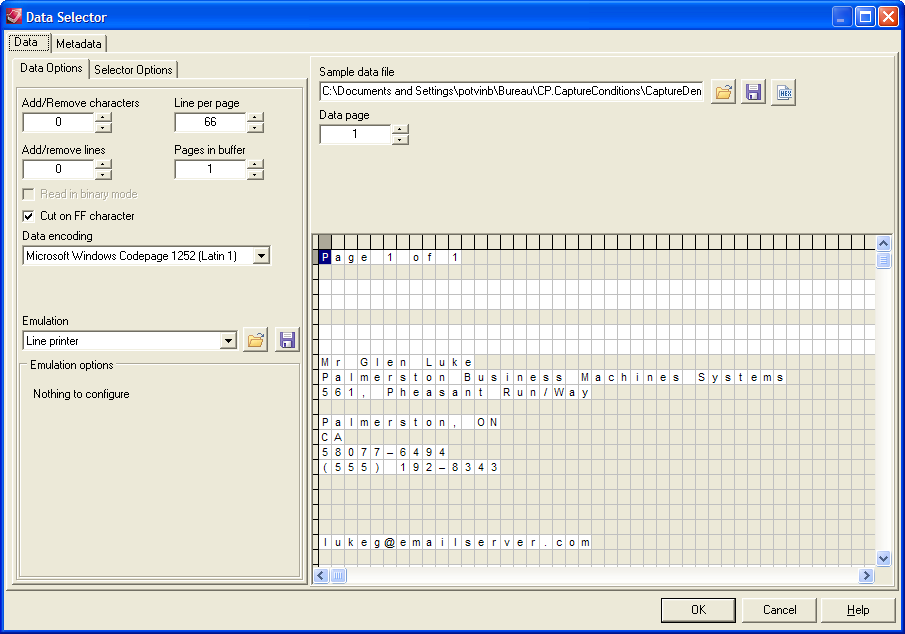
Data tab
The Data tab contains the Data Options, which let you select your emulation, and the Selector Options, which let you personalize the data selector's display options (see Data Selector display preferences).
The Data Selector uses the emulation (either the emulation chosen when the sample data file was selected, or the one chosen in the last Change Emulation action task appearing above the current task) to format the data. It displays the formatted data to let you make selections easily using the mouse pointer.
Depending on the chosen emulation and data file, the options in the Data Selector, the Sample data file section and the Data pane itself may change to accommodate your choice. The Line Printer, Ascii, Channel Skip and User-Defined emulations will display the default options (see About data emulation) and a grid-like display of each character on each line. The following emulations however, will be slightly different.
Database Emulation
The Database emulation exchanges the Browse button  for the Database Emulation Configuration button
 ![]() , which displays the Database Emulation Configuration (see Database emulation).
, which displays the Database Emulation Configuration (see Database emulation).
Once a database has been opened and query entered (see Choosing a database sample file), the Data pane displays the results of the SQL Query in a grid format, which each line representing a single returned row from the database. Each column represents a field returned by the query, with its field name as a row header.
PDF Emulation
- If you use a PDF emulation, the Data pane displays the data as you would see it in any PDF reader.
- A new zoom drop-down list is displayed to let you set the zoom in percentage or fit the PDF to the window or the width of the window.
- A new status bar, displaying the (Left, Top) and (Right, Bottom) coordinate pairs, is shown under the Data pane.
XML Emulation
- XML data is represented in a tree structure which corresponds to the data in the XML file. Each node of the XML can be expanded to see the nodes under it. See XML Emulation.
Metadata tab
The Metadata tab allows to load a Metadata file and make a selection from it.
The Sample metadata filename is the path to the Metadata file describing the current sample data file. Buttons on the right can be used to load Metadata from a file or to save the current Metadata to a file.
Tip: To get a sample of the Metadata file, debug your process and step through it until the option Debug > View Metadata gets enabled. This happens when Metadata have been created by a task in the process. Open the Metadata viewer and save the Metadata file to use it as a sample file. Click the Open a meta data file button to open the sample in the Metadata selector.
PlanetPress Design documents (unlike Connect Designer templates) are built to contain Metadata. PlanetPress Design users may therefore generate a Metadata file for their active sample data file, using a PlanetPress Design document: click the Create meta data file button.
The Generated PressTalk Expression shows the expression to retrieve the currently selected attribute or field. Metadata are retrieved with the GetMeta() function (see Metadata selections). This expression is editable, which allows you to customize the string returned by the Metadata selector.
Tip: The wildcard parameter '?' indicates that the function operates on all nodes (not just one) of a given level; see Wild card parameter "?".
The Enable search on multiple levels option is available when a Metadata is selected under Production information or User defined information. If it is not selected, the option flag includes NoCascade (+2). For an explanation of option flags in the GetMeta() function, see Option flags.
Metadata level is a tree view allowing users to select the Metadata level from which to display or select Metadata elements.
The Production information list displays all Metadata fields describing the current Metadata level, as selected in the Metadata Level tree view, for the current data page, as selected in the Data page box.
The User defined information lists all Metadata fields defined by the user on the current Metadata level.
Note: Not all of the options in the Metadata Selector in PlanetPress Design 7 are available in the user interface of PlanetPress Workflow . However, when these settings are made in PlanetPress Design 7, they will function as expected in PlanetPress Workflow2022.2.