Default Settings
When you start PrintShop Mail, it always opens with a blank document that uses default settings for the layout sizes and other preferences. You can change those preferences so that new blank documents will have your own, custom settings. This can be a time saver if you often create new documents and have to set your preferences each time.
To modify the default preferences:
- Close your currently opened document by clicking on the File menu then selecting Close.
- Open the Preferences menu:
- In Windows: From the Edit menu, select Preferences (or use the CTRL+K keyboard shortcut)
- In Mac OS: From the PrintShop Mail menu, select Preferences (or use the
 +, keyboard shortcut)
- Make the changes you want to any of the sections of the preferences.
- Click OK in the preferences window to save the changes.
Starting from now, any new document that you create will use these preferences. To change the default settings in the future, simply repeat these steps.
To reset PrintShop Mail to its default settings
You can reset the preferences to the default settings that were in effect when you first installed PrintShop Mail.
- Close PrintShop Mail
- Double-Click on the PrintShop Mail icon on your desktop, or click on it from the Start Menu, Programs, PrintShop Mail Suite 7
- Immediately when the Splash Screen appears, press and hold the CTRL and SHIFT keys on your keyboard.
The following dialog is displayed: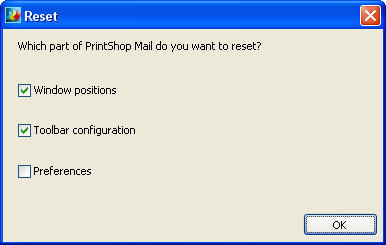
- Check the settings that you want to reset to the defaults:
- Window positions: Resets all of the windows and panels to their original, default locations and states.
- Toolbar configuration: Resets the position, order and appearance of all the toolbars and their buttons to their original defaults.
- Preferences: Resets all of the Preferences to their original defaults, except for the language of the interface.
- Click OK to apply the reset and open PrintShop Mail.