Risks Configuration
1. Click Tags
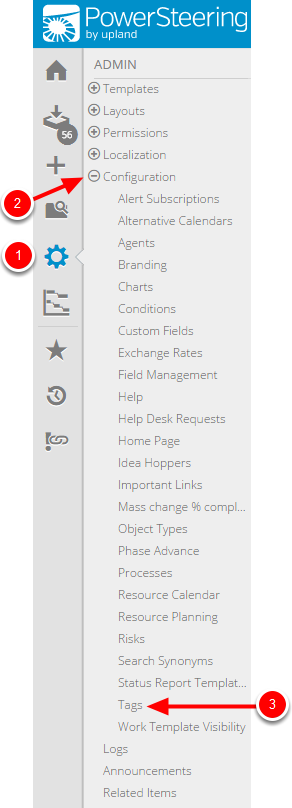
- On the Icon Bar click the Admin button.
- Click Configuration to expand the menu, then click Tags.
2. Create Tags
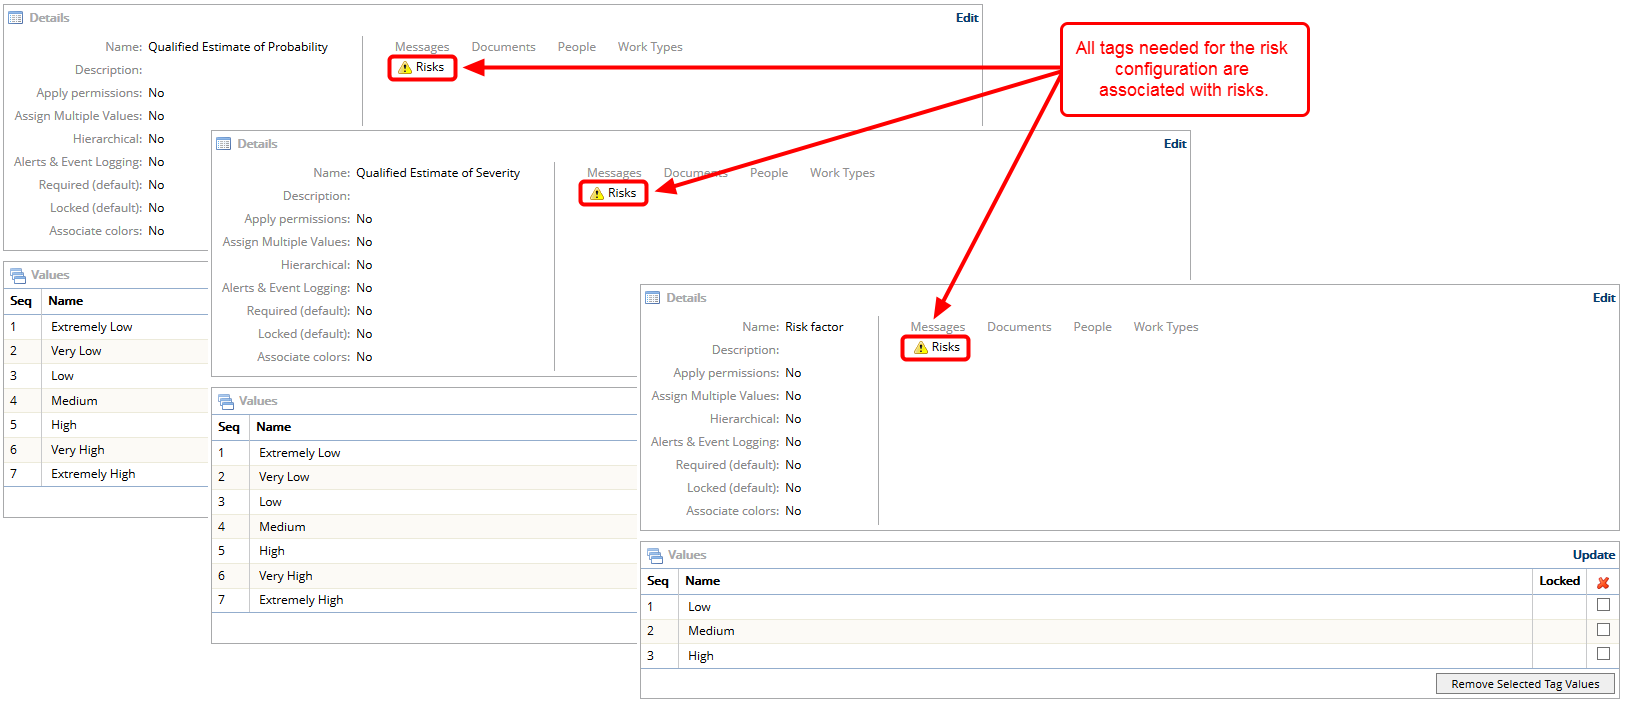
- Prior to configuring risk values, you need to have tags created in PowerSteering for all of the characteristics you would like to use to score your risks. All of these tags must be associated with risks. See Add a New Tag and Add or Update Tag Values for more information about creating tags.
Note: You can associate colors with values for your risk factor tag; however, risks will not use these colors. They will use the colors defined in the thresholds and colors section of the Risks page.
3. Click Risks
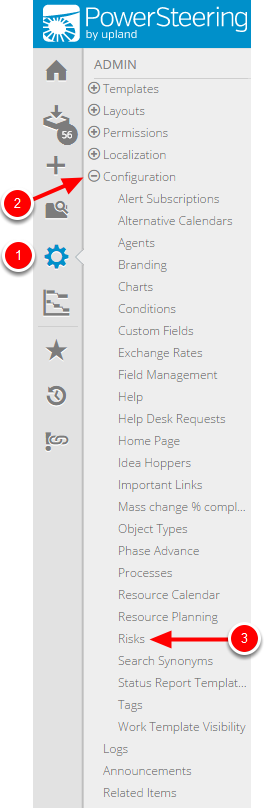
- On the Icon Bar click the Admin button.
- Click Configuration to expand the menu, then click Risks.
4. Configure Values
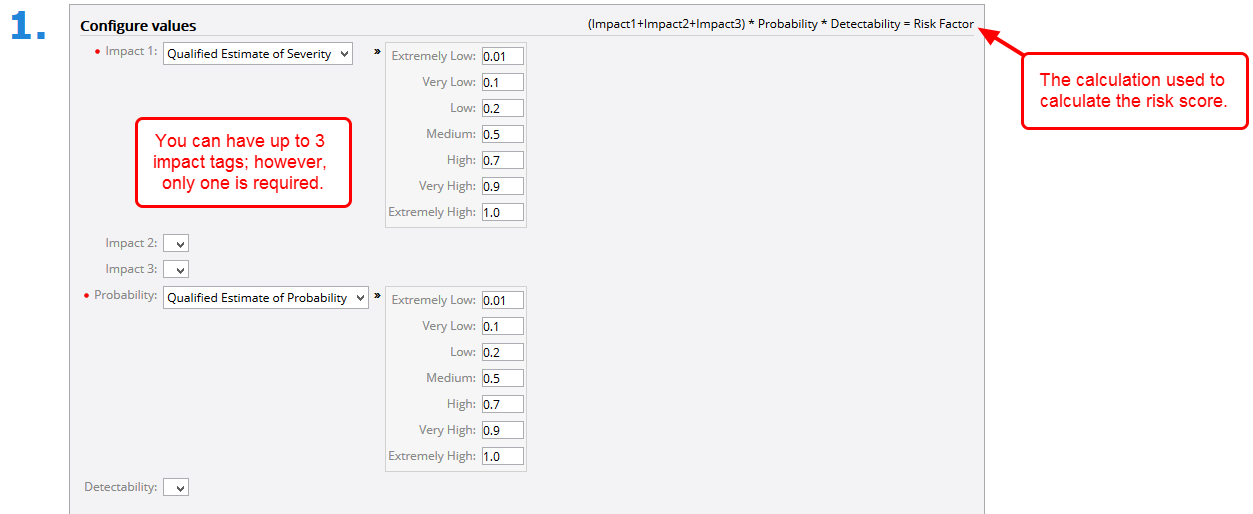
- From the Impact 1 drop-down menu, select the corresponding tag. All tags associated with Risks will appear in this menu if they have not already been selected as a probability, detectability, or risk factor tag.
- Tag values will appear to the right. For each tag value, enter a numerical weight.
- Repeat Steps 1 and 2 for Impact 2 and 3 (if needed).
- From the Probability drop-down, select the corresponding tag. All tags associated with Risks will appear in this menu if they have not already been selected as an impact, detectability, or risk factor tag.
- Tag values will appear to the right. For each tag value, enter a numerical weight.
- From the Detectability drop-down, select the corresponding tag (optional). If you are not going to use a Detectability tag, set the Detectability drop-down to the blank selection. Note: All tags associated with Risks will appear in this menu if they have not already been selected as an impact, probability, or risk factor tag.
- Tag values will appear to the right. For each tag value, enter a numerical weight.
5. Configure Thresholds and Colors

- From the Risk Factor drop-down, select the corresponding tag. All tags associated with Risks will appear in this menu if they have not already been selected as an impact, probability, or detectability tag.
- Tag values will appear to the right. For each tag value, enter a threshold (in descending order) and select a color value.
- Once you have set Impact, Probability, Detectability, and Risk Factor, click the Save Changes button.
6. Example Risk
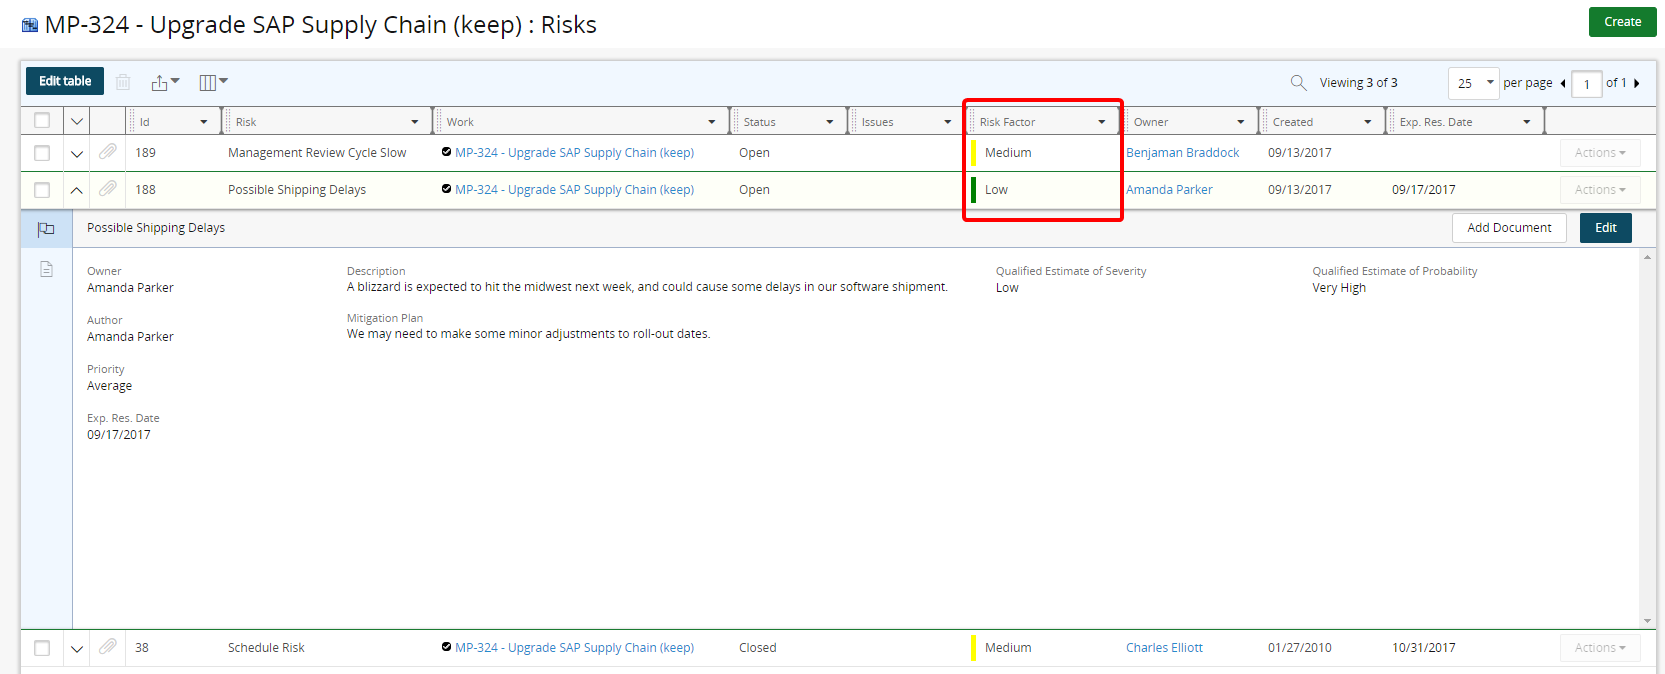
- Above is an example of how risk configuration affects a risk created by the end user.
Note: The Risk Factor column header will not change based on the risk factor tag used. PowerSteering only uses the tag's thresholds and colors but ignores the name.