Data Extract Filter Tab
The Filter tab helps limit the amount of information that is displayed in a data extract job based on criteria that is preselected by the creator of the data extract job.
1. Click Filter Tab

- Click the Filter tab.
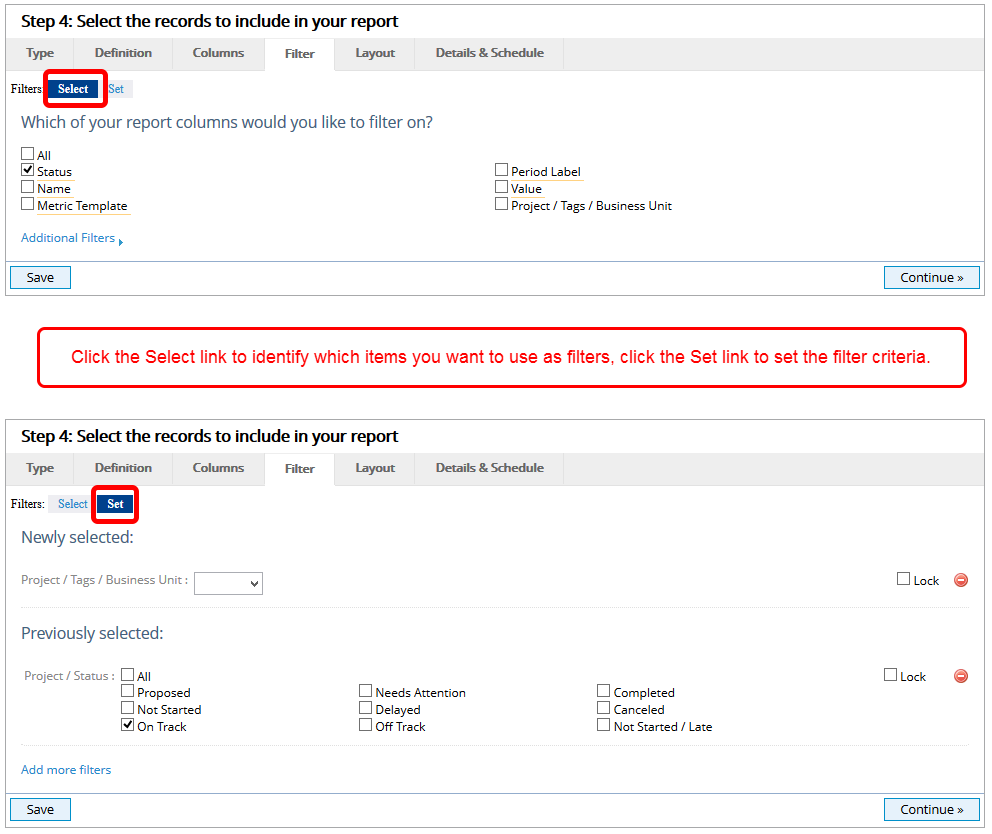
The Filter tab is where you select criteria that will help you limit the information that is included in your data extract job. Below is a description of the fields and options on the Filter page.
Select / Set: This is a toggle switch that will change what is displayed on the screen. Select is the page where you identify which columns from your data extract job you want to use as filters. Set is the page where you create the filter.
Which of your report columns would you like to filter on?: This section of the page displays the columns that have been selected to display in your data extract job. If you select a check box you will be directed to the Set page (see definition above) where you can further define your filter criteria.
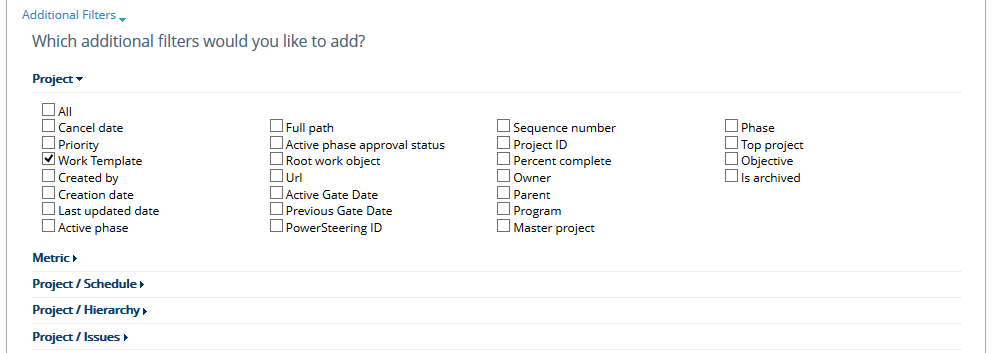
Additional Filters: When selected, you have the opportunity to select additional columns to use as filters on the data extract job even though the column itself is not displayed in the data extract job. Remember to indicate what you have selected as an additional filter in either the name or description of the data extract job so users understand that the data extract job is being filtered on something that they do not see in the data extract file(s).
2. Select a Column

- Select a column check box to filter.
- Click Continue.
3. Set Filter Criteria

- Select the criteria check boxes you wish to use to filter this data extract job.
- Click Select.
Note: Each filter that is selected is going to have a different set of steps to set the filter criteria.
Note: Dates in report filters reflect the Time Zone preference set for the current user, so may appear differently to users in different time zones.
3.1 Click Select / Set

- Click the Select link to identify which items you want to use as filters, click the Set link to set the filter criteria. Repeat this step as many times as necessary to set the filter criteria for all the selected columns.
4. Click Additional Filters

- Click the Additional Filters link.
5. Select Additional Filters

- Select the check boxes associated with the data you want to add as a filter.
Note: You are only using these columns as filters to manage the data in the data extract job. The columns you select on this page will not appear in the data extract job.
6. Click Continue or Tab

- Click Continue to go to the Layout tab, or click another tab within the Data Extract.