Report Wizard Columns Tab
The Columns tab is used to add information to your report display. For every check box you select, a new column is added to your report. You will have opportunity later in the process to update the name of the column header and rearrange the order of how the columns appear. The columns that are displayed will be based on the category and type of report you select on the Type tab.
1. Click Columns Tab
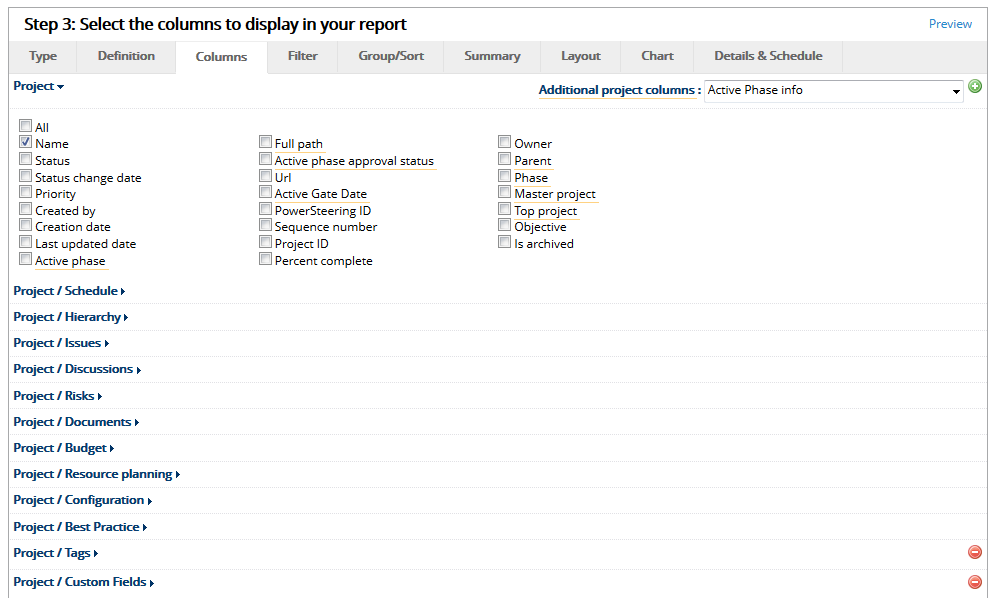
- Click the Columns tab.
The options available on the Columns tab will be impacted by what category and type of report you select. The column fields are organized by subject category under different headings that expand and collapse when selected. For example if you want information associated with the project's budget, you would click on the Project / Budget link to view the columns and then select the check boxes associated with the information you want in your report.
Note: When you first click on the Columns tab the sections that are expanded indicate where a column has been pre-selected based on the category and type of report.
2. Select Columns
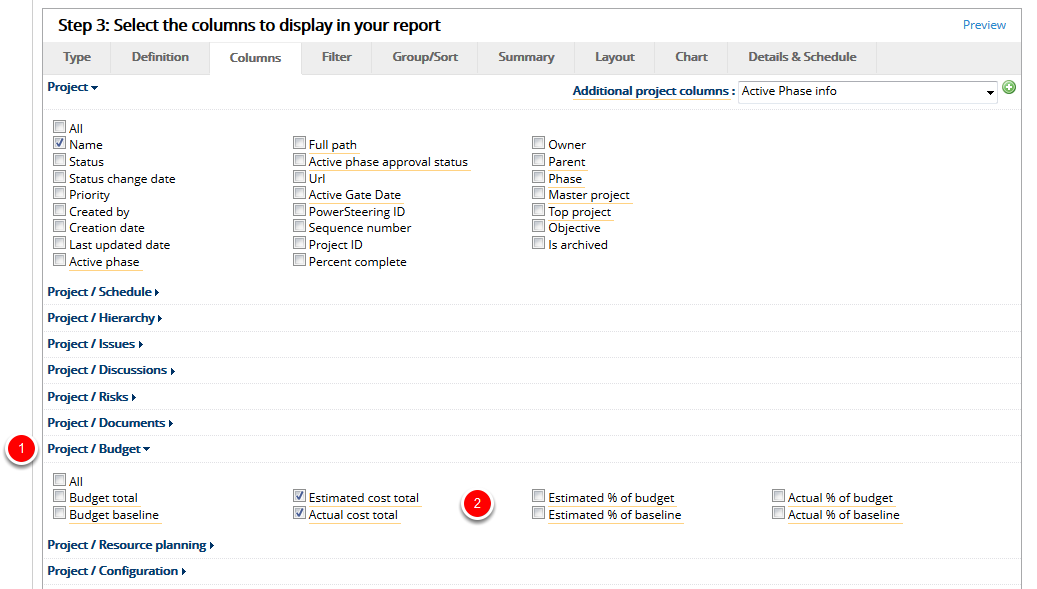
- Click on a column category heading link to expand the section and view the available columns.
- Select the check box for each column you want to add to your report.
- Repeat Steps 1 and 2 until you have added all the desired columns to your report.
Note: When selecting the Project/Custom Fields category, certain column names may appear a second time with a -raw suffix in their label, meaning the column will return unformatted values.
3. Click Additional Project Columns
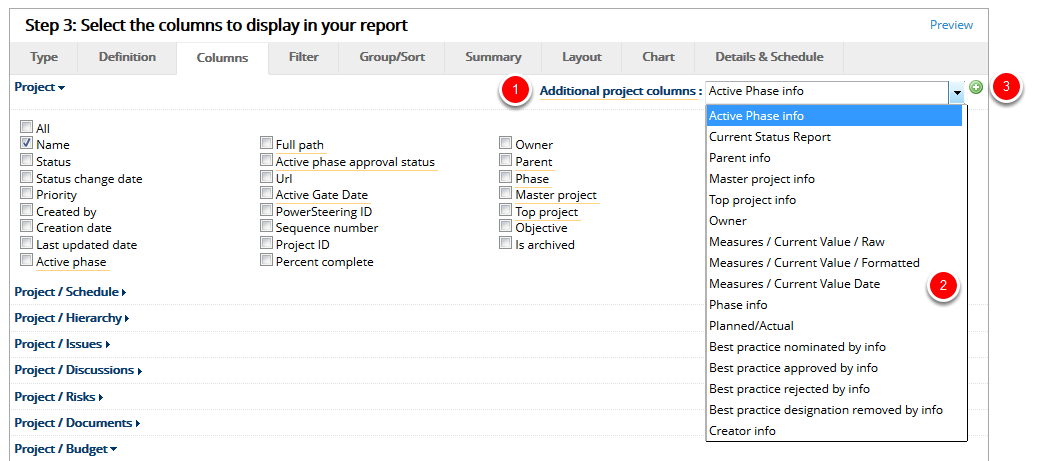
- Click Additional project columns, select a set of columns to add.
- Click the green plus symbol.
Additional project columns enable you to add to the existing columns that are already available for selection. Once added, a new category heading link will be displayed that you can expand to view additional column selections. The selections in the Additional project columns list will differ based on the category and type of report selected on the Type tab.
4. View Added Project Columns
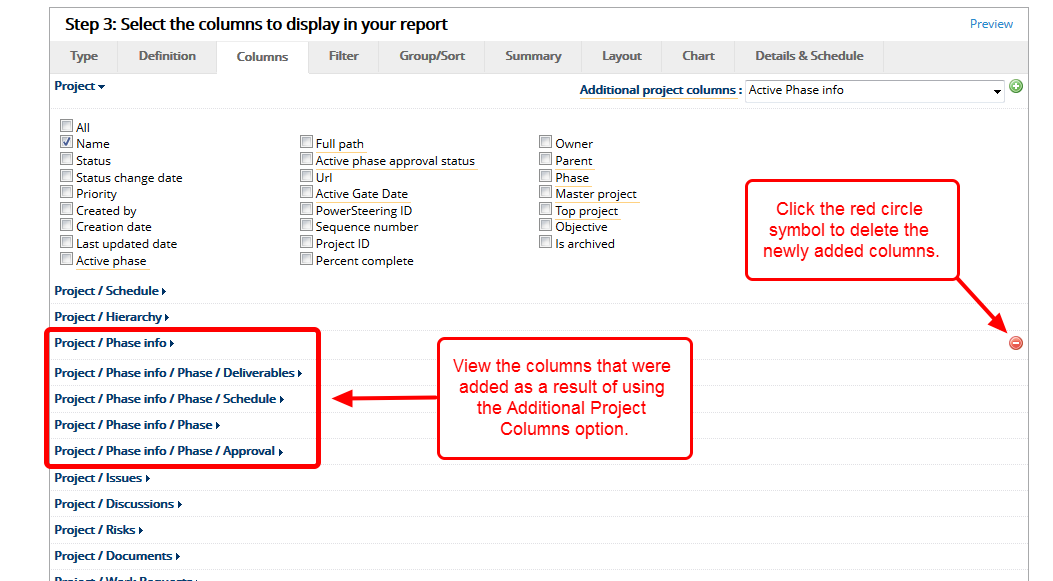
- View the additional columns that were added to the Columns page.
- Click on a column category heading link to expand the section and view the available columns.
- Select the check box for each column you want to add to your report.
- Repeat steps 2 and 3 until you have added all the desired columns to your report.
Note: Click the red circle symbol to delete the newly added set of columns from the Columns page.
5. Click Continue or Tab
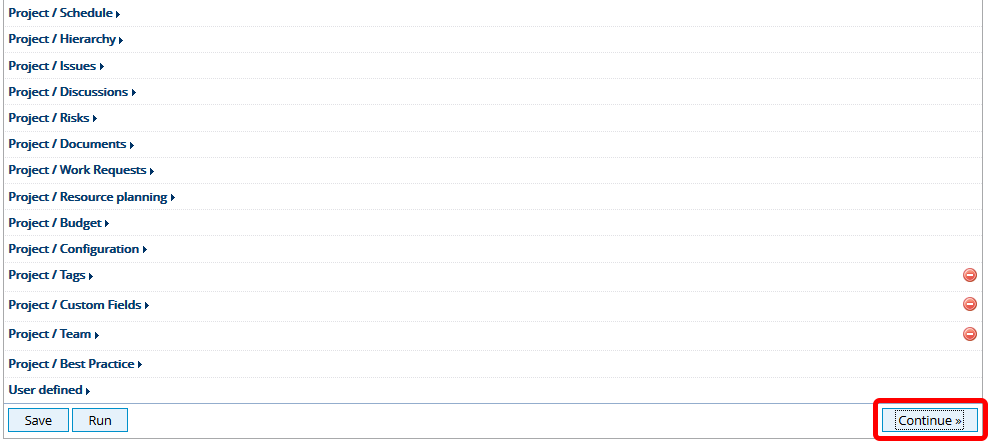
- Click Continue to go to the Filters tab, or click another tab within the Report Wizard.