Upland Analytics Subscriptions
PowerSteering users can create report/Dashboard subscriptions in Upland Analytics. Subscription recipients will receive an email containing a link that allows them to download the report or Dashboard directly onto their device.
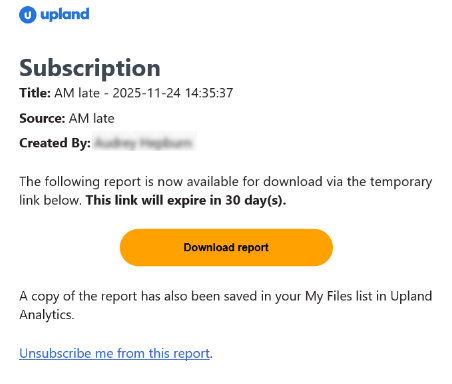
Subscriptions can be sent to PowerSteering users, User Groups, or external email addresses. Alternatively, they can be automatically transferred to the configured SFTP server whenever they run.
Note: An SFTP connection can be established by navigating to Analytics Settings  → SFTP Settings.
This page covers the following:
Create a subscription to a report or Dashboard
Users can create report or Dashboard subscriptions in Upland Analytics. Subscriptions will automatically send out report links to PowerSteering users or external email addresses.
To create an Upland Analytics subscription:
Before You Start: Users require the "Subscriptions - Create" Upland Analytics permission to create new subscriptions.
-
Select the Upland Analytics icon
 from the Navigation Menu.
-
Navigate to a report or Dashboard.
Tip: If the report or Dashboard is accessible through the "My Reports and Dashboards" window, you can select See More
 → Subscribe to create a subscription for it.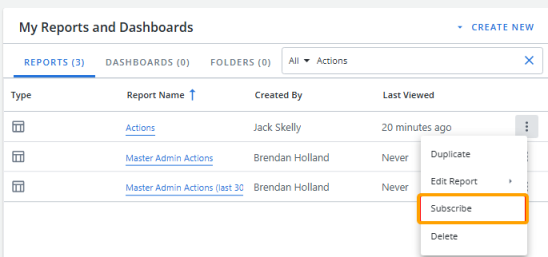
If you do this, skip to Step 4. -
Select See More
→ Subscription → Create from the top of the screen.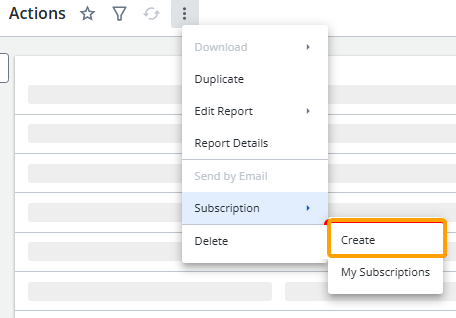
-
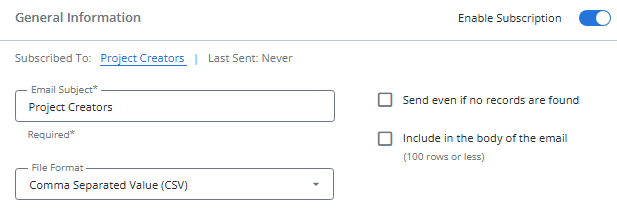
Configure the "General Information" fields for the subscription.
-
Enable Subscription: Toggle this switch to turn the subscription on or off. The subscription will only be sent to recipients if the switch is blue.
-
Email Subject: Enter in the text that will appear in the subject line of the subscription email. This will also serve as the subscription's name in Upland Analytics.
Note: "Subscription:" will automatically be appended to the beginning of the subject line in the actual email.
Tip: If the report or Dashboard will have multiple subscriptions attached to it, consider using a unique name so it can be easily identified.
-
File Format: Use the drop-down menu to choose the type of file the report or Dashboard will be downloaded as.
Note: The choices will differ based on the type of report.
-
Send even if no records are found: Select this checkbox to send out the subscription to recipients even if it does not contain any data.
-
Include in the body of the email (100 rows or less): Select this checkbox if you would like the report to appear directly within the email. The download link will still be included in the email as well if this is selected.
Note: This option is only available for "Table" and "Pivot" report types.
-
-
Configure the "Scheduling Rules" for the subscription.
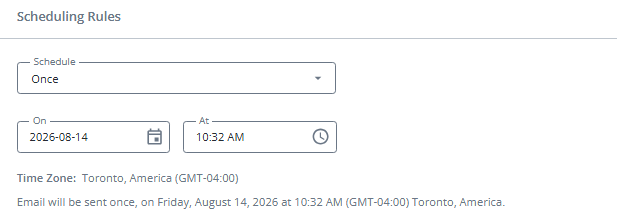
Tip: Be sure to mind the "Time Zone" information at the bottom of the "Scheduling Rules" section. It may be important if you plan on sending the subscription to recipients in different time zones.
 Click here for more information on the "Schedule" drop-down menu options
-
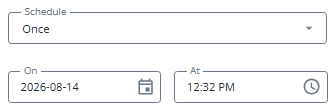
Once: The subscription will only be sent out to recipients once. Use the "On" and "At" fields to determine the date and time.
-
Daily: The subscription will be sent out on a daily basis. Use the "Interval" drop-down menu to determine how often the report will be sent out each day.
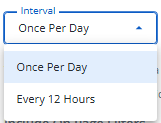 Once Per Day
The subscription will be sent out at the same time every day. Use the "At" field to determine the time of day.
 Every 12 Hours
The subscription will be sent out twice daily. Use the "At" fields to determine which times of day.
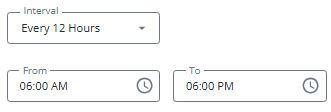
Note: There must be at least 12 hours between the selected times.
-
Weekly: The subscription will be sent out on a weekly basis.
Use the "Interval" drop-down menu to determine how often the report will be sent out each day.
Once Per Day
The subscription will be sent out at the same time every day. Use the "At" field to determine the time of day.
Every 12 Hours
The subscription will be sent out twice daily. Use the "At" fields to determine which times of day.
Note: There must be at least 12 hours between the selected times.
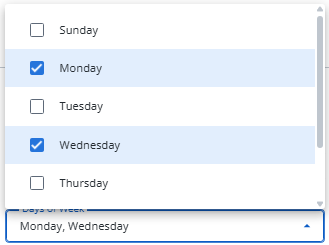
Use the "Days Of The Week" drop-down menu to select each day of the week the subscription will be sent out.
-
Monthly: The subscription will be sent out on a monthly basis.
Select the first option to choose a specific day of the month to send out the subscription
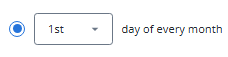
Note: If a month does not contain the selected day (i.e. not all months have a 31st day), the subscription will be sent out on the last day of that month.
OR
Select the second option to choose a specific day of the week to send out the subscription each month (i.e. the first Monday of each month).
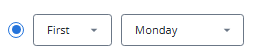
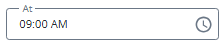
Use the "At" field to determine which time of day the subscription will be sent out.
-
-
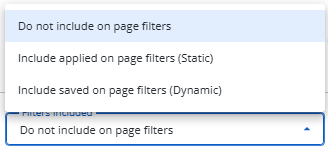
Determine how filters will be included in the linked report/Dashboard using the "Filters Included" drop-down menu.
-
Do not include on page filters: The subscription will always be sent with the unfiltered report.
-
Include applied on page filters (Static): The subscription will use the on-page filters that are currently applied on the report. These filters are locked in and will not change, even if you update the on-page filters later.
-
Include saved on page filters (Dynamic): The subscription will always use the most up-to-date version of your saved on-page filters. If you change your saved on-page filters later, the subscription will reflect those changes the next time it runs.
Tip: If there are no saved on-page filters, you can select Include saved on page filters (Dynamic) option as a placeholder so that when on-page filters are saved in the future, they will be automatically included in the subscription.
-
-
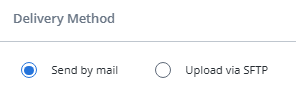
Select which "Delivery Method" to use for the subscription.
-
Send by mail: The subscription will be sent out via email to the recipients chosen from the "Recipients Information" table below.
-
Upload via SFTP: The subscription will be automatically transferred to the configured SFTP server whenever it runs.
Note: An SFTP connection can be established by navigating to Analytics Settings
→ SFTP Settings.Note: Selecting this will remove the "Recipients Information" settings. If you would like to select this option, skip to Step 9 below.
-
-
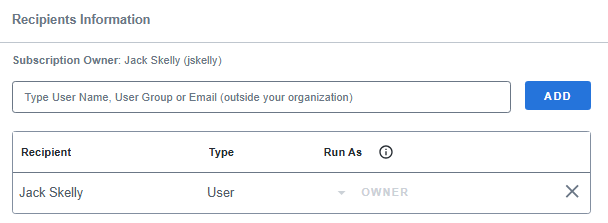
Choose the subscription's recipients.
 Click here for more information on selecting recipients
Type in the name of a PowerSteering user, a User Group, or an external email address. Select the name of the user or User Group from the drop-down that appears and then select the Add button to add them as a recipient.
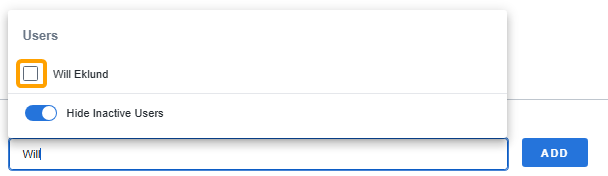
Note: External email addresses cannot be selected from a drop-down menu. Simply type in the address and then select the Add button to add them as recipients.
Once the recipients are added to the table below, use the "Run As" column to determine whether each one will view the report or Dashboard as an "Owner" or as a "Recipient".
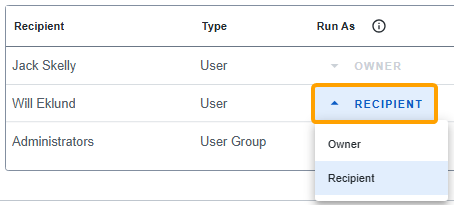
-
Owner: The recipient(s) will view the report or Dashboard as if they have the same permissions as the Report/Dashboard Owner. They will be able to see any data that the Owner has permission to see.
Caution: External email addresses will always receive the Owner designation because they do not have any PowerSteering permissions. If your report or Dashboard contains any sensitive or confidential information, make sure the email addresses are spelled correctly and the recipients can be trusted.
Note: Users with Owner selected will only be able to view the data you are able to view. If you have limited permissions, consider selecting Recipient for users instead.
-
Recipient: The recipient(s) will view the report or Dashboard with their own permissions. They will only be able to see the data that their PowerSteering permissions enable them to see.
Note: Use the "X" icon next to a recipient to remove them from the subscription.
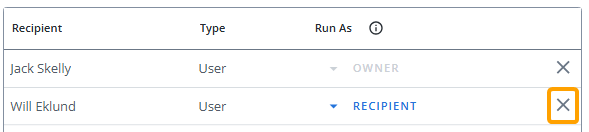
You can also remove yourself from the subscription if you are not interested in receiving it. -
-
Select the Save button in the bottom right-hand corner of the page.
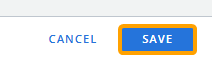
After selecting Save, the subscription will be saved to Upland Analytics. It can be viewed or edited at any time through the report/Dashboard itself or on the "Subscriptions" page.
Edit a subscription
Once created, Upland Analytics subscriptions can be edited at any time to update any of its details.
To edit a subscription:
Before You Start: Users require the "Subscriptions - Edit" Upland Analytics permission to edit subscriptions that they have created themselves. Users require the "Subscriptions - Full Access" permission to edit subscriptions that they have not created.
-
Select the Upland Analytics icon
from the Navigation Menu.
-
Navigate to a report or Dashboard.
Tip: You can also select Analytics Settings
→ Subscriptions to view and access all of the subscriptions you have created, as well as the subscriptions that you have been added to (although you will need the "Subscriptions - Full Access" permission to edit them).
If you choose to edit a subscription this way, skip ahead to Step 5. -
Select See More
→ Subscription → My Subscriptions from the top of the screen.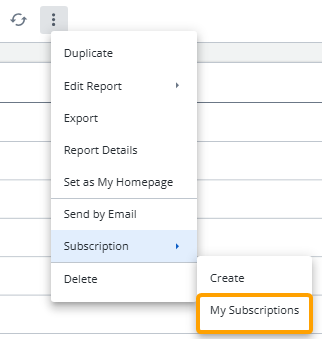
-
Select See More
→ Edit from the subscription you would like to edit.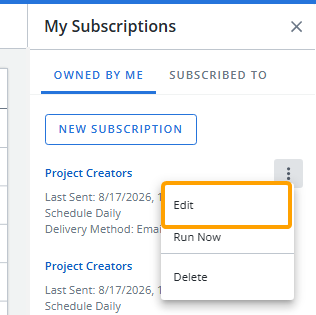
Note: The "Owned By Me" tab contains the subscriptions you created for the report or Dashboard. Users require the "Subscriptions - Full Access" permission to edit any subscriptions under the "Subscribed To" tab.
-
Edit any of the subscription's details.
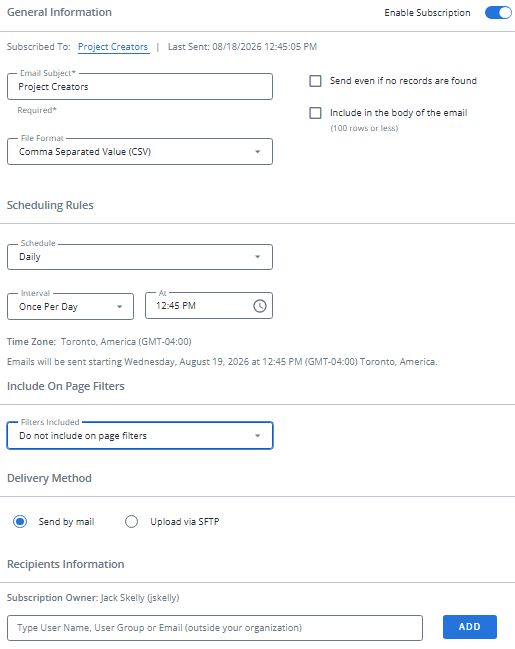 General Information
-
Enable Subscription: Toggle this switch to turn the subscription on or off. The subscription will only be sent to recipients if the switch is blue.
-
Email Subject: Edit the text that will appear in the subject line of the subscription email. This will also serve as the subscription's name within Upland Analytics.
Note: "Subscription:" will automatically be appended to the beginning of the subject line in the actual email.
Tip: If the report or Dashboard will have multiple subscriptions attached to it, consider using a unique name so it can be easily identified.
-
File Format: Use the drop-down menu to choose the type of file the report or Dashboard will be downloaded as.
Note: The choices will differ based on the type of report.
-
Send even if no records are found: Select this checkbox to send out the subscription to recipients even if it does not contain any data.
-
Include in the body of the email (100 rows or less): Select this checkbox if you would like the report to appear directly within the email. The download link will still be included in the email as well if this is selected.
Note: This option is only available for Table and Pivot report types.
Scheduling Rules
Use the "Schedule" drop-down menu to determine when the subscription will be sent out:
-
Once: The subscription will only be sent out to recipients once. Use the "On" and "At" fields to determine the date and time.
-
Daily: The subscription will be sent out on a daily basis. Use the "Interval" drop-down menu to determine how often the report will be sent out each day.
Once Per Day
The subscription will be sent out at the same time every day. Use the "At" field to determine the time of day.
Every 12 Hours
The subscription will be sent out twice daily. Use the "At" fields to determine which times of day.
Note: There must be at least 12 hours between the selected times.
-
Weekly: The subscription will be sent out on a weekly basis.
Use the "Interval" drop-down menu to determine how often the report will be sent out each day.
Once Per Day
The subscription will be sent out at the same time every day. Use the "At" field to determine the time of day.
Every 12 Hours
The subscription will be sent out twice daily. Use the "At" fields to determine which times of day.
Note: There must be at least 12 hours between the selected times.
Use the "Days Of The Week" drop-down menu to select each day of the week the subscription will be sent out.
-
Monthly: The subscription will be sent out on a monthly basis.
Select the first option to choose a specific day of the month to send out the subscription
Note: If a month does not contain the selected day (i.e. not all months have a 31stday), the subscription will be sent out on the last day of that month.
OR
Select the second option to choose a specific day of the week to send out the subscription each month (i.e. the first Monday of each month).
Use the "At" field to determine which time of day the subscription will be sent out.
Include On Page Filters
Determine how filters will be included in the linked report/Dashboard using the "Filters Included" drop-down menu
-
Do not include on page filters: The subscription will always be sent with the unfiltered report.
-
Include applied on page filters (Static): The subscription will use the on-page filters that are currently applied on the report. These filters are locked in and will not change, even if you update the on-page filters later.
-
Include saved on page filters (Dynamic): The subscription will always use the most up-to-date version of your saved on-page filters. If you change your saved on-page filters later, the subscription will reflect those changes the next time it runs.
Tip: If there are no saved on-page filters, you can select Include saved on page filters (Dynamic) option as a placeholder so that when on-page filters are saved in the future, they will be automatically included in the subscription.
Delivery Method
Select which "Delivery Method" to use for the subscription.
-
Send by mail: The subscription will be sent out via email to the recipients chosen from the "Recipients Information" table below.
-
Upload via SFTP: The subscription will be automatically transferred to the configured SFTP server whenever it runs.
Note: An SFTP connection can be established by navigating to Analytics Settings
→ SFTP Settings.Note: Selecting this will remove the "Recipients Information" settings. If you would like to select this option, skip to Step 9 below.
Recipients Information
Edit the subscription's recipients.
Type in the name of a PowerSteering user, a User Group, or an external email address. Select the name of the user or User Group from the drop-down that appears and then select the Add button to add them as a recipient.
Note: External email addresses cannot be selected from a drop-down menu. Simply type in the address and then select the Add button to add them as recipients.
Once the recipients are added to the table below, use the "Run As" column to determine whether each one will view the report or Dashboard as an "Owner" or as a "Recipient".
-
Owner: The recipient(s) will view the report or Dashboard as if they have the same permissions as the report/Dashboard Owner. They will be able to see any data that the Owner has permission to see.
Caution: External email addresses will always receive the Owner designation because they do not have any PowerSteering permissions. If your report or Dashboard contains any sensitive or confidential information, make sure the email addresses are spelled correctly and the recipients can be trusted.
Note: Users with Owner selected will only be able to view the data you are able to view. If you have limited permissions, consider selecting Recipient for users instead.
-
Recipient: The recipient(s) will view the report or Dashboard with their own permissions. They will only be able to see the data that their PowerSteering permissions enable them to see.
Note: Use the "X" icon next to a recipient to remove them from the subscription.
You can also remove yourself from the subscription if you are not interested in receiving it. -
-
Select the Save button in the bottom right-hand corner of the page.
After selecting Save, your changes will be applied to the subscription.
Unsubscribe from a report or Dashboard
Users can unsubscribe from Upland Analytics reports or Dashboards at any time. Once a user unsubscribes, the report or Dashboard will no longer be sent to them. Other recipients will continue to receive the subscription according the schedule.
Caution: Subscriptions will automatically be deleted if all PowerSteering users have been unsubscribed. This means that external email recipients are not enough to keep the subscription from being deleted; at least one PowerSteering user must be subscribed in order to maintain the subscription.
This section covers the following topics:
Unsubscribe from a single report or Dashboard
Users can unsubscribe from Upland Analytics subscriptions by directly accessing the report or Dashboard itself. Users who do this will no longer receive the subscription whenever it is scheduled to be sent out.
To unsubscribe from a report or Dashboard:
Before You Start: Users require the "Subscriptions - View" Upland Analytics permission to unsubscribe from subscriptions directly from a report or Dashboard. If you do not have this permission, you may need to unsubscribe from the subscription email itself.
-
Select the Upland Analytics icon
from the Navigation Menu.
-
Navigate to a report or Dashboard.
-
Select See More
→ Subscription → My Subscriptions from the top of the screen.
-
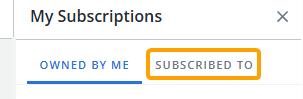
Select the Subscribed To tab from the "My Subscriptions" window that appears on the right-hand side of the page.
-
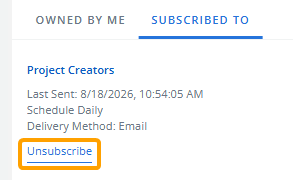
Select Unsubscribe from the subscription you would like to unsubscribe from.
-
Select Unsubscribe from the "Unsubscribe" window.
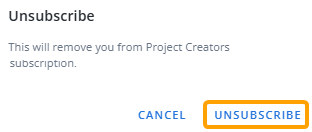
After selecting Unsubscribe, you will no longer be subscribed to the subscription. You will no longer receive a link to the report or Dashboard whenever it gets sent out.
Unsubscribe from the subscription email
Users can unsubscribe from Upland Analytics subscriptions directly from the subscription email itself. Doing so will stop any additional emails from the subscription in the future.
To unsubscribe from a subscription via email:
-
Open up the subscription email.
-
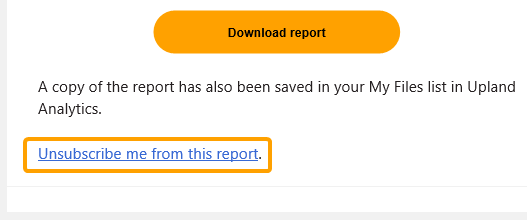
Select Unsubscribe me from this report at the bottom of the email.
-
Select the Yes, unsubscribe me button on the webpage that opens up.
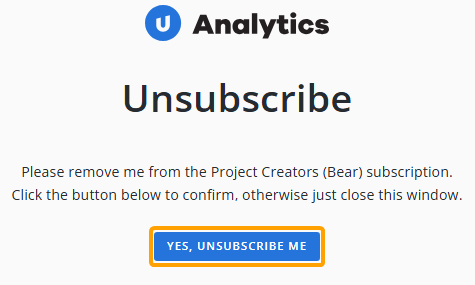
After selecting Yes, unsubscribe me, you will be removed from the subscription as a recipient. You will no longer receive the subscription when it gets sent out.
Unsubscribe from multiple subscriptions in bulk
Users can unsubscribe from multiple subscriptions at once directly from the "Subscriptions" page.
To unsubscribe from multiple subscriptions in bulk:
Before You Start: Users require the "Subscriptions - View" permission to unsubscribe from subscriptions on the "Subscriptions" page.
-
Select the Upland Analytics icon
from the Navigation Menu.
-
Select the Arrow icon
 to open the Analytics Menu (if it is not already open).
-
Select the Analytics Settings icon
from the bottom left-hand corner of the page.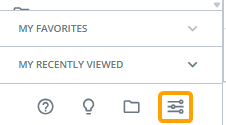
-
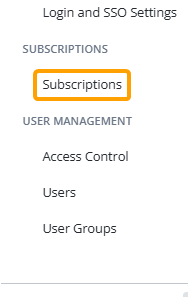
Select Subscriptions.
-
Select the checkboxes of the subscriptions you would like to unsubscribe from.
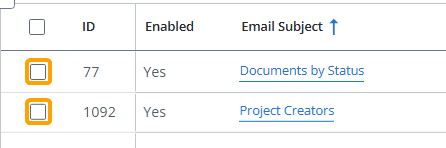
Tip: Select the checkbox in the column header to automatically select every subscription listed on the page.
Keep in mind that there may be other pages, so this might not select every subscription in Upland Analytics. You may have to navigate to different pages and/or increase the "Rows per Page" if this is your goal. -
Select the Unsubscribe icon
 to unsubscribe from all of the selected subscriptions.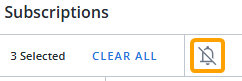
-
Select Unsubscribe from the "Unsubscribe" window.
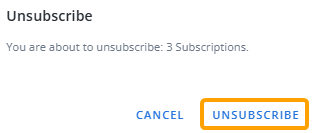
After selecting Unsubscribe, you will be removed as a recipient from each selected subscription. You will no longer receive the subscriptions when it sends out.
Delete a subscription
Upland Analytics subscriptions can be deleted at any time. Once deleted, they will no longer be automatically sent out to recipients and be erased from Upland Analytics.
Caution: Deleting a subscription will permanently delete it for all listed recipients, not just for yourself. If you would no longer like to be subscribed to a report or Dashboard, consider unsubscribing instead.
Note: Upland Analytics subscriptions will automatically delete themselves once they are no longer scheduled to be sent out. For instance, a subscription scheduled to be sent out only once will be automatically deleted immediately after sending.
This section covers the following:
Deleting a single subscription
If you are interested in deleting a single subscription from Upland Analytics, it is usually easier to delete it directly from the report or Dashboard itself.
Caution: Deleted subscriptions cannot be recovered. They will need to be recreated from scratch if mistakenly deleted.
To delete a subscription:
Before You Start: Users require the "Subscriptions - Delete" Upland Analytics permission to delete subscriptions that they have created themselves. Users require the "Subscriptions - Full Access" permission to delete subscriptions that they did not create.
-
Select the Upland Analytics icon
from the Navigation Menu.
-
Navigate to the report or Dashboard that contains the subscription you would like to delete.
-
Select See More
→ Subscription → My Subscriptions from the top of the screen.
-
Select See More
→ Delete from the subscription you would like to delete.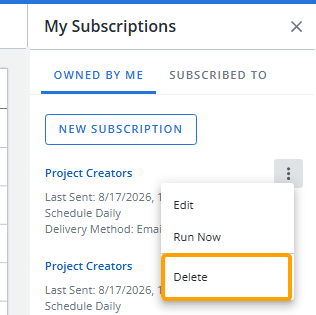
Note: The Owned By Me tab contains the subscriptions you created for the report or Dashboard. Users require the "Subscriptions - Full Access" permission to delete any subscriptions under the Subscribed To tab (which contains subscriptions that they are recipients of, but did not create).
-
Select the Delete button from the "Delete Subscription" window.
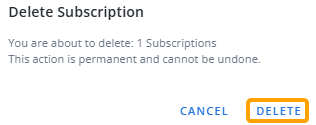
After selecting Delete, the subscription will be removed from Upland Analytics. Any listed recipients will no longer receive the report or Dashboard.
Deleting subscriptions in bulk
Multiple subscriptions can be deleted at once directly from the "Subscriptions" page.
Caution: Deleted subscriptions cannot be recovered. They will need to be recreated from scratch if mistakenly deleted.
To delete subscriptions in bulk:
Before You Start: Users require the "Subscriptions - Delete" Upland Analytics permission to delete subscriptions that they have created themselves. Users require the "Subscriptions - Full Access" permission to delete subscriptions that they have not created.
-
Select the Upland Analytics icon
from the Navigation Menu.
-
Select the Arrow icon
to open the Analytics Menu (if it is not already open).
-
Select the Analytics Settings icon
from the bottom left-hand corner of the page.
-
Select Subscriptions.
-
Select the checkboxes of the subscriptions you would like to delete.
Tip: Select the checkbox in the column header to automatically select every subscription listed on the page.
Keep in mind that there may be other pages, so this might not select every subscription in Upland Analytics. You may have to navigate to different pages and/or increase the "Rows per Page" if this is your goal. -
Select the Delete icon
 to delete all of the selected subscriptions.
Note: If the icon is greyed out, it means you have selected at least one subscription that you do not have permission to delete. Please keep in mind that users require the "Subscriptions - Full Access" permission to delete subscriptions that they did not create themselves.
-
Select Delete from the "Delete Subscriptions" window.
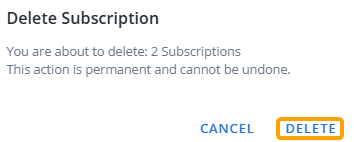
After selecting Delete, the subscriptions will be removed from Upland Analytics. Any listed recipients will no longer receive the report or Dashboard.
Manually run subscriptions
Instead of waiting for the scheduled time, users can manually run Upland Analytics subscriptions at any time. Doing so will not affect the subscription's schedule.
Note: Subscriptions that are run manually will contain up-to-date data, not data from the most recent scheduled run.
There are two ways to manually run subscriptions:
Manually run a single subscription
Users can manually run subscriptions by navigating directly to a report or Dashboard.
To manually run a single subscription:
Before You Start: Users require the "Subscriptions - Bulk Run" permission to manually run Upland Analytics subscriptions. This allows them to run any subscription they have access to, not just those that they have created themselves.
-
Select the Upland Analytics icon
from the Navigation Menu.
-
Navigate to the report or Dashboard that contains the subscription you would like to run.
-
Select See More
→ Subscription → My Subscriptions from the top of the screen.
-
Select either the Owned By Me or the Subscribed To tab.
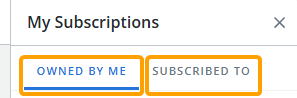
Note: The Owned By Me contains subscriptions to the report or Dashboard that you have created yourself. The Subscribed To tab contains subscriptions to the report or Dashboard that you did not create, but you are a recipient of.
-
Select See More
→ Run Now from the subscription you would like to manually run.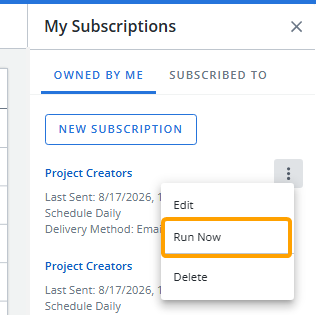
-
Select Run from the "Run Subscriptions" window.
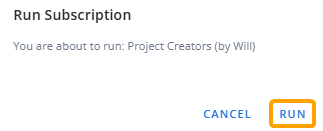
After selecting Run, the subscription will be sent out with up-to-date data. Each listed recipient will receive the subscription and the rest of the schedule will not be affected.
Run subscriptions in bulk
Users can manually run multiple subscriptions at once from the "Subscriptions" page.
To run multiple subscriptions at once:
Before You Start: Users require the "Subscriptions - Bulk Run" permission to manually run Upland Analytics subscriptions. This allows them to run any subscription they have access to, not just those that they have created themselves.
-
Select the Upland Analytics icon
from the Navigation Menu.
-
Select the Arrow icon
to open the Analytics Menu (if it is not already open).
-
Select the Analytics Settings icon
from the bottom left-hand corner of the page.
-
Select Subscriptions.
-
Select the checkboxes of the subscriptions you would like to manually run.
Tip: Select the checkbox in the column header to automatically select every subscription listed on the page.
Keep in mind that there may be other pages, so this might not select every subscription in Upland Analytics. You may have to navigate to different pages and/or increase the "Rows per Page" if this is your goal. -
Select the Runicon
 to delete all of the selected subscriptions.
-
Select Run from the "Run Subscription" window.
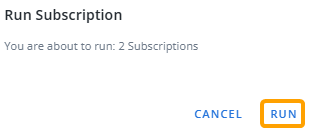
After selecting Run, each selected subscription will be sent out with up-to-date data. Each subscription's listed recipients will receive them. Their schedules will not be affected.