Post-Advance Actions
Post-Advance Actions will automatically take place after a Gate is advanced on a Gated Work. Specifically, administrators can configure these to either lock or unlock Metrics after advancing the Gate. Additionally, administrators can configure the action to copy Metric data from one Metric view to another after a Gate is advanced.
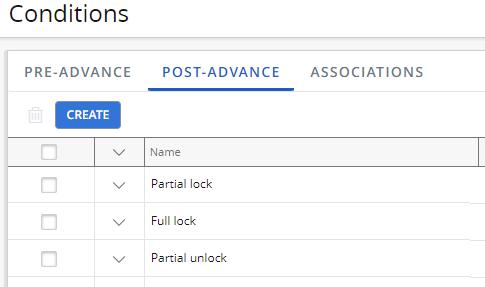
Once created, Post-Advance Actions have to be attached to existing Gates using the Associations tab.
Before You Start: Only PowerSteering administrators can create Conditions. If you are not an administrator, contact one to request a new Condition.
Administrators can create Post-Advance Actions that do the following:
Lock or unlock Metric views
Administrators can create Post-Advance Actions that either lock Metric views up to a certain date / period or unlock them from a certain date / period. Once associated to a Gate, the corresponding Metric(s) on the Gated Project will be automatically locked or unlocked once the Gate is advanced.
Note: This action will only apply to Gated Projects that have the selected Metric Template attached to them.
Note: This process only locks numeric Metric data, not Metric Tags or Custom Fields. See Lock or unlock Metric Tags and/or Custom Fields below if this is what you are interested in doing.
To create a Post-Advance Action that will lock / unlock Metric views:
-
Select Conditions from the "Configuration" section of the Admin menu:
Click thumbnail to play.
-
Select the "Post-Advance" tab:

-
Select the Create button:

-
Enter a name for your new action:

-
Enter a description for your new action:

-
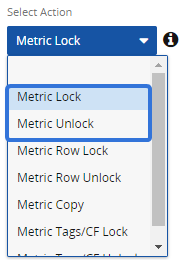
Select Metric Lock or Metric Unlock from the "Select Action" drop-down menu:
-
Metric Lock: The selected Metric view(s) from a specified Metric Template will be locked up to a certain date / period (including the selected date / period).
-
Metric Unlock: The selected Metric view(s) from a specified Metric Template will be unlocked after a certain date / period (including the selected date / period). Additionally, all data prior to the selected date / period will be locked.
Note: Periods are the columns of a Metric. They are based on the "Frequency" selection of the Metric Template.
For example, imagine it is February 2023. An administrator has associated a "Metric Lock" Post-Advance Action to a Gate. The action will lock the specified Metric view to the "Previous Period". The selected Metric Template has a "Monthly" frequency, which means each period (column) represents a month. In this case, January 2023 is the previous period, so Metric data from the specified template and view will be locked up to January 2023: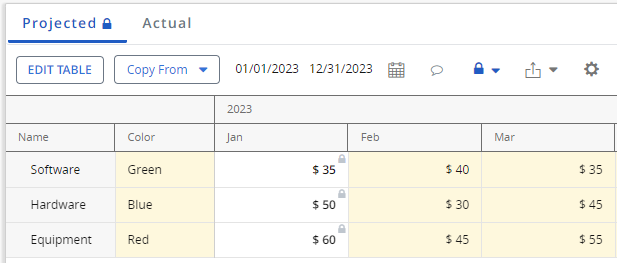
-
-
Select Add Metric Rule:

-
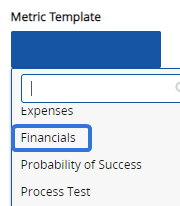
Select a Metric Template from the "Metric Template" drop-down menu:
-
Select which Metric view will be locked / unlocked from the "View" drop-down menu:
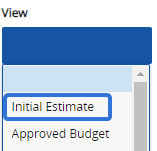
Note: This drop-down menu will only appear if the Metric Template selected in Step 8 contains multiple views.
-
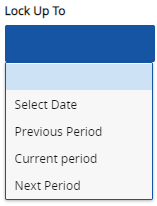
Use the "Lock Up To" / "Unlock From" drop-down menu to select a date / period:
-
Select Date: Use the "Date" field that appears to select a specific date:
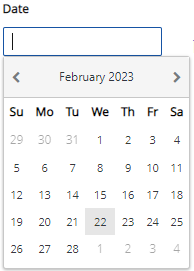
Note: If a date is not selected, the entire Metric view will be locked / unlocked.
-
Previous Period: The Metric view will be locked up to / unlocked from the previous period.
-
Current Period: The Metric view will be locked up to / unlocked from the current period.
-
Next Period: The Metric view will be locked up to / unlocked from the next period.
-
-
(Optional) Select Add Metric Rule and repeat Steps 8-10 to apply the Metric lock / unlock to another Metric view from the same Metric Template or a different one:

Repeat until you have added all of your desired Metric rules.
-
(Optional) Select the "Trash" icon
 next to any Metric rules to delete them.
 -
(Optional) Select the "When Gate is Skipped" checkbox if you would like the Post-Advance Action to also apply if the Gate is skipped instead of advanced:

Note: If left unchecked, the Post-Advance Action will only apply if the Gate is advanced, not skipped.
-
Select the Save button in the top right-hand corner:

After clicking Save, the Post-Advance Action will be complete. Use the Associations tab to attach it to a Gate.
Lock or unlock Metric line items
Administrators can create Post-Advance Actions that either lock Metric line items up to a certain date / period or unlock them from a certain date / period. Once associated to a Gate, the corresponding Metric line item(s) on the Gated Project will be automatically locked or unlocked once the Gate is advanced.
Note: This action will only apply to Gated Projects that have the selected Metric Template attached to them.
Note: This process only locks numeric Metric data, not Metric Tags or Custom Fields. See Lock or unlock Metric Tags and/or Custom Fields below if this is what you are interested in doing.
To create a Post-Advance Action that will lock / unlock specific Metric line items:
-
Select Conditions from the "Configuration" section of the Admin menu:
Click thumbnail to play.
-
Select the "Post-Advance" tab:

-
Select the Create button:

-
Enter a name for your new action:

-
Enter a description for your new action:

-
Select Metric Row Lock or Metric Row Unlock from the "Select Action" drop-down menu:
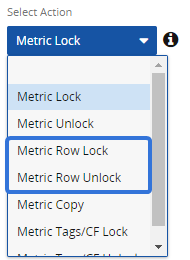
- Metric Row Lock: The selected Metric line item(s) will be locked up to a certain date / period (including the selected date / period). The administrator can specify the Metric template(s), the Metric view(s), and the line item(s) that will be included in the lock while adding Metric rules.
-
Metric Row Unlock: The selected Metric line item(s) will be unlocked after a certain date / period (including the selected date / period). Additionally, all data prior to the selected date / period will be locked. The administrator can specify the Metric template(s), the Metric view(s), and the line item(s) that will be included in the unlock while adding Metric rules.
Note: Periods are the columns of a Metric. They are based on the "Frequency" selection of the Metric Template.
For example, imagine it is February 2023. An administrator has associated a "Metric Row Lock" Post-Advance Action to a Gate. The action will lock the specified Metric line item to the "Previous Period". The selected Metric Template has a "Monthly" frequency, which means each period (column) represents a month. In this case, January 2023 is the previous period, so Metric data from the specified template and view will be locked up to January 2023:
-
Select Add Metric Rule:

-
Select a Metric Template from the "Metric Template" drop-down menu:

-
Select a Metric view from the "View" drop-down menu:

Note: This drop-down menu will only appear if the Metric Template selected in Step 8 contains multiple views.
-
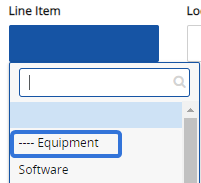
Select which Metric line item will be locked / unlocked from the "Line item" drop-down menu:
-
Use the "Lock Up To" / "Unlock From" drop-down menu to select a date / period:

-
Select Date: Use the "Date" field that appears to select a specific date:

Note: If no date is selected, the entire Metric line item will be locked / unlocked.
-
Previous Period: The Metric line item will be locked up to / unlocked from the previous period.
-
Current Period: The Metric line item will be locked up to / unlocked from the current period.
-
Next Period: The Metric line item will be locked up to / unlocked from the next period.
-
-
(Optional) Select Add Metric Rule and repeat Steps 8-11 to apply the Metric lock / unlock to another Metric line item from the same Metric Template or a different one:

Repeat until you have added all of your desired Metric rules.
-
(Optional) Select the "Trash" icon
 next to any Metric rules to delete them.
 -
(Optional) Select the "When Gate is Skipped" checkbox if you would like the Post-Advance Action to apply if the Gate is skipped instead of advanced:

Note: If left unchecked, the Post-Advance Action will only apply if the Gate is advanced, not skipped.
-
Select the Save button in the top right-hand corner:

After clicking Save, the Post-Advance Action will be complete. Use the Associations tab to attach it to a Gate.
Copy Metric data from one view to another
Administrators can create Post-Advance Actions that copy inputted Metric data from one Metric view to another. Once associated to a Gate, the Metric will have data copied from one of its views to another once the Gate is advanced.
Note: This action will only apply to Gated Projects that have the selected Metric Template attached to them.
Note: This process copies both numeric data and Tag / Custom Field data.
To create a Post-Advance Action that will copy Metric data from one view to another:
-
Select Conditions from the "Configuration" section of the Admin menu:
Click thumbnail to play.
-
Select the "Post-Advance" tab:

-
Select the Create button:

-
Enter a name for your new action:

-
Enter a description for your new action:

-
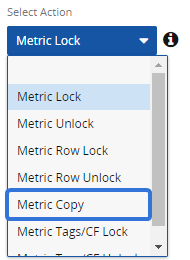
Select Metric Copy from the "Select Action" drop-down menu:
-
Select Add Metric Rule:

-
Select a Metric Template from the "Metric Template" drop-down menu:

-
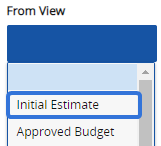
Select a Metric view to copy data from using the "From View" drop-down menu:
-
Select which view(s) will receive the copied Metric data to using the "To Views" drop-down menu:
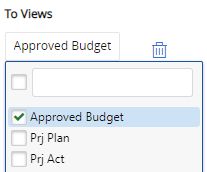
Tip: Use the empty text field at the top of the list to search for views. Also, use the checkbox next to the empty text field to select every listed view.
-
(Optional) Select Add Metric Rule and repeat Steps 8-10 to apply another Metric copy within the same Post-Advance Action:
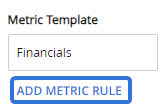
Repeat until you have added all of your desired Metric rules.
-
(Optional) Select the "Trash" icon
 next to any Metric rules to delete them.
 -
(Optional) Select the "When Gate is Skipped" checkbox if you would like the Post-Advance Action to also apply if the Gate is skipped instead of advanced:

Note: If left unchecked, the Post-Advance Action will only apply if the Gate is advanced, not skipped.
-
Select the Save button in the top right-hand corner:

After clicking Save, the Post-Advance Action will be complete. Use the Associations tab to attach it to a Gate.
Lock or unlock Metric Tags and/or Custom Fields
Administrators can create Post-Advance Actions that either lock Metric Tags / Custom Fields on certain line items or unlock them. Once associated to a Gate, the corresponding Metric Tags/Custom Fields on the Metric will be automatically locked or unlocked once the Gate is advanced.
Note: This action will only apply to Gated Projects that have the selected Metric Template attached to them.
To create a Post-Advance Action that will lock / unlock Metric Tags and Custom Fields:
-
Select Conditions from the "Configuration" section of the Admin menu:
Click thumbnail to play.
-
Select the "Post-Advance" tab:

-
Select the Create button:

-
Enter a name for your new action:

-
Enter a description for your new action:

-
Select Metric Tags/CF Lock or Metric Tags/CF Unlock from the "Select Action" drop-down menu:
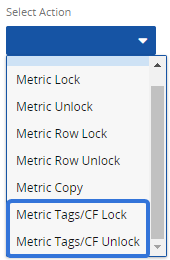
- Metric Tags/CF Lock: The selected Metric Tags and/or Custom Fields will be locked on certain line items of a Metric Template.
-
Metric Tags/CF Unlock: The selected Metric Tags and/or Custom Fields will be unlocked on certain line items of a Metric Template.
-
Select Add Metric Rule:

-
Select a Metric Template from the "Metric Template" drop-down menu:

-
Select a Metric view from the "View" drop-down menu:

Note: This drop-down menu will only appear if the Metric Template selected in Step 8 contains multiple views.
-
Use the "Line Item" drop-down menu to select which Metric line item will have its Tags and/or Custom Fields locked/unlocked:

-
Use the "Lock Up To" / "Unlock From" drop-down menu to select a date / period:

-
Use the "Custom Fields" and "Tags" drop-down menus to select the Tags and/or Custom Fields that will be locked/unlocked:
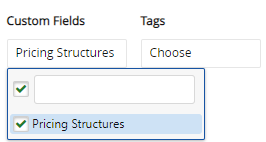
Tip: Use the empty text field at the top of the list to search for Tags or Custom Fields. Also, use the checkbox next to the empty text field to select every listed Tag or Custom Fields.
-
(Optional) Select Add Metric Rule and repeat Steps 8-12 to apply the Metric lock / unlock to another Metric view from the same Metric Template or a different one:

Repeat until you have added all of your desired Metric rules.
-
(Optional) Select the "Trash" icon
 next to any Metric rules to delete them.
 -
(Optional) Select the "When Gate is Skipped" checkbox if you would like the Post-Advance Action to also apply if the Gate is skipped instead of advanced:

Note: If left unchecked, the Post-Advance Action will only apply if the Gate is advanced, not skipped.
-
Select the Save button in the top right-hand corner:

After clicking Save, the Post-Advance Action will be complete. Use the Associations tab to attach it to a Gate.
