Add a Role
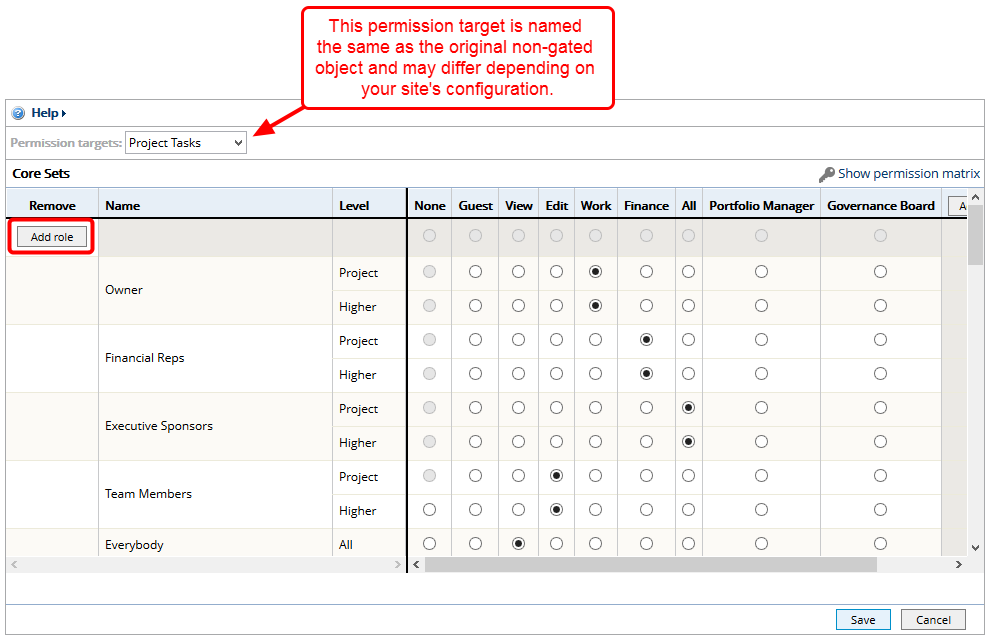
Note: This permission target is named the same as the original non-gated object and may differ depending on your site's configuration.
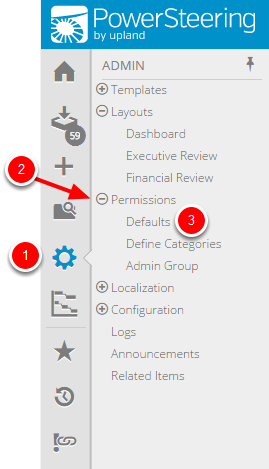
1. Click Defaults

- On the Icon Bar click the Admin button.
- Click Permissions to expand the menu, then click Defaults.
2. Click Add Role

- Click Add role.
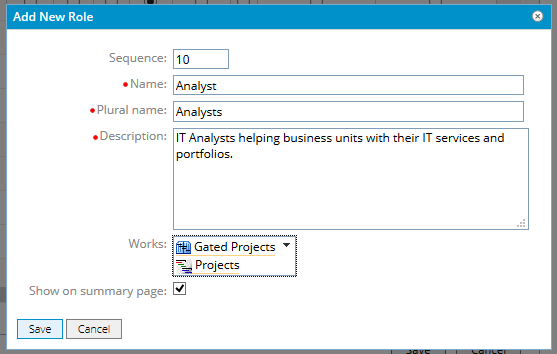
3. Enter Role Information

- Enter role information.
- Click Save.
Sequence: A number that defines where the role will appear in relation to other roles. If left blank, the role will be sorted alphabetically. Note: The role sequence defined here is pervasive across other parts of PowerSteering.
Name: The name of the role.
Plural Name: The plural name of the role which appears whenever users are being assigned to work, or when all members assigned to work are displayed.
Description: Text that describes the role's purpose (optional).
Works: Select the work type(s) to which the new role will apply.
Show on summary page: If selected, a list of this role’s members will appear on the work summary page.
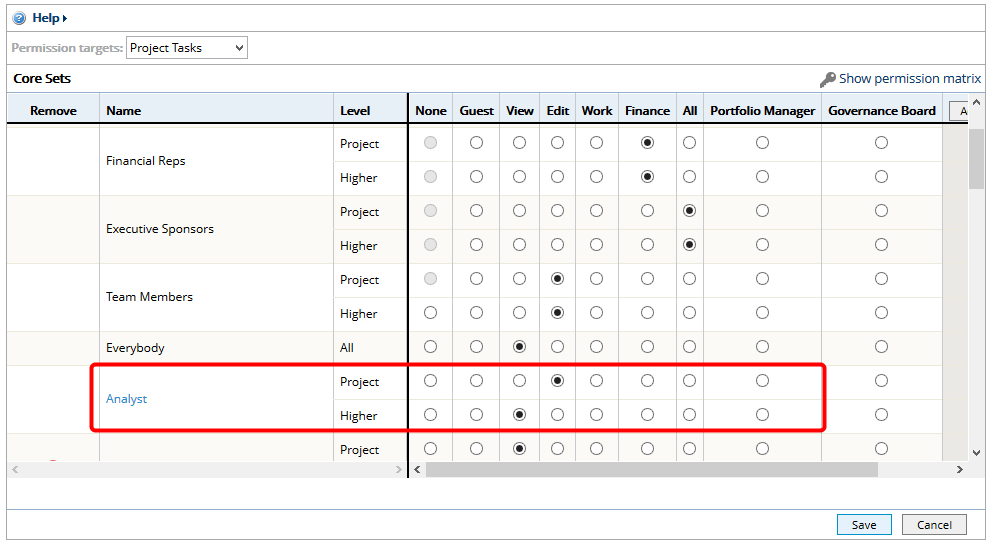
4. View Role

- View newly created role.