Create a Scorecard Metric Template
A Scorecard Metric is used to "score" items on a rating scale. When a value is selected for a scorecard metric line item, it is "scored" using a discrete value that is set up when the metric template is created. Organizations often use this kind of metric against incoming Ideas to create some type of objective scoring method to determine which projects they will or will not do. The actual scoring can be anything from complexity of the project to cost and / or ease of implementation.
Example: Marilyn's organization wishes to evaluate Projects on three criteria to ensure they are running smoothly: clarity, strategic alignment, and Resource availability. To accommodate this, Marilyn creates a "Project Review" Scorecard Metric that can be used to evaluate Projects. She associated it with the "Project" Object Type, which means it will automatically appear on all work items created from it.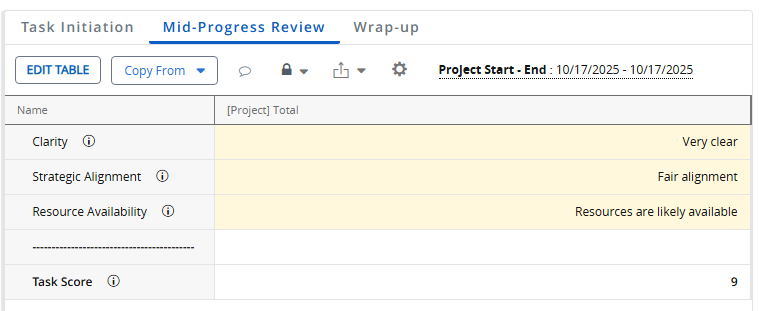
Each task is expected to undergo three separate evaluations that match up with the Metric's three views: Task Initiation (before the task begins), Mid-Progress Review (halfway through the task), and Wrap-up (once the task has concluded).
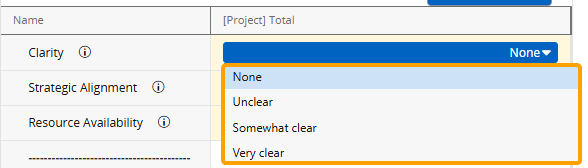
When it is time to evaluate the Project, a user can open up the "Project Review" Scorecard Metric on a work item and choose the appropriate values for each criterion: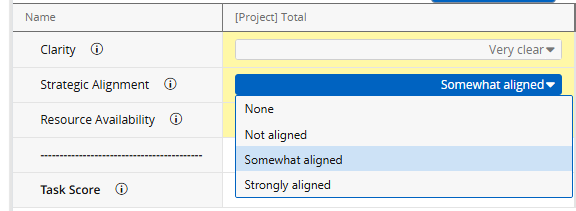
Before Scorecard Metrics can be attached to PowerSteering work items, a Scorecard Metric Template must be created.
To create a Scorecard Metric Template:
Before You Start: Users require the "Metric Template Administration" Context permission to create new Metric Templates.
-
Select Admin
 → Templates → Metrics from the Navigation Menu.
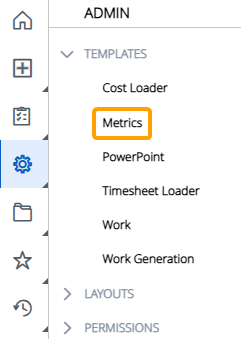
-
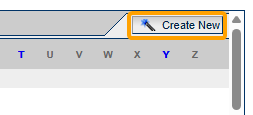
Select the Create New button in the top right-hand corner of the screen.
-
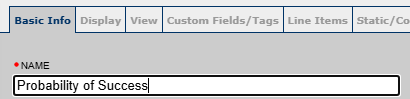
Enter a name for your Scorecard Metric Template.
-
Select Yes from the "Allow Rollup" field.

-
Select No Frequency from the "Frequency Is" field.

-
Make any more desired adjustments to the "Basic Info" tab.
Note: See Basic Info Metric Tab for more information about each individual field.
 Click here for information on attaching Scorecard Metrics to the Create Work wizard
Tip: A Scorecard Metric view can be displayed on the Create Work wizard for work items created using an automatically associated Object Type.
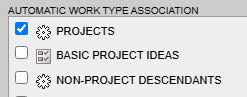
In this example, all new work items created using the "Projects" Object Type will feature the Metric view on the Create Work wizard.
This feature will only be active when the "Frequency Is" field is be set to "No Frequency" and the "Tag" field is set to "No Tag Breakdown".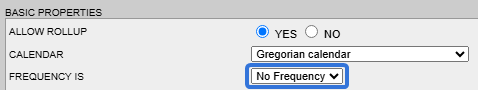

If the Scorecard Metric will feature multiple views, administrators can use the "Display on Project Creation" checkboxes on the View tab to select the Metric View that will be featured.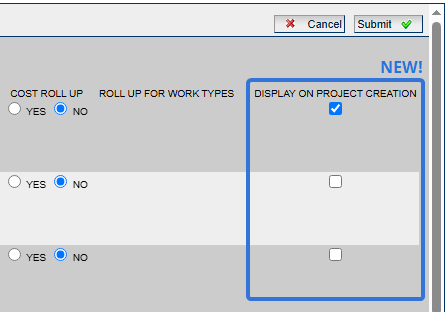
These checkboxes (as well as the entire View tab) will only be displayed when "Views" are enabled from the the Basic Info tab.
If the Scorecard Metric does not feature multiple views, administrators can simply enable "Display on Project Creation" from the Basic Info tab.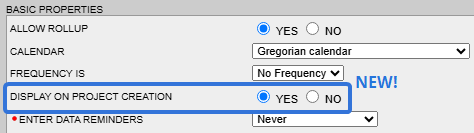
This field will only be available if "Views" are disabled for the Metric.
-
Select the Next button.
-
Make any desired adjustments to the "Custom Fields/Tags" tab.
Note: See Custom Fields/Tags Metric Tab for more information about each individual field.
-
Select the Next button.
-
Add line items that will serve as the Scorecard Metric criteria.

Each line item's fields must be set to the following:
-
SEQ: Enter a number that determines the line item’s position in the Scorecard Metric list. Lower numbers appear at the top and higher numbers appear at the bottom.
Tip: Consider using multiples of 10 or 100 instead of simply counting up one-by-one ("1", "2", "3", etc.). This will make it easier to add new line items between existing ones later on.
-
Data Type: "Numeric"
-
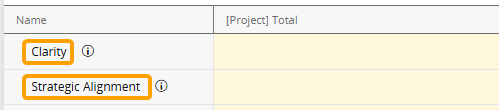
Line Name: Enter a name that will be displayed on the line item in the Scorecard Metric. This should be the name of the criterion that the work item is scored on.
-
Constraint: "Set"
-
Behavior: "Absolute"
-
Scale: N/A
-
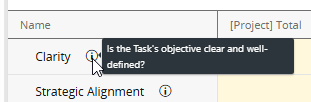
Description: Describe the criterion that will be used to score the work item. The description will appear as a tooltip on the Scorecard Metric.
Note: See Line Items Metric Tab for more information on these fields.
Tip: Strongly consider adding a "Separator" line item below all of your criteria line items. To do so, add a "SEQ" number that is greater than all of the other line item "SEQ" numbers and select "Separator" from the "Data Type" field. Also, you may want to add a string of dashes as the line item name.

This will create a line that separates your criteria from the total score on your Scorecard Metric.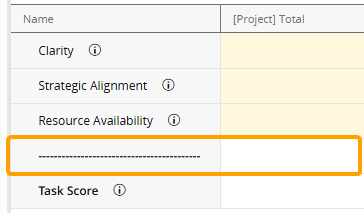
-
-
Add a line item for the total score.

Note: If you are not interested in adding a line item for the cumulative score, skip this step.
This line item's fields must be set to the following:
-
SEQ: Enter a number that determines the line item’s position in the Scorecard Metric list. Lower numbers appear at the top and higher numbers appear at the bottom.
Tip: This line item should be placed at the bottom of top of the Scorecard Metric.
-
Data Type: "Numeric"
-
Line Name: Enter a name for the line item. It should reflect the line item's cumulative nature.
-
Constraint: "None"
-
Behavior: "Absolute"
-
Default: N/A
-
Scale: N/A
-
Description: Enter a description for the line item. The description will appear as a tooltip on the Scorecard Metric.
-
-
Select the Next button.
-
Configure the Scorecard Metric criteria values.
Note: These fields determine the values that will appear when users open each line item's drop-down menu on the Scorecard Metric.
They also determine how each selection will contribute to the total score.Note: Select More Items if you need to add more selections for a line item.
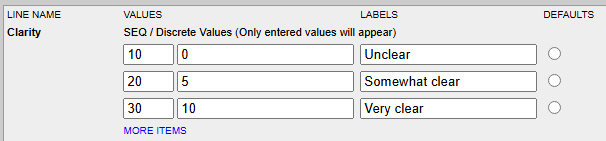
Fill in the following fields for each of the line item's drop-down selections:
-
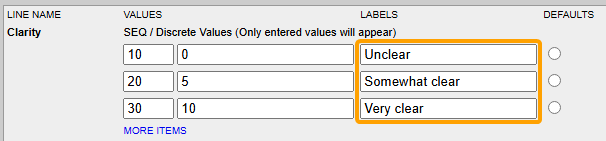
Values (SEQ): Enter a number that determines the selection’s position in the line item's drop-down menu. Lower numbers appear at the top and higher numbers appear at the bottom.
Tip: Consider using multiples of 10 or 100 instead of simply counting up one-by-one ("1", "2", "3", etc.). This will make it easier to add new selections between existing ones later on.
-
Values (Discrete Values): Enter the value that the selection will contribute to the total score. The total score will add up all of the values of the selected drop-down choices.
Note: Users will not see these values on the actual Scorecard Metric; only the labels (below) that represent them.
Example: For the "Clarity" line item, selecting "Unclear" will contribute nothing to the final score, selecting "Somewhat clear" will contribute 5 points to the final score, and selecting "Very clear" will contribute 15 points to the final score.
-
Labels: Enter the value that will be displayed for the selection in the line item's drop-down menu.
Example: For the "Clarity" line item, the three labels will be displayed as three drop-down choices on the Scorecard Metric.
-
Defaults: If desired, select one of the values to serve as the default. This value will be automatically selected before a user edits the Scorecard Metric.
-
-
Select the Next button.
-
Select the total score line item.
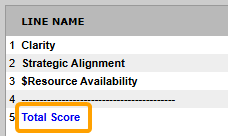
Note: If you did not add a line item for the total score, skip to Step 18.
-
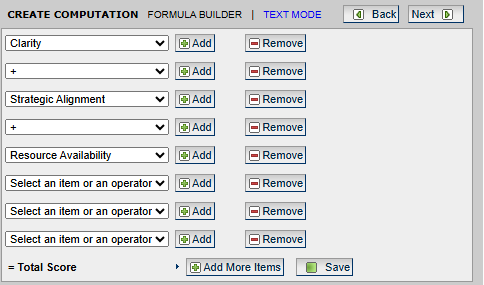
Use the "Create Computation" window to create a formula that adds the line item's values together.
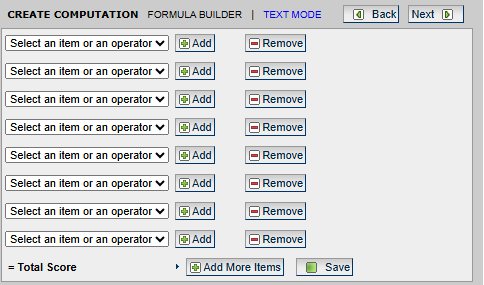
Note: See Computation Metric Tab for more information.
Example: To create a simple formula that adds up the scores of each criteria for the final score, use the drop down menus to select each line item as well as "+" between each one.
-
Select the Save button.
-
-
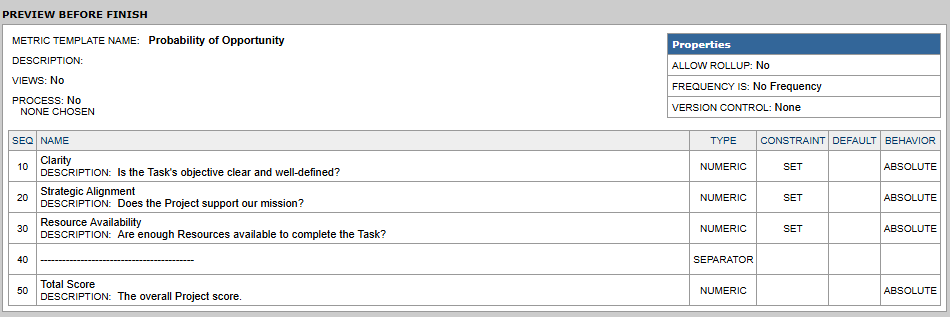
Review the Scorecard Metric Template details.
-
Select the Submit button.
After selecting Submit, the Scorecard Metric Template will be saved to PowerSteering. It can be directly attached to work items at any time. If it was associated with any Object Types on the Basic Info Metric Tab, it will be automatically added to all work items created from the selected types.
Note: Work created using a template with one of the automatically associated Object Types as the "Root work object" will also automatically receive the Metric.