This article covers the approving of a Leave Request Entry.
- Access the Leave Request Manager page:
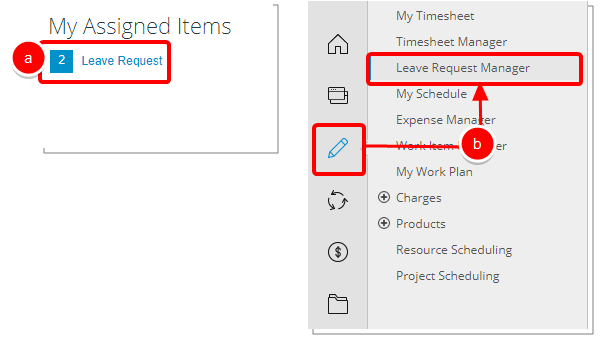
- Within the My Assigned Items web part of the Home Page: Click the Leave Request link
- From the Navigation Menu: Click Entries then select Leave Request Manager in the Navigation Menu.
- Click All Requests to access Leave Requests you have visibility to.
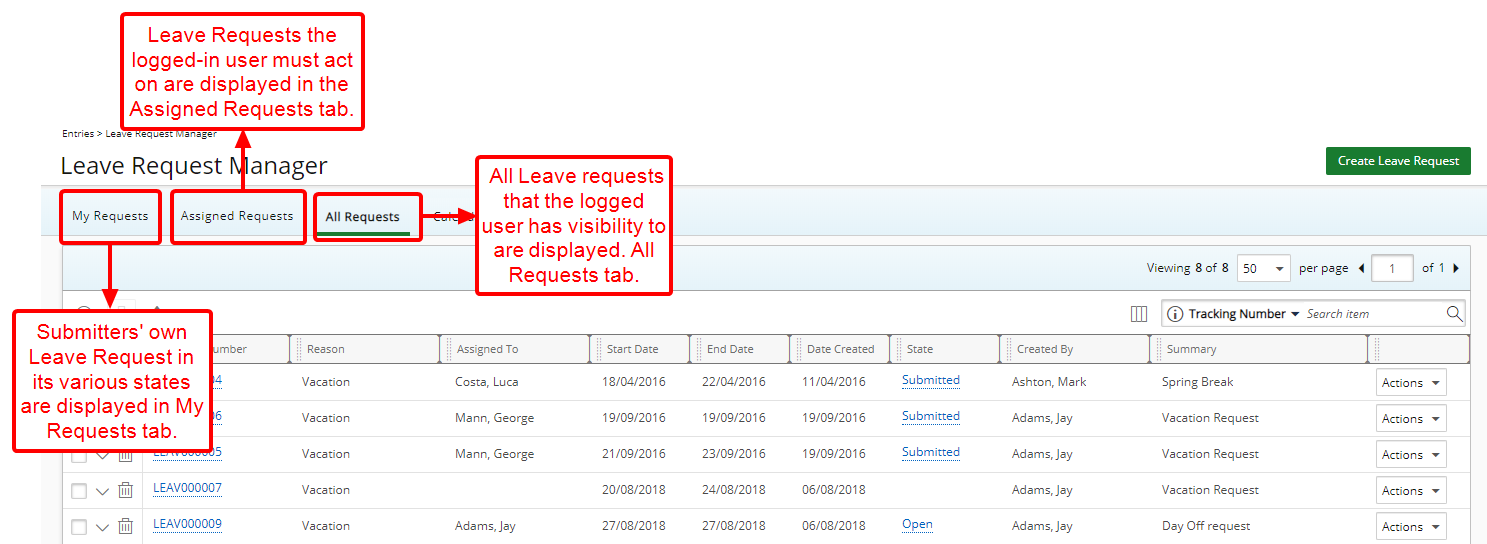
Note: Users with at least one Site in their Scope will see only Leave Requests that were created by other users sharing the same Site when viewing the All Requests or Calendar View tabs.
- Click Actions to open the Actions context menu.
- Select the appropriate Action.Approve or Reject.
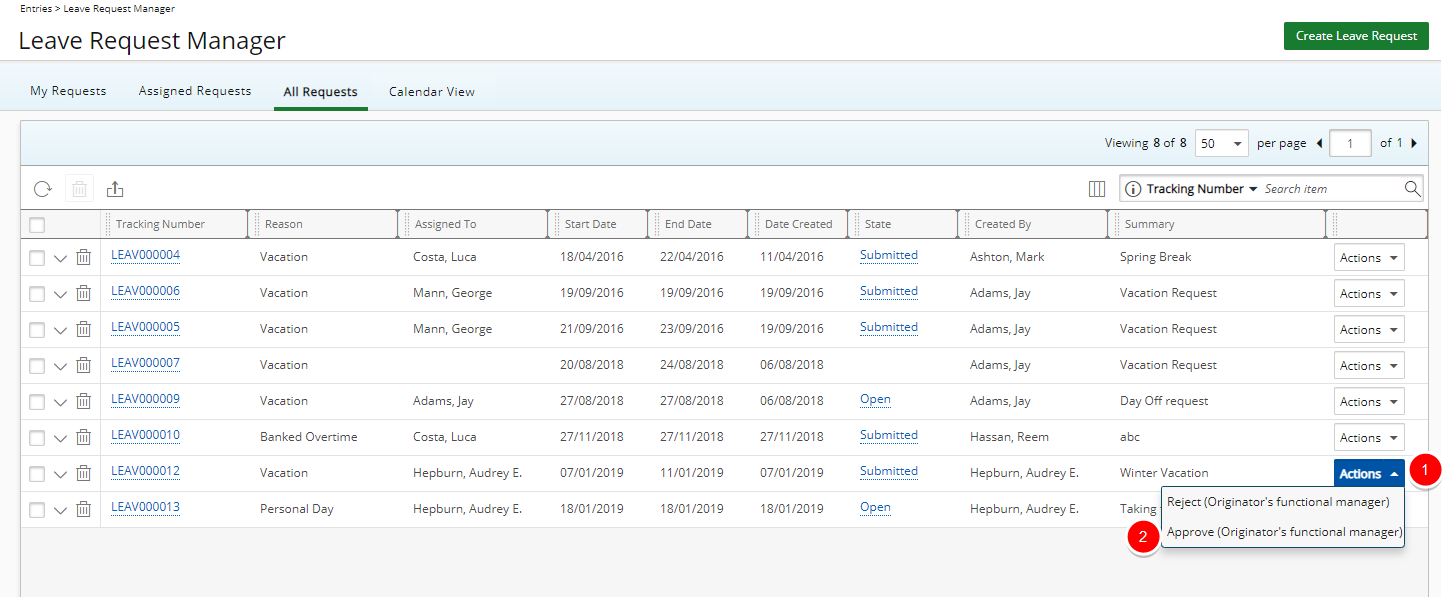
Note: The options available to you will vary depending on how the Leave Request Workflow has been setup.
- Upon actioning on a Leave Request, the Leave Request Manager page will refresh and you will see the remaining Leave Requests in your list.
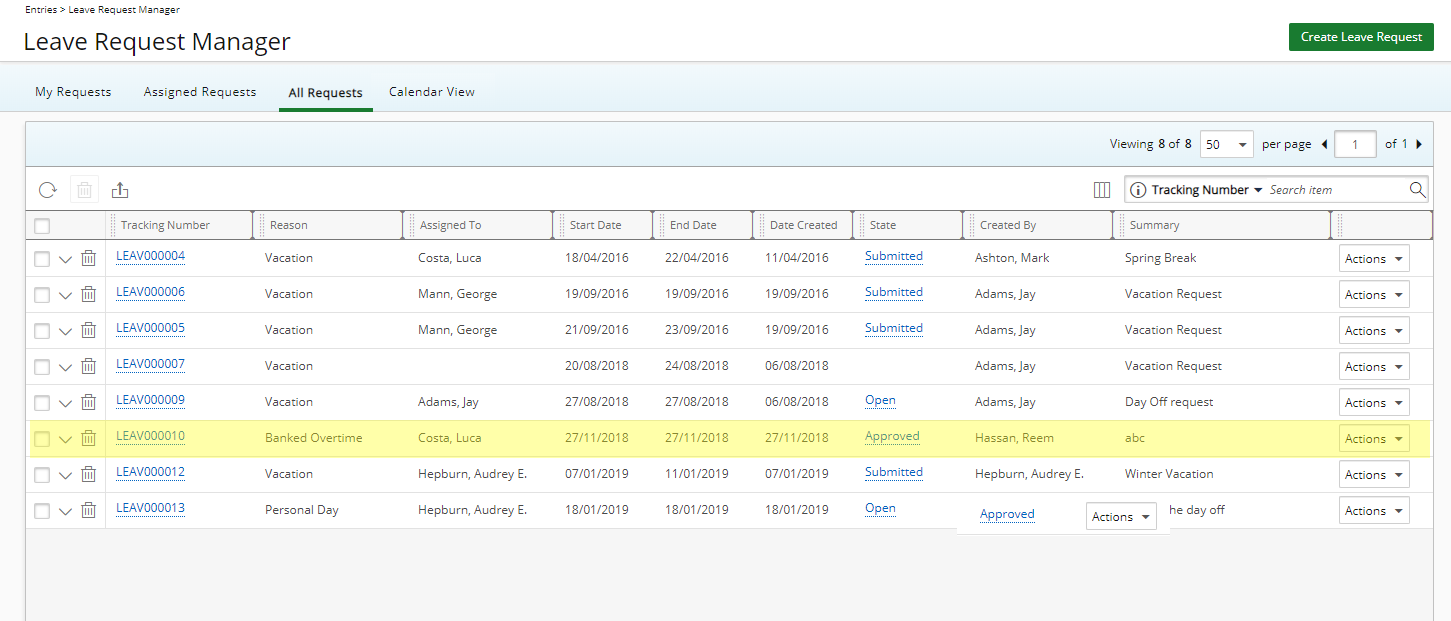
Note: The Leave Request you actioned on will move along to the next State within the predefined Leave Request Workflow and will be assigned accordingly.