Run-time Filter conditions can be applied to the Timesheet Manager View allowing to narrow your list so that you retrieve just the right amount of information you need.
This article details how to apply an on-page Filter on the Timesheet Manager View.
The process and steps of applying a run-time Filter on any View is the same. For the purpose of this article we are going to apply a nested run-time Filter on the Timesheet Administrator View.
- From the Icon Bar click Entries
 .
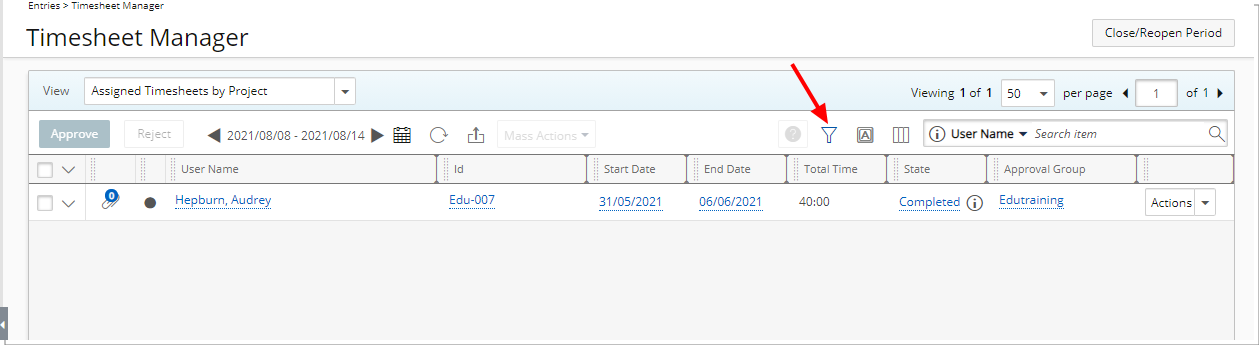
. - From the Navigation Menu click Timesheet Manager.
- Choose the required View from the list of available options.
- Click the Filter
 button to access the Filters dialog box.
 - From the Filters dialog box. Click the New
 button located on the table header. Note that a new line item will be added to the table.
Tip: You can move the Filter dialog box to a new position. Simply move your mouse to the header area. When your mouse pointer turns onto a move pointer
 , click and drag the dialog box to its new position.
 - From the Field Name selection box, in addition to any User Defined Fields associated with Timesheets, you can choose the following options: Billable Time, Client Name, Double Overtime, Is Billable, Is Payable, Overtime, Payable Time, Period Status, Project Alternate Manager, Project Code, Project Id, Project Is Active, Project Manager, Project Name, Project Portfolio, State Attribute, State Name, Task Id, Task Name, Task Work Type, Time Charge, Total Time, User Active Site, User Approval Group, User Approval Group Manager, User Functional Group, User Functional Group Manager, User Id, User is Active, User Master Site, User Name, User Resource Group, User Resource Group Manager, User Resource Type, User Termination Date and User Title.
- Depending on your chosen Field in step 6 above, the Conditions may vary and will have one of the following options:
- In and Not In
- =, <>, Like, Not Like, In and Not In
- =, <>, >=, <=, <, >, Between and Not Between
- The Value 1 and Value 2 options are dependent on the chosen Field and Conditions. You may have to either:
- Click the ellipsis button and select the Value from a list
Or - Enter a value for Value 1/Value 2.
- Click the ellipsis button and select the Value from a list
- For the purpose of this article we are going to choose the Client Name Field, select the In Condition and choose a Client from the Client List.

Note: A tool tip is available when hovering over a Selected Value1/Value2 box. Each Selected Value is separated by a dash and a maximum of three lines are displayed. Clicking the Show More… link within this tool tip will open the corresponding List page where you can view your selections.
- Click Save.
Note: If more then one Filter is added each Filter line item must to be saved, otherwise the changes will be lost upon exit.
- You can either add a nested Filter which will allow you to Combine with and And/Or condition by following these steps:
- Click the Add button located against the Filter you just saved. A new nested Filter will be added on a new line below your existing Filter.
- From the Combine selection box choose wither And/Or option.
- Select the desired field you want to use in the Field Name.
- Select the desired Condition from the available Condition options.
- If applicable select the desired Value from the available Value 1 and Value 2 options.
- Click Save.

- Click the Add
- Or create another Filter by following the Steps 5-9 above.
- Click Close to return to the Timesheet Manager Page.
- View filtered Timesheet Manager page.
Note: When an on-page Filter is applied on the Timesheet Manager the Filter icon turns blue
 , indicating that a Filter is applied.