Most financial institutions allow clients to download a file containing all the transactions executed on their accounts, whether it is a bank account or a credit card account. This download is usually in a standard file format, which can be used to import the transactions into a personal financial system for further processing.
You can use the Import Transactions functionality to include debit or credit card transactions you may have incurred for company purposes, or for which you are accountable to the company. Simply download the transactions file and import it into your Expense Report.
This article details the importing of a .OFX transactions file, into an Expense Report.
Note: The Import Transactions option is available only for users who have the Import transactions right in their Security Profile (Setup > Organization > System > Security > Security Profile > Entry > Expense).
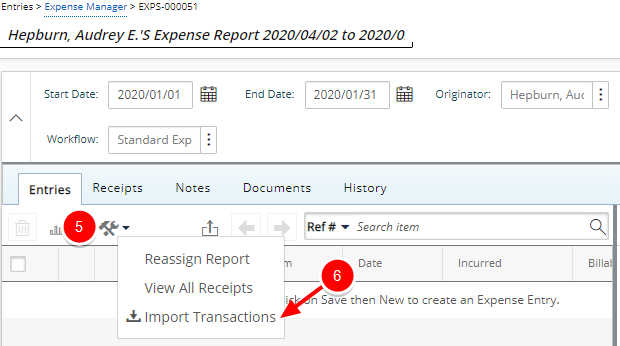
- From the Icon Bar click Entries
 .
. - From the Navigation Menu click Expense Manager.
- From the available Views, select My Expense Reports, which provides a list of your Expense Reports.
- Click an Expense Report Tracking# to access it.
Note: Transactions cannot be imported into an Expense Report in Completed State.
Tip: You can also select the selection box against the Expense Report where you want to import the transaction to. Click the Tools button. From the Tools context menu select Import Transactions then continue to step 7 below.
- Click the Tools
 button.
 - From the Tools context menu select Import Transactions.
Note: Make sure that the imported Transaction falls within the period of the selected Expense Report.
- Upon the Import Transactions to Expense Report page displaying, click the Select File button.
- Choose the file to import from your computer.
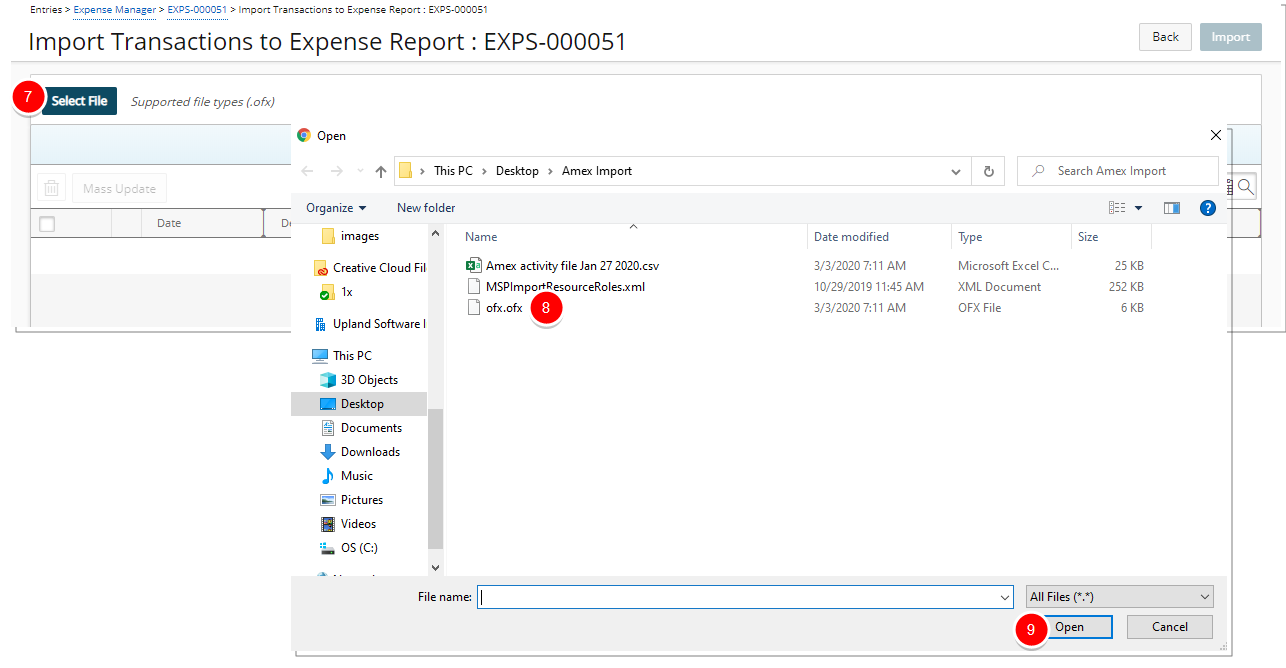
- Click Open.
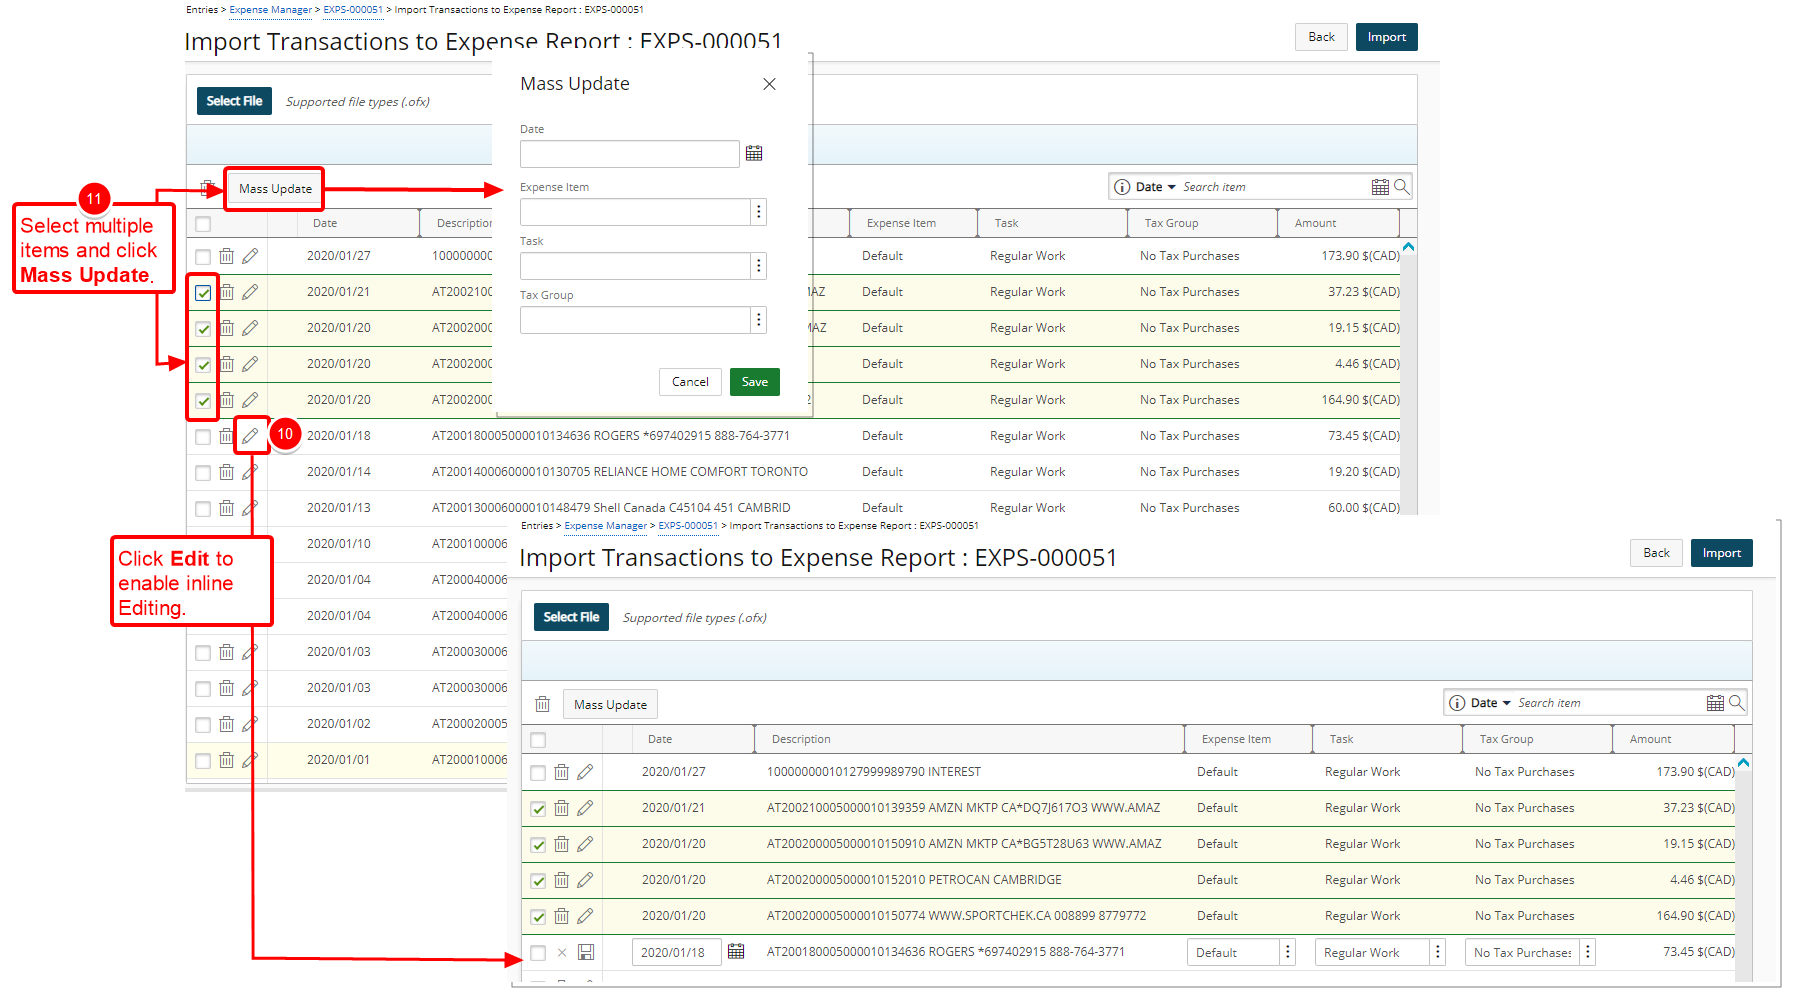
- Click the Edit button against a transaction to update the Date, Expense Item, Task and Tax Group of a single Transaction.
- Select Multiple Transactions and click the Mass Update button to update the Date, Expense Item, Task and Tax Group of a multiple Transactions.
- Edit or Mass Update Transaction(s):
 Update single Transaction
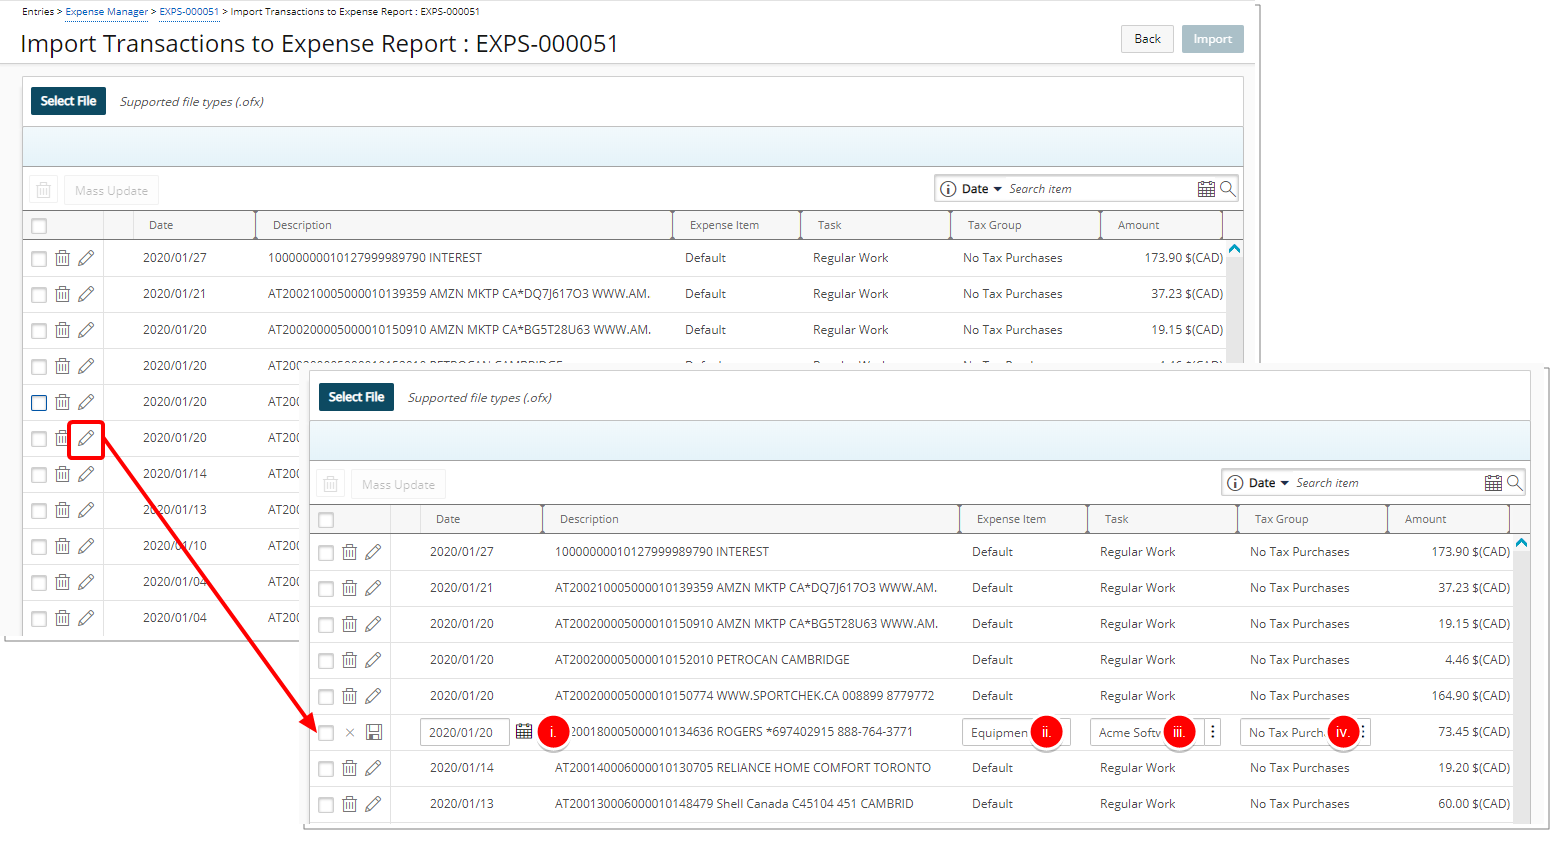
- Click the Edit
 button against a Transaction
 - Make the necessary changes:
- Click the Calendar button and select a new Date.
- Click the Expense Item browse button and choose the appropriate option from the Expense Item List page.
- Click the Task browse button and choose the appropriate option from the Task List page.
- Click the Tax Group browse button and choose the appropriate option from the Tax Group List page.
- Click Save
 .
.
Note: When associating a Task to a Transaction, the Budget Restrictions set at the Project (Project List > Project edit > Planners > Budget > Associated Expense Items) or Task (Setup > Work > Tasks > Task Edit > Budget > Associated Expense Items) level(s) are taken into consideration.
- Click the Edit
- Update multiple Transactions
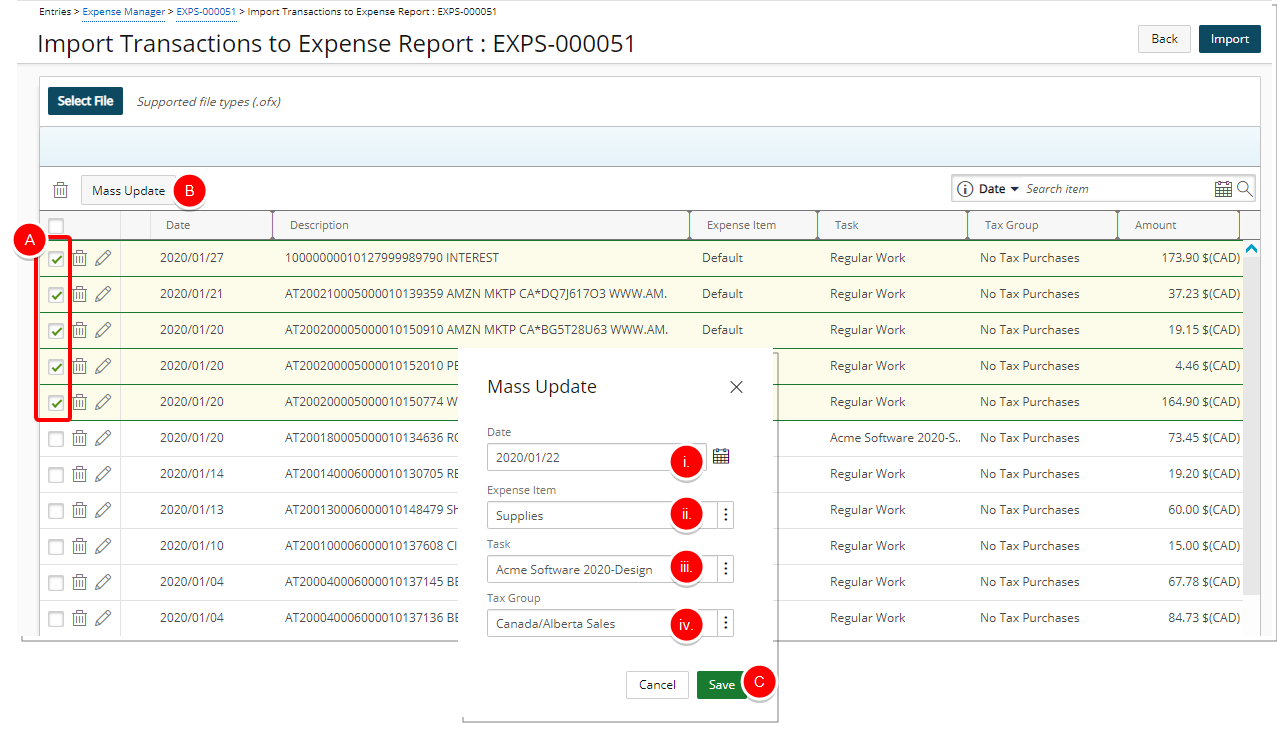
- Select multiple Transactions.
- Click Mass Update
- Upon the Mass Update dialog box appearing, make the necessary changes:
- Click the Calendar button and select a new Date.
- Click the Expense Item browse button and choose the appropriate option from the Expense Item List page.
- Click the Task browse button and choose the appropriate option from the Task List page.
- Click the Tax Group browse button and choose the appropriate option from the Tax Group List page.
- Click Save.
- Select The Transactions to import.
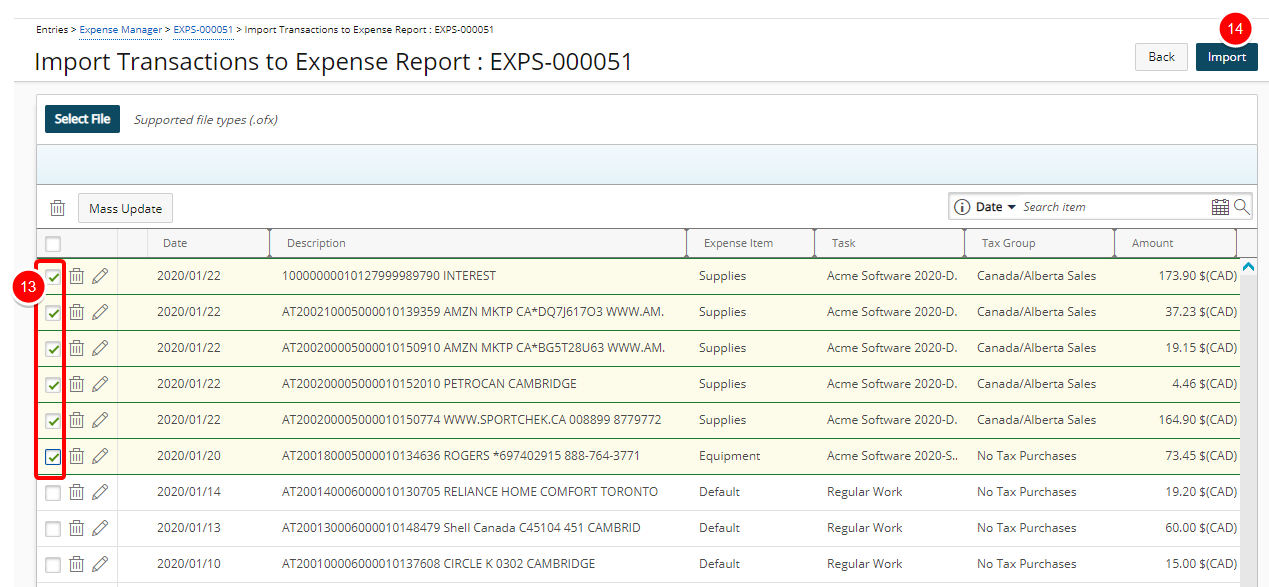
- Click the Import button.
Note: Credit/Debit FEEs are imported as Credit/Debit, respectively.
- View the Success message bar.
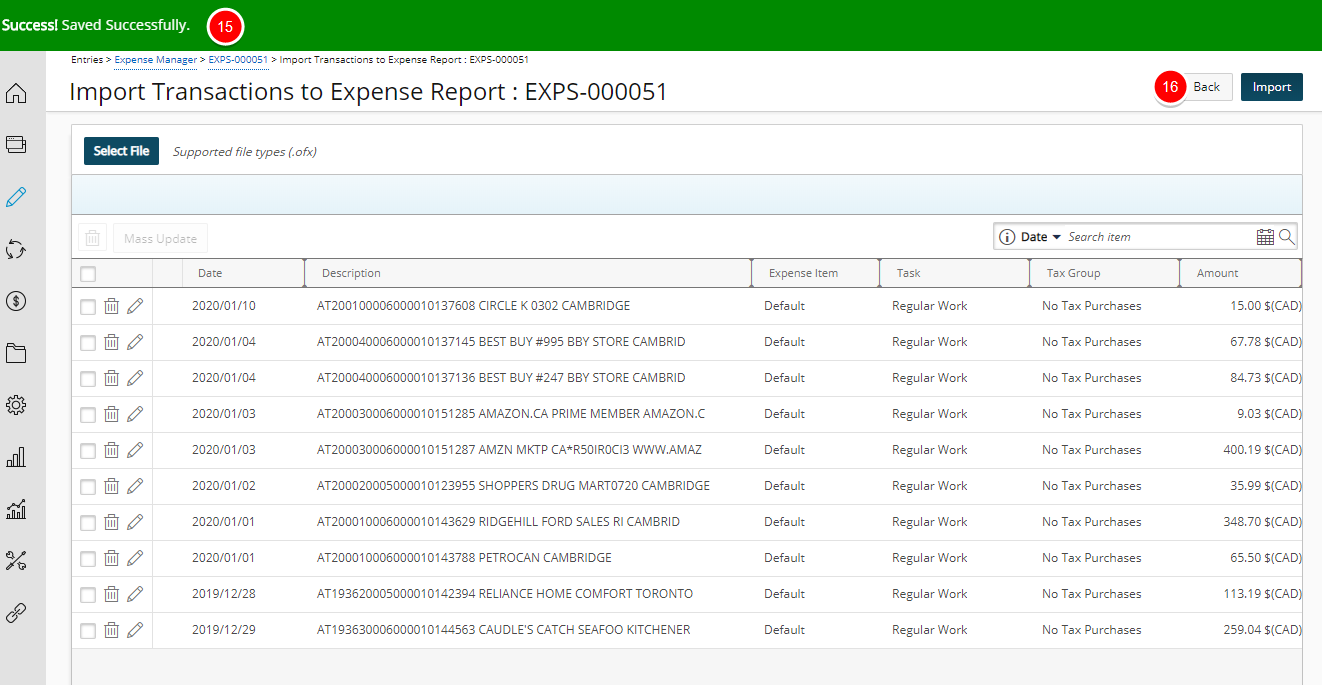
- Click Back to return to the Expense Report.
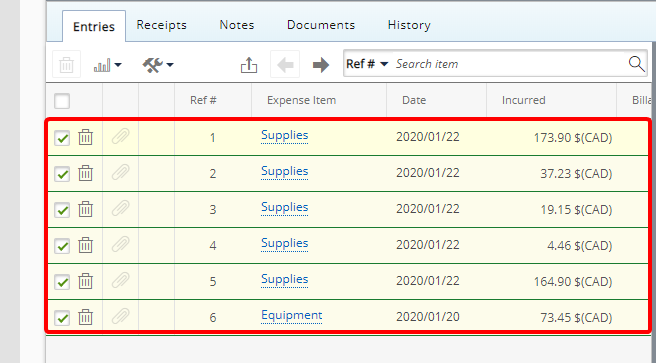
- View the Imported Transactions as Expense Entry items in your Expense Report.
-
Click Save to save your Expense Report.
