Most financial institutions allow clients to download a file containing all the transactions executed on their accounts, whether it is a bank account or a credit card account. This download is usually in a standard file format, which can then be used to import the transactions into a personal financial system for further processing.
This article details the importing of a .csv or .txt transactions file.
Note: The Manage Exceptions and Import Transactions buttons are available only for users who have the Credit Card transaction right in their Security Profile (Setup > Organization > System > Security > Security Profile > Entry > Expense).
- From the Icon Bar click Entries
 .
. - From the Navigation Menu click Expense Manager.
- Click the Import Transaction button.
- Upon the Import Transactions page displaying, click the Select File button.
- Choose the file to import from your computer.
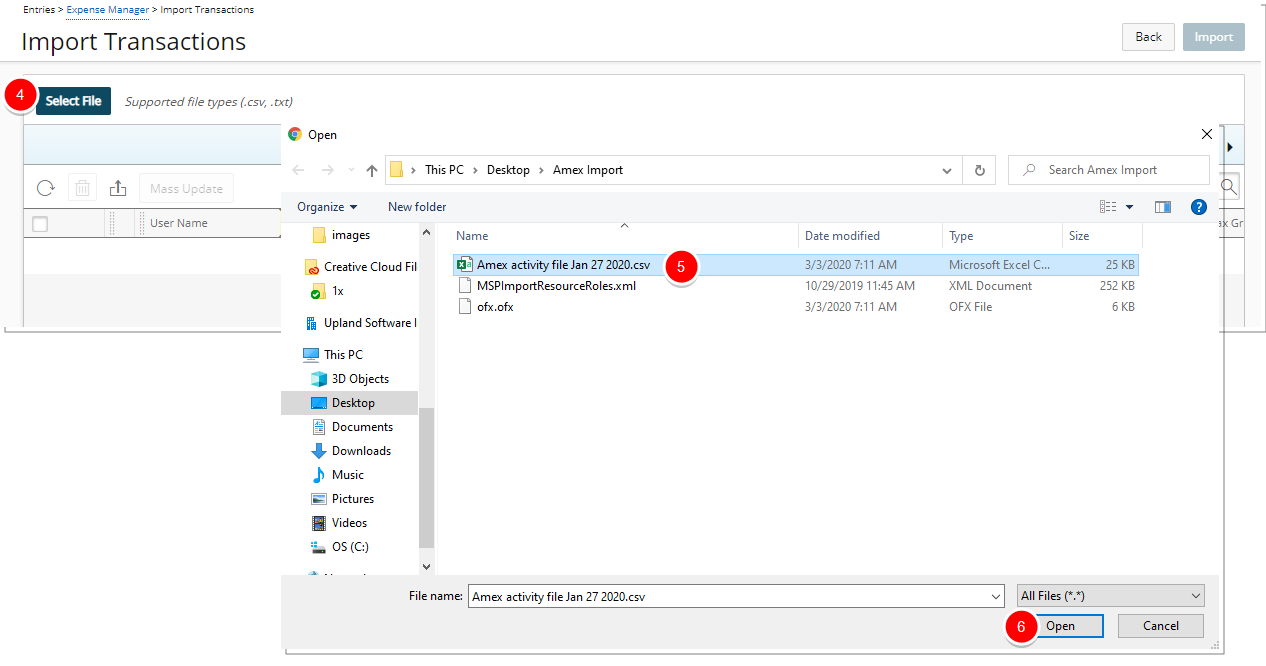
- Click Open.
Note: Supported file types are .csv and .txt. For the purpose of this article, a .csv file will be imported as the steps for importing both file types are the same.
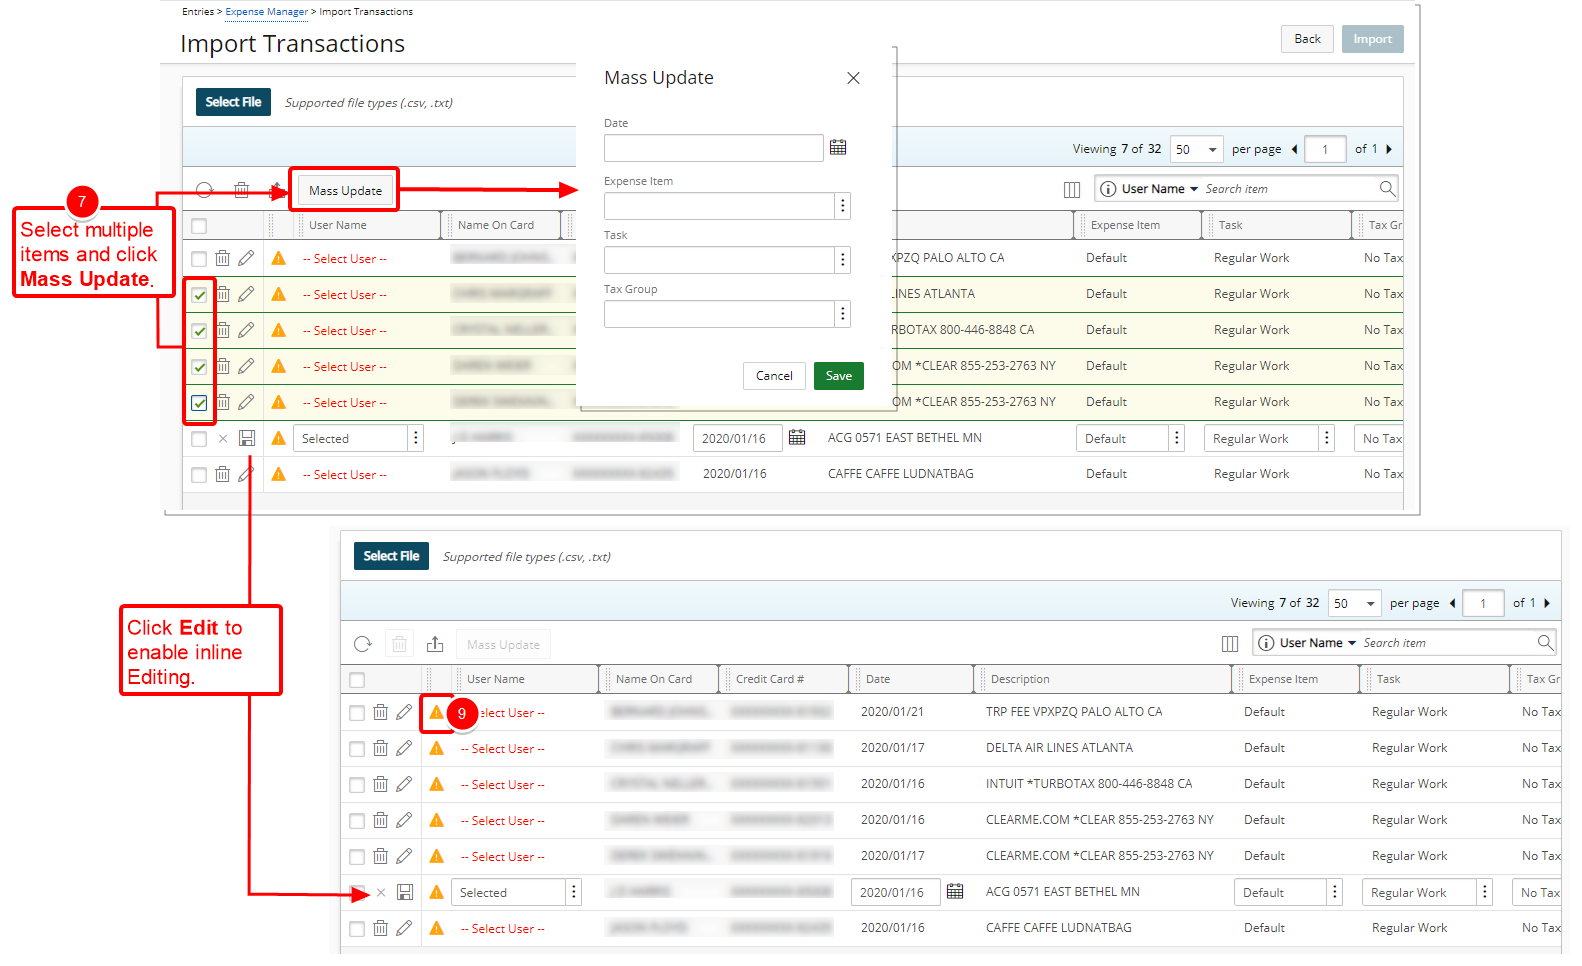
- Click the Edit
 button against a transaction to update the User Name, Date, Expense Item, Task and Tax Group of a single Transaction.
 - Select Multiple Transactions and click the Mass Update button to update the User Name , Date, Expense Item, Task and Tax Group of a multiple Transactions.
Note: If the selected Transactions have the same Name On Card you can also update the User name. Otherwise the option to update the User Name will not be available on the Mass Update dialog box.
- Hover over the warning icon to view the tooltip with detailed information.
- Edit or Mass Update Transaction(s)
 Update single Transaction
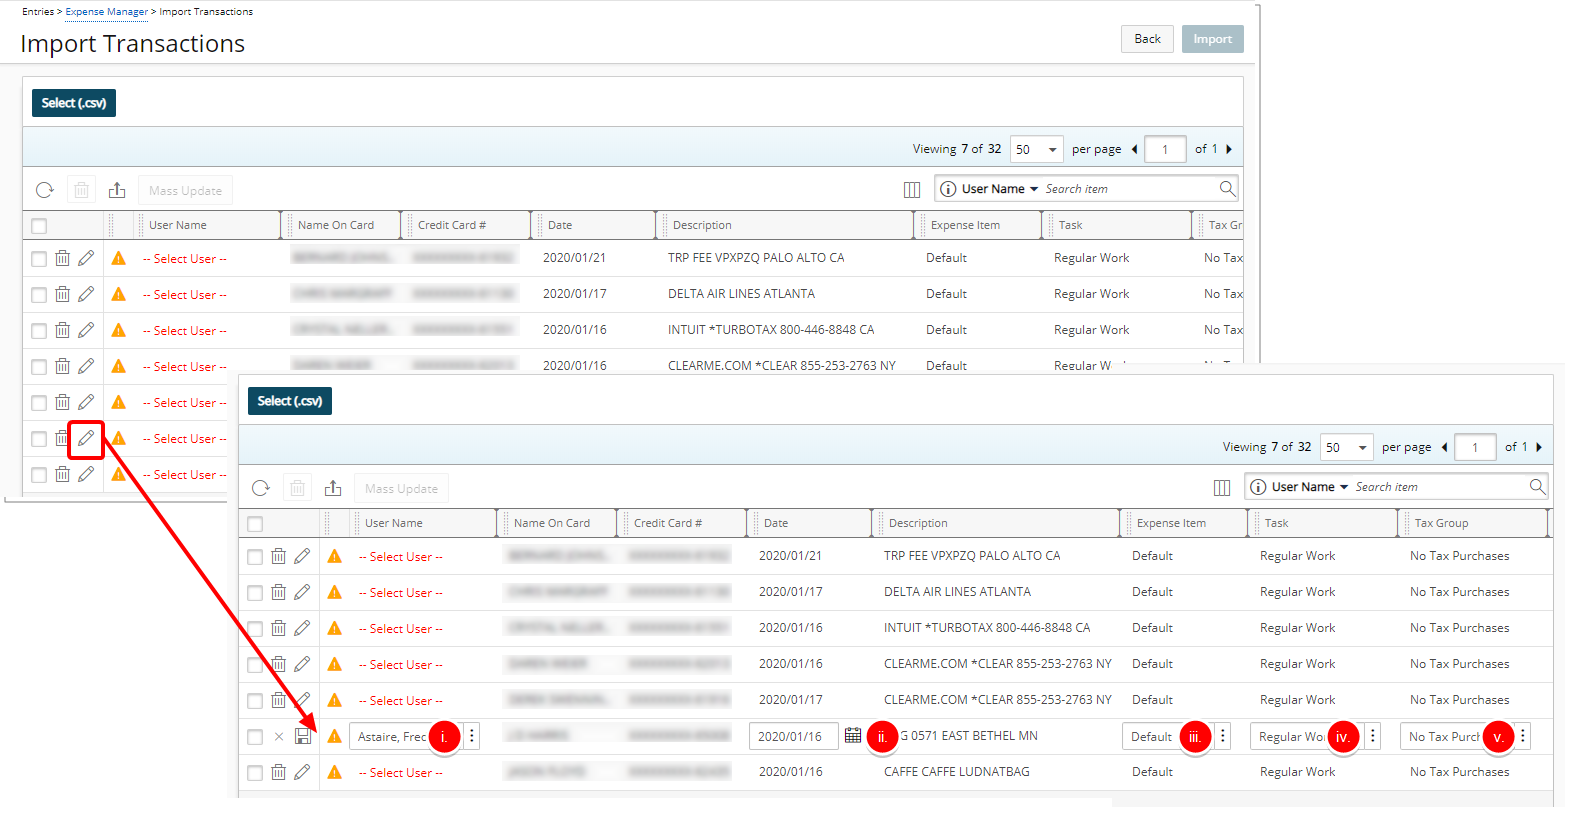
- Click the Edit button against a Transaction
- Make the necessary changes:
- Click the User Name browse button and choose the appropriate user from the User List page.
- Click the Calendar button and select a new Date.
- Click the Expense Item browse button and choose the appropriate option from the Expense Item List page.
- Click the Task browse button and choose the appropriate option from the Task List page.
- Click the Tax Group browse button and choose the appropriate option from the Tax Group List page.
- Click Save and continue to Step 5 below if your credit card is not associated to the User, otherwise go to step 6.
Note: When associating a Task to a Transaction, the Budget Restrictions set at the Project (Project List > Project edit > Planners > Budget > Associated Expense Items) or Task (Setup > Work > Tasks > Task Edit > Budget > Associated Expense Items) level(s) are taken into consideration.
- Update multiple Transactions
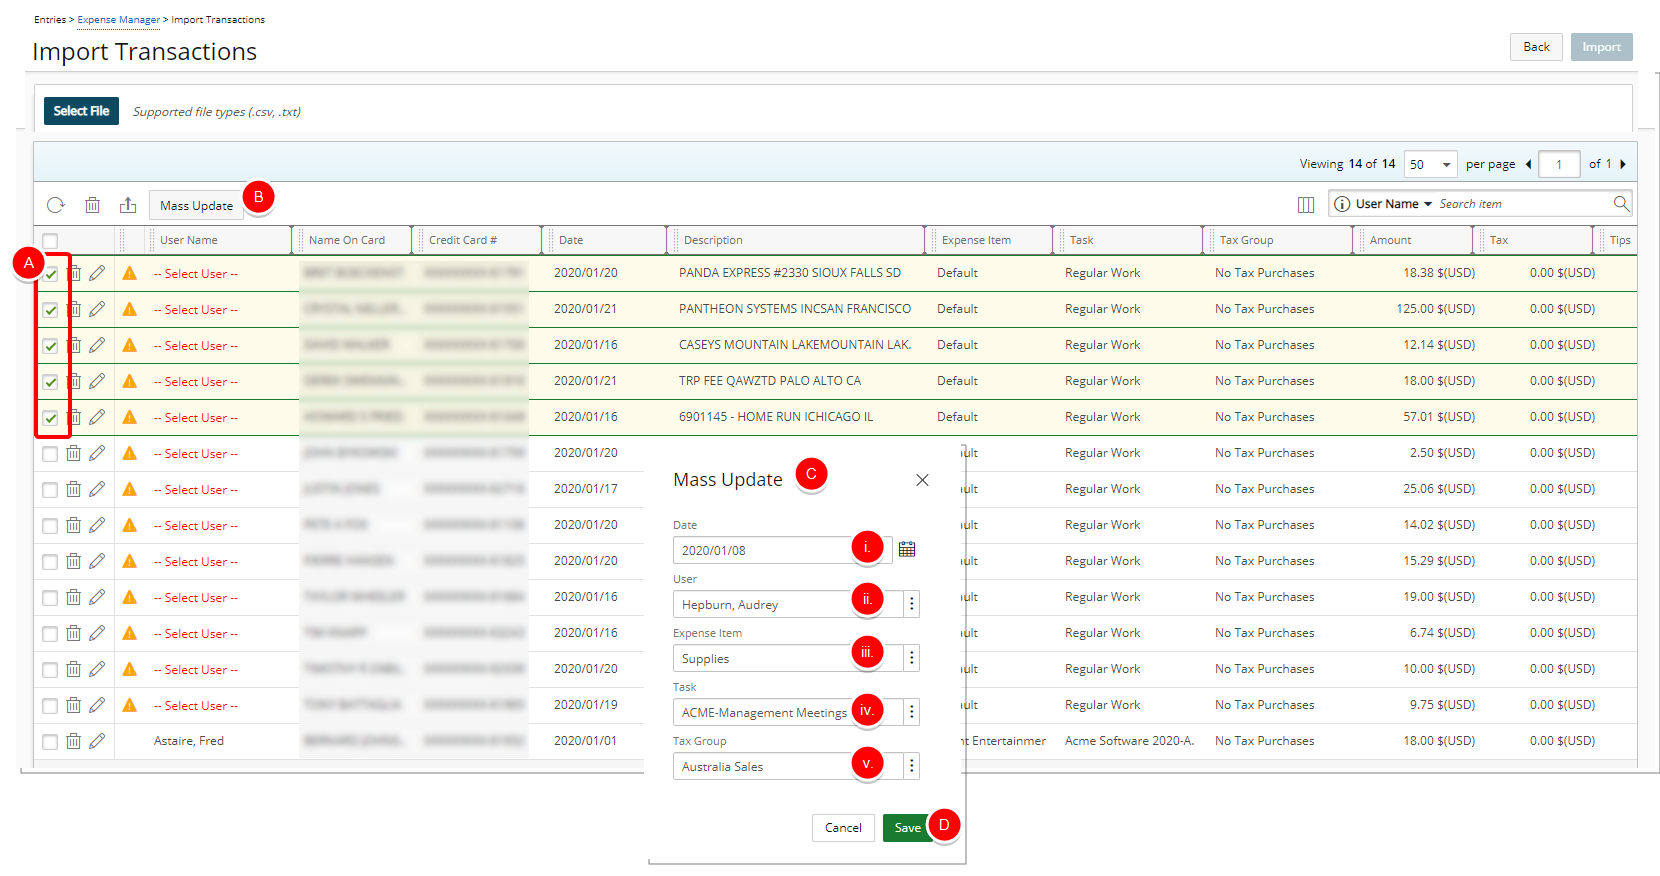
- Select Multiple Transactions.
- Click Mass Update
- Upon the Mass Update dialog box appearing, make the necessary changes:
- Click the Calendar button and select a new Date.
- Click the User browse button and choose the appropriate option from the User List page.
Note: The User name option box will only be available if the selected Transactions have the same Name On Card.
- Click the Expense Item browse button and choose the appropriate option from the Expense Item List page.
- Click the Task browse button and choose the appropriate option from the Task List page.
- Click the Tax Group browse button and choose the appropriate option from the Tax Group List page.
- Click Save and continue to Step 5 below if your credit card is not associated to the User, otherwise go to step 6.
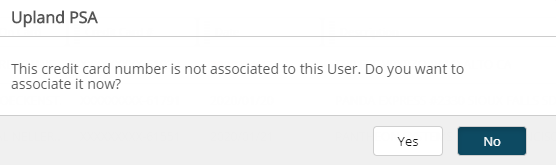
- Upon the confirmation message box displaying click Yes to associate the credit card number to the selected User. Otherwise click No.
Note: The logged user must be granted the Modify permission to Accounting in their Security Profile (Setup > Organization > System > Security > Security Profile > Setup > Financial) otherwise, the Credit Card Number will not be associated to the selected User.
- Click the Import button.
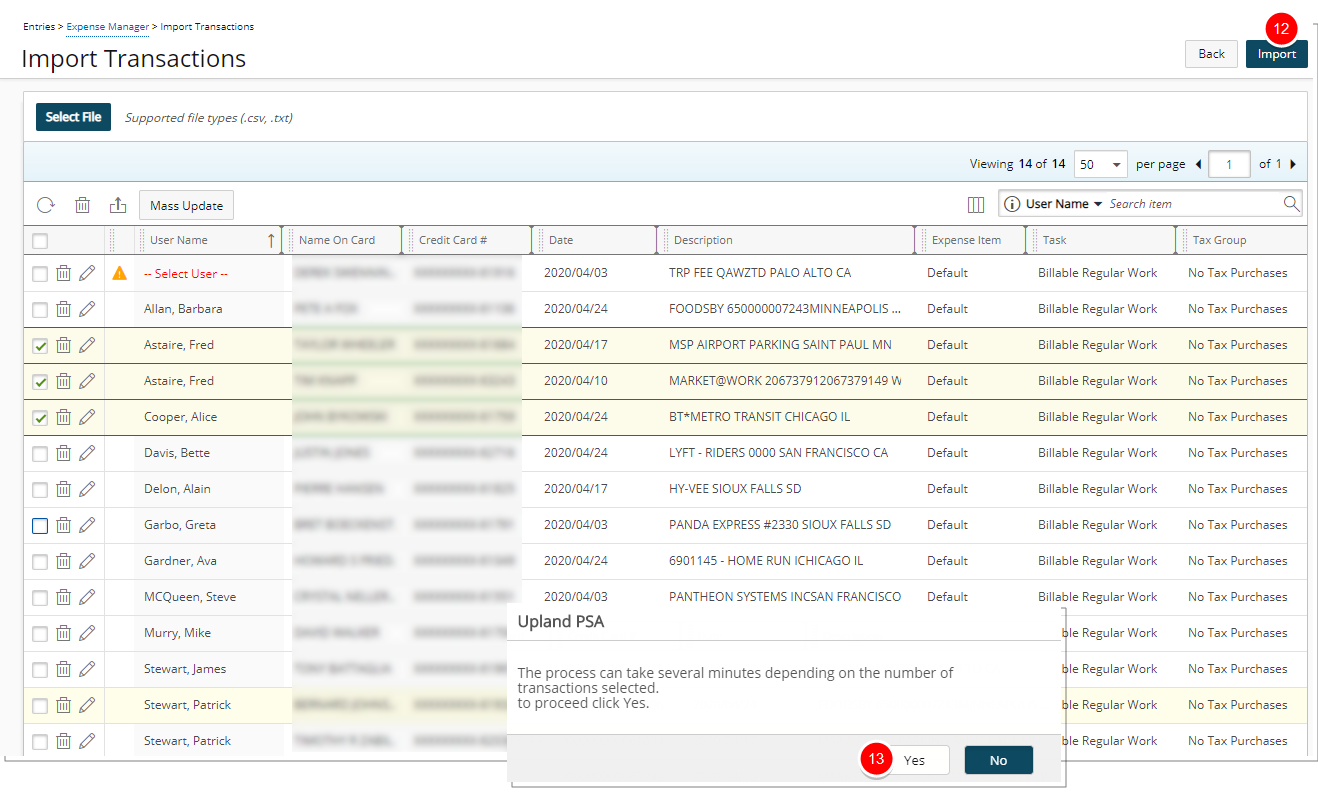
- Upon the confirmation dialog box appearing, click Yes to start the process.
Note: When importing an already imported .csv or .txt transactions file, a confirmation message is displayed informing you that the file(s) were already processed. The confirmation dialog box allows you to choose to continue, which will result in duplicated imported data or to cancel the import process.
- View the Success message bar.
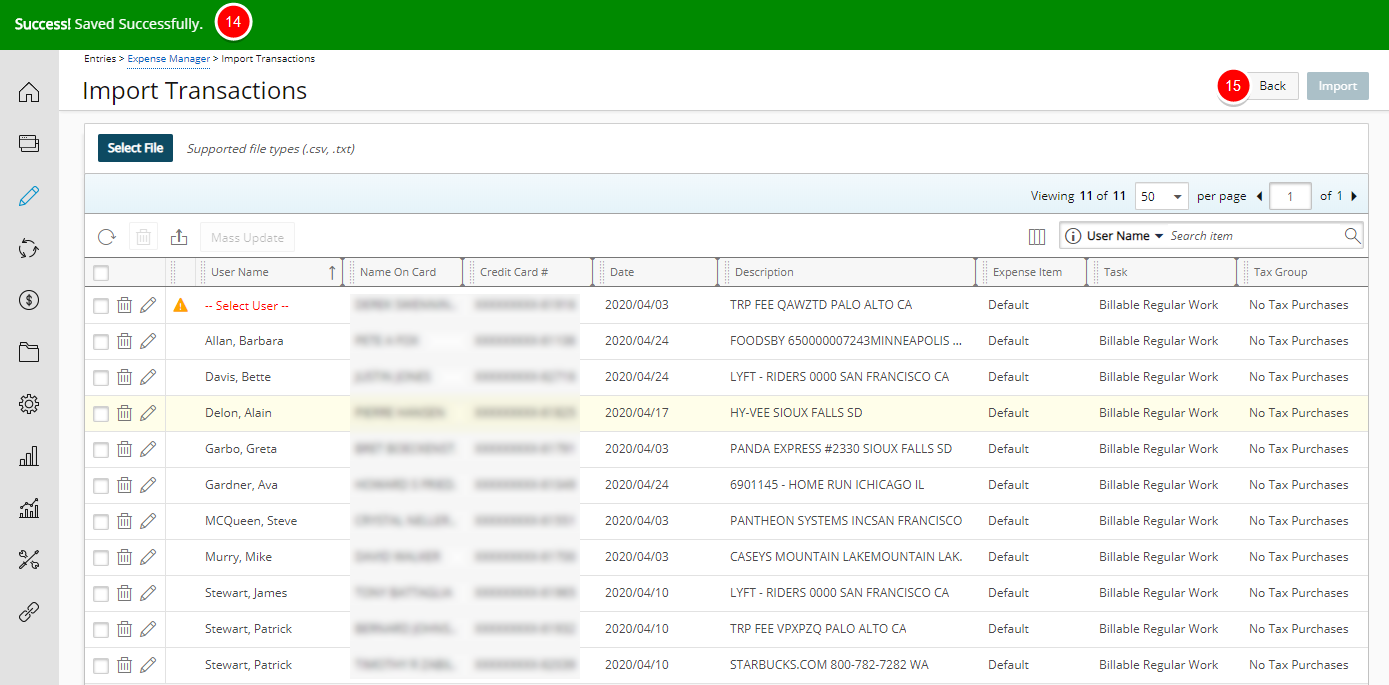
- Click Back to return to the Expense Report.
- View the Imported Transactions as Expense Reports items in your Expense Manager.

Note:
- If an Open Expense Report already existed for the selected transaction dates for a User, then that Expense Report will be updated with new Entries and no new Expense Report(s) will be created.
- If multiple Open Expense Reports with the same Period already existed, for the selected transaction dates for a User, then the earliest created Expense Report for that period will be updated with new Entries.
- If multiple User transactions are being processed in the .txt file then there will be multiple Expense Reports created per user/per period. As an example an Expense Report will be created for each month if the Expense Report Interval is set as Month.
- If the Allow only one Expense Report per cycle is selected and the User already has an Expense Report in a completed State for that period, an error message will be displayed and no transactions will be imported.
- Click one of the Expense Reports to view the details. You can now modify and add any other Expense Entries and/or details as required.
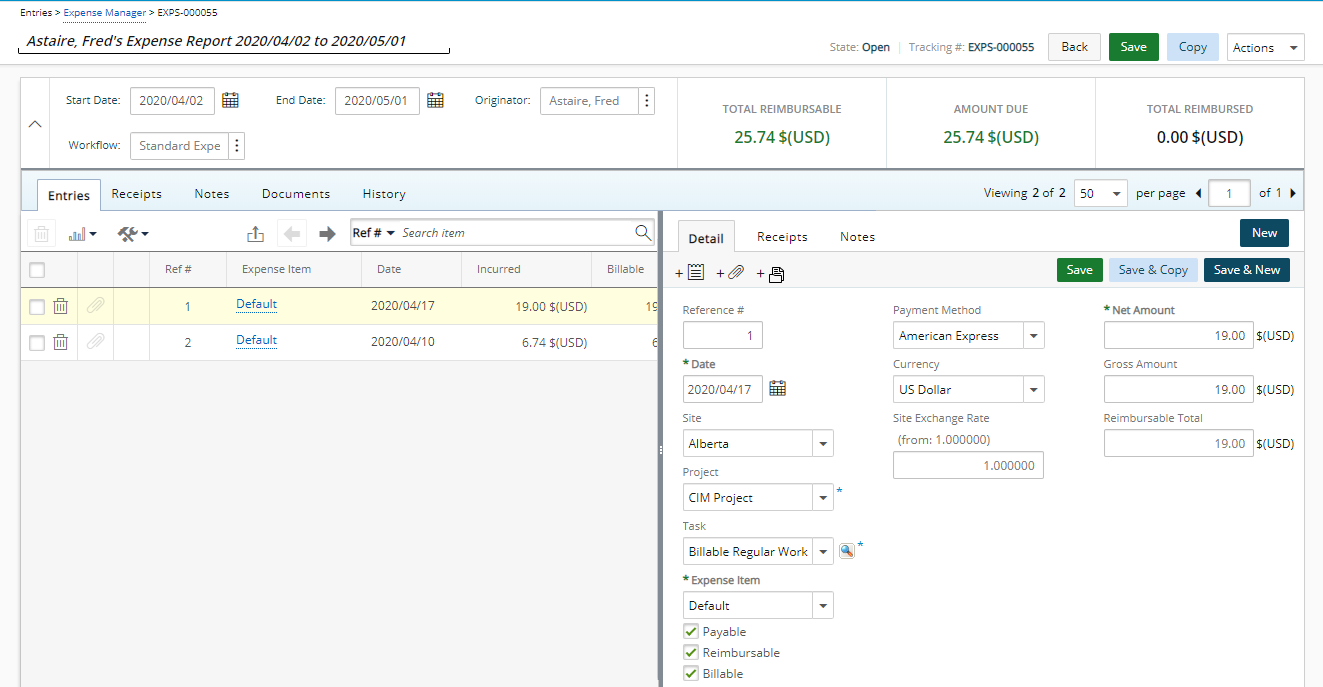
Note: In our example two Expense Entries were created in the same Expense Report for a User, as the Transaction Dates fell within the same Expense Report period.