Any encountered errors, while importing are listed on the Manage Exceptions page. The unresolved imported transactions (either through the Automation Process or by the manual importing through a .csv or .txt by the logged user) are listed and can be resolved through the Manage Exceptions page by mapping the transaction to the appropriate users, tasks, or expense items.
This article details how to access and manage transaction exceptions
Note: The Manage Exceptions and Import Transactions buttons are available only for users who have the Credit Card transaction right in their Security Profile (Setup > Organization > System > Security > Security Profile > Entry > Expense).
- From the Icon Bar click Entries
 .
. - From the Navigation Menu click Expense Manager.
- From the Expense Manager page, click the Manage Exceptions button.
- Note that some of the fields appear in Red because they have not been mapped properly.
- Click the Edit button against a transaction to update the User Name, Date, Expense Item, Task and Tax Group of a single Transaction.
- Select Multiple Transactions and click the Mass Update button to update the User Name , Date, Expense Item, Task and Tax Group of a multiple Transactions.
Note: If the selected Transactions have the same Name On Card you can also update the User Name. Otherwise the option to update the User Name will not be available on the Mass Update dialog box.
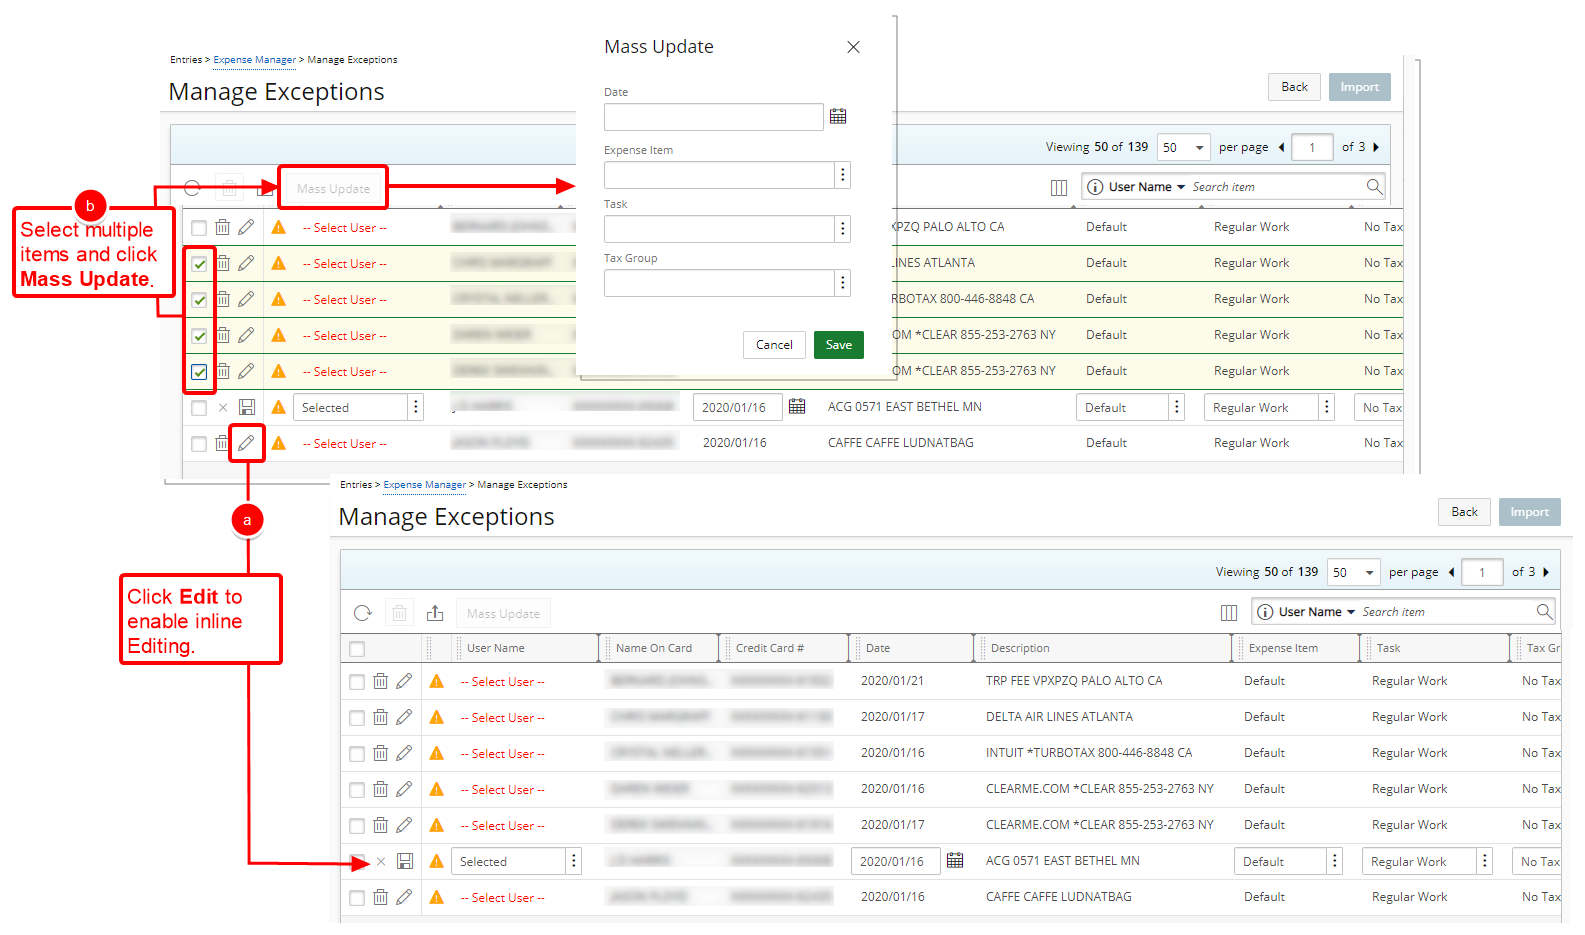
- Edit or Mass Update Transaction(s)
 Update single Transaction
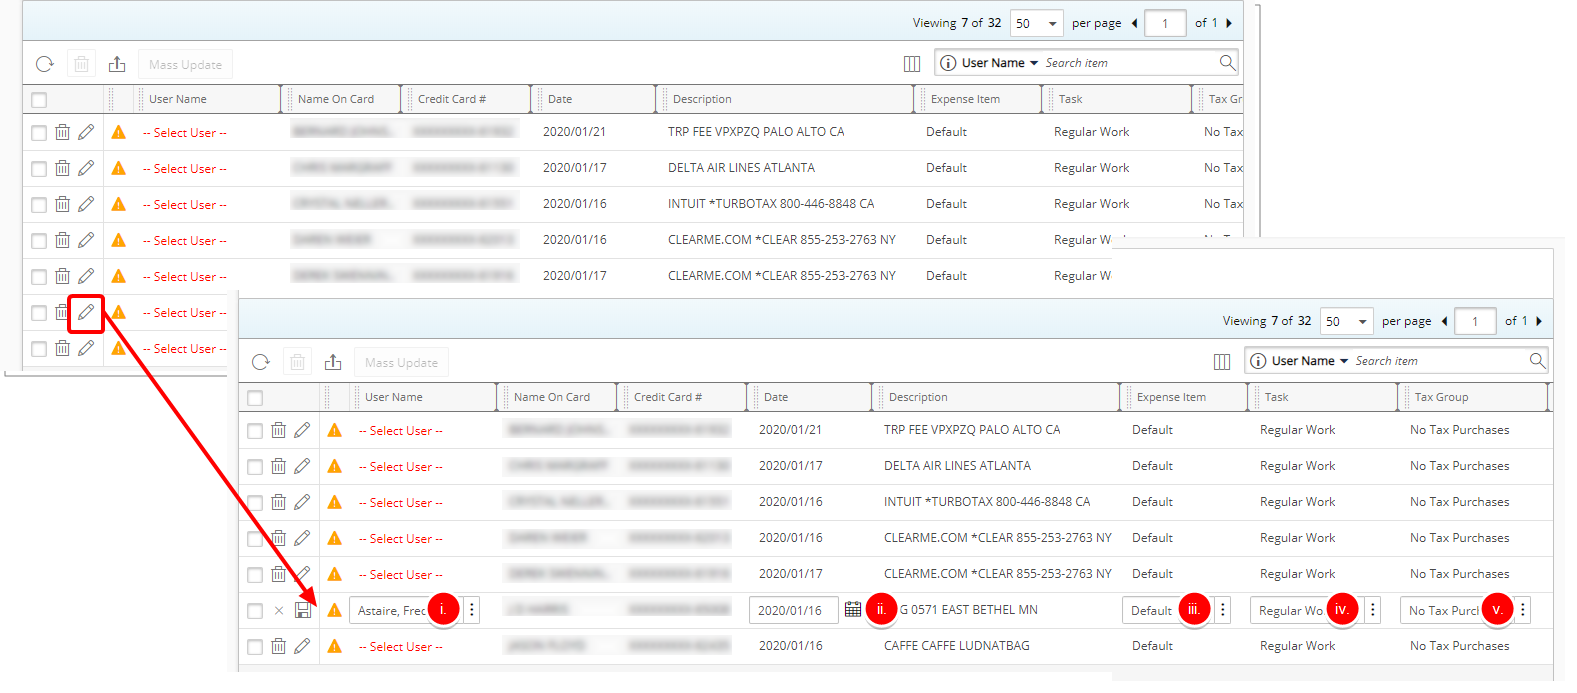
- Click the Edit button against a Transaction
- Make the necessary changes:
- Click the User Name browse button and choose the appropriate user from the User List page.
- Click the Calendar button and select a new Date.
- Click the Expense Item browse button and choose the appropriate option from the Expense Item List page.
- Click the Task browse button and choose the appropriate option from the Task List page.
- Click the Tax Group browse button and choose the appropriate option from the Tax Group List page.
- Click Save and continue to Step 4 below.
Note: When associating a Task to a Transaction, Budget Restrictions set at the Project (Project List > Project edit > Planners > Budget > Associated Expense Items) or Task (Setup > Work > Tasks > Task Edit > Budget > Associated Expense Items) level(s) are taken into consideration.
- Update multiple Transactions
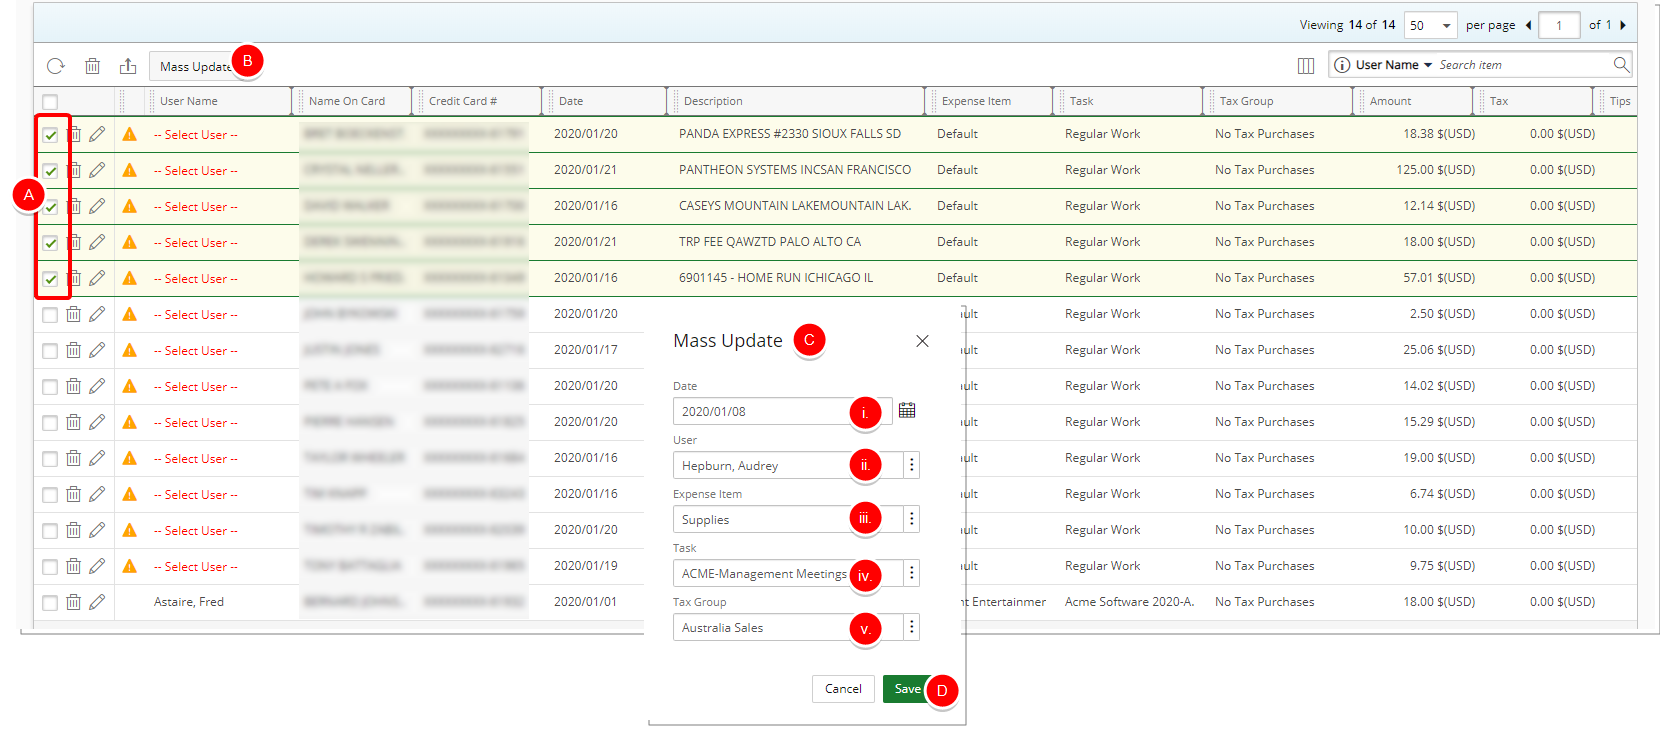
- Select Multiple Transactions.
- Click Mass Update.
- Upon the Mass Update dialog box appearing, make the necessary changes:
- Click the Calendar button and select a new Date.
- Click the User browse button and choose the appropriate option from the User List page.
Note: The User option box will only be available if the selected Transactions have the same Name On Card.
- Click the Expense Item browse button and choose the appropriate option from the Expense Item List page.
- Click the Task browse button and choose the appropriate option from the Task List page.
- Click the Tax Group browse button and choose the appropriate option from the Tax Group List page.
- Click Save and continue to Step 4 below.
- Upon the confirmation message box displaying click Yes to associate the Credit card number to with selected User. Otherwise click No.
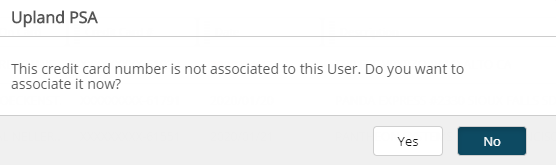
Note: The logged user must have the Change access right to the Accounting Component in their Security Profile (Setup > Organization > System > Security > Security Profile > Setup > Financial) otherwise, the Credit Card Number will not be associated to the selected User.
- The application will then verify all records for the matching criteria. If multiple matching records are found a second confirmation message will be displayed. Click Yes to associate the Credit card number to the matching records. Selecting No will update only the selected record.
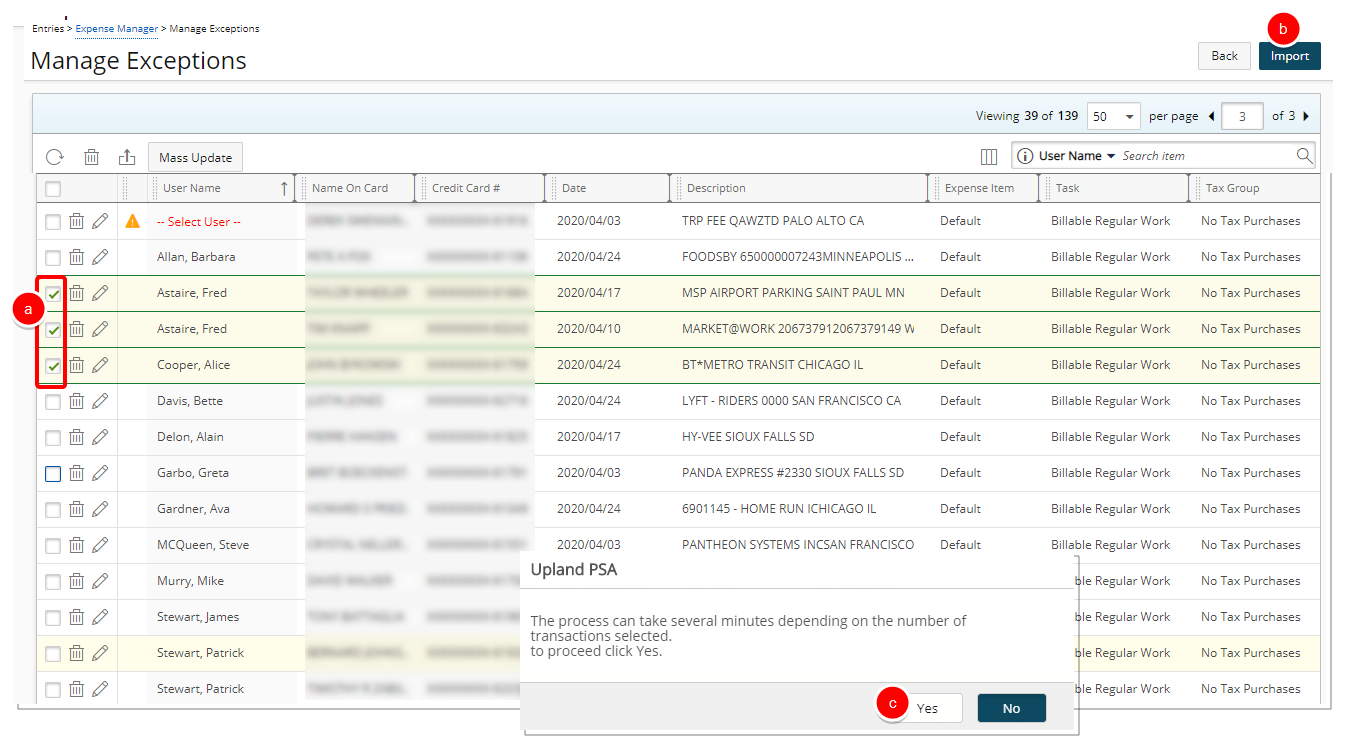
- Once the fields have been properly mapped, you can then select the required transactions and click the Import button to map these entries to the appropriate Expense Reports.
- Select The Transactions to import.
- Click the Import button.
- Upon the confirmation dialog box appearing, click Yes to start the process.
- View the Success message bar.
- Click Back to return to the Expense Report.

-
View the Imported Transactions as Expense Reports items in your Expense Manager.

Note: If an Expense Report already existed for the selected transaction dates for a User, then that Expense Report will be updated with new Entries and no new Expense Report will be created.
- Click one of the Expense Reports to view the details.
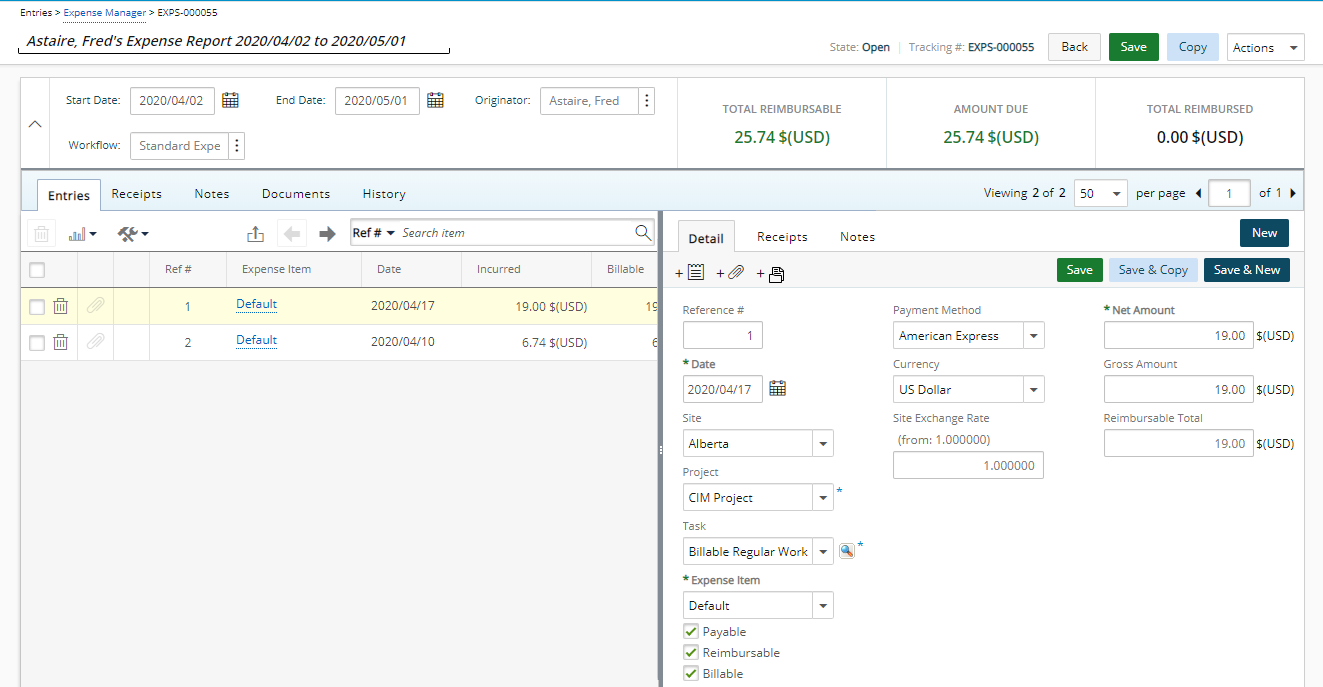
Note: In our example two Expense Entries were created in the same Expense Report for a User as the Transaction Dates fell within the Expense Report period.