On-Page/Run Time Filter conditions can be applied to the Work Item Manager View allowing you to narrow your list so that you retrieve just the right amount of information you need.
This article details how to apply an On-Page/Run Time Filter on a Work Item Manager View.
The process and steps of applying a run-time Filter on any View is the same. However, the Fields available in each View may differ. The list of Filters available in each View are listed in Available Filter criteria - Work Item Manager Views.
Note: On-Page/Run Time Filters applied to the Work Item Manager View are exclusively available to the User creating them and applied upon subsequent visits by the same User across all browsers.
- From the Icon Bar click Entries
 .
. - From the Navigation Menu click Work Item Manager.
- Select the View you wish to filter. For the purpose of this article we are going to apply a nested run-time Filter on the All Work Items View.
- Click Filter
 .
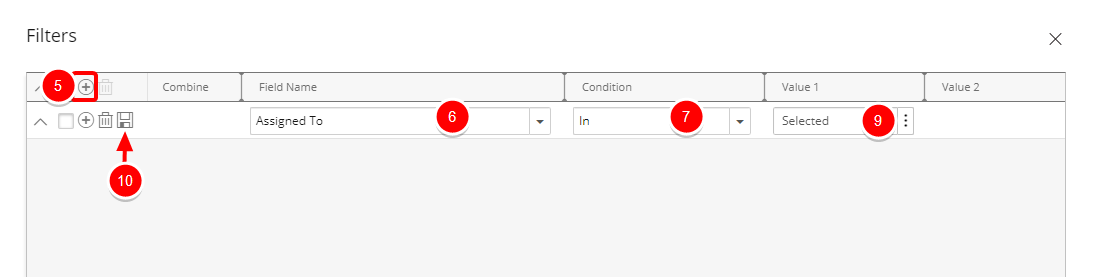
. - From the Filters dialog box. Click the New
 button located on the table header. Note that a new line item will be added to the table.
Tip: You can move the Filter dialog box to a new position. Simply move your mouse to the header area. When your mouse pointer turns onto a move pointer
 , click and drag the dialog box to its new position.
 - From the Field Name selection box select the required Filter criteria.
- Depending on your chosen Field in step 6 above, the Conditions may vary and will have one of the following options:
- In and Not In
- =, <>, Like, Not Like, In and Not In
- =, <>, >=, <=, <, >, Between and Not Between
- The Value 1 and Value 2 options are dependent on the chosen Field and Conditions. You may have to either:
- Click the ellipsis button and select the Value from a list
Or - Enter a value for Value 1/Value 2.
- Click the ellipsis button and select the Value from a list
- For the purpose of this article we are going to choose the Assigned To Field, select the In Condition and choose a User from the User List.
Note: A tool tip is available when hovering over a Selected Value1/Value2 box. Each Selected Value is separated by a dash and a maximum of three lines are displayed. Clicking the Show More… link within this tool tip will open the corresponding List page where you can view your selections.
- Click Save
 .
.Note: If more then one Filter is added each Filter line item must to be saved, otherwise the changes will be lost upon exit.
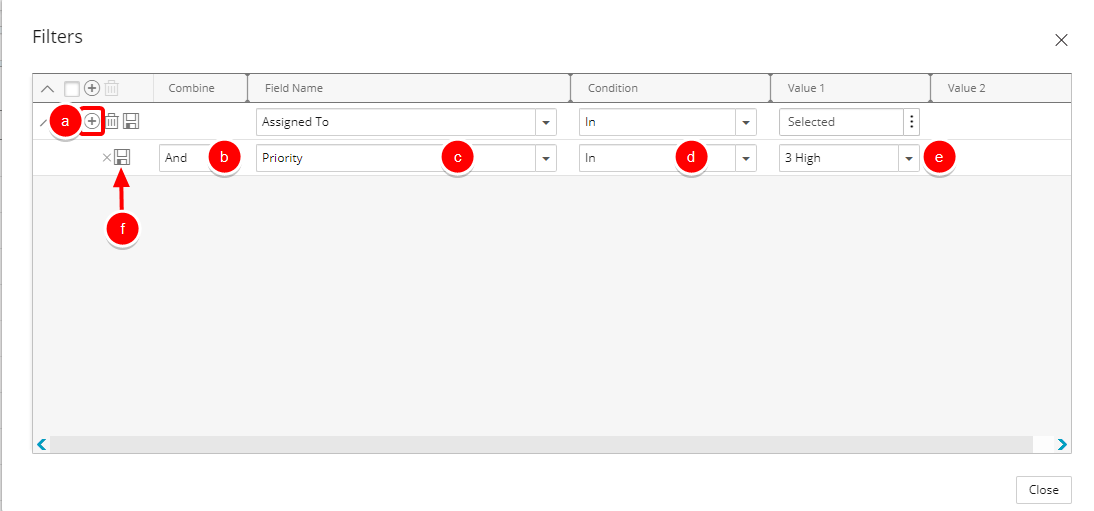
- You can either add a nested Filter which will allow you to Combine with and And/Or condition by following these steps:
- Click the Add button located against the Filter you just saved. A new nested Filter will be added on a new line below your existing Filter.
- From the Combine selection box choose wither And/Or option.
- Select the desired field you want to use in the Field Name.
- Select the desired Condition from the available Condition options.
- If applicable select the desired Value from the available Value 1 and Value 2 options.
Click Save
.
- Click the Add
- Or create another Filter by following the Steps 5-9 above.
- Click Close to return to the Work Item Manager Page.
- View filtered Work Item Manager page.

Note: When an on-page filter is applied in the Work Item Manager, the Filter button changes appearance — the button background turns blue, and the icon itself becomes white (
 ) — indicating that a filter is currently active.