Save a Booking and Create a New One Immediately
This article covers saving a new booking and immediately creating a new one in the Add Booking dialog box.
Note: The pages and/or format in which the page(s) is/are shown in this article may differ from yours as your organization may have required a different set up altogether, or you may have different rights granted to you.
- Depending on your organizational role and rights granted to you, you can access the Work Plan through one of any or one of the avenues, each of which are illustrated in Accessing the Work Plans.
- Upon the Work Plan displaying click New and select Booking from the available options.
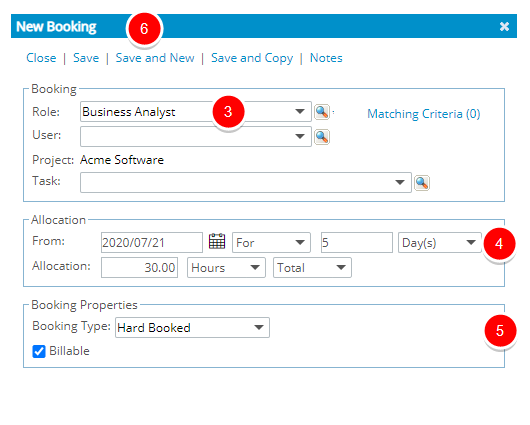
- Upon the New Booking dialog box displaying, select a Role.
- Select a User (optional).
- Select a Task (optional)
- Select or enter the appropriate values in the Allocation section.
- If required modify the default selection made for Booking Type.
- Select appropriate Booking Attribute(s).
- If needed, navigate to the Notes tab.
- Click the Show Formatting Options
 button to access the Rich Text editor to format your Note.
 - Select the required Note Type.
- Enter the required note in the text field and format it as needed using the available options in the Rich Text Editor.
Note: If Enable Mentioning in Comments & Notes is turned on in System Configuration, you can mention team members using @ notation. A placeholder message—“Type @ to mention and to notify someone”—appears next to the cursor as guidance.
- Click Send
 to save the note and send notifications to mentioned users. You can add additional notes by repeating steps 5 and 6 as needed, or edit or delete a saved note.
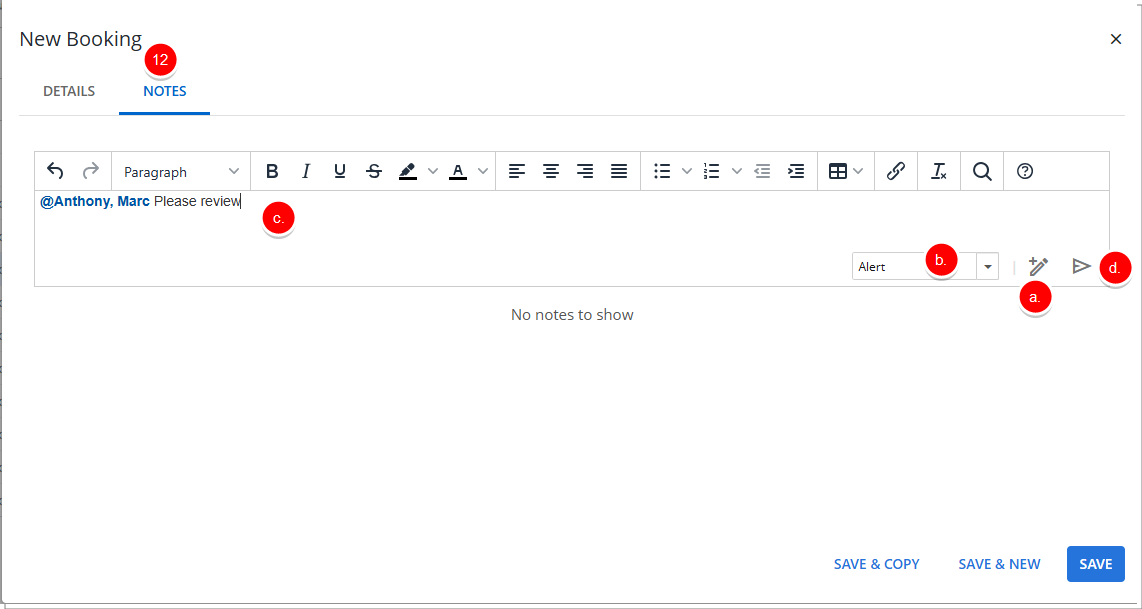
- Click the Show Formatting Options
- Click Save and New to save the Booking and reset the dialog box to create a new one.
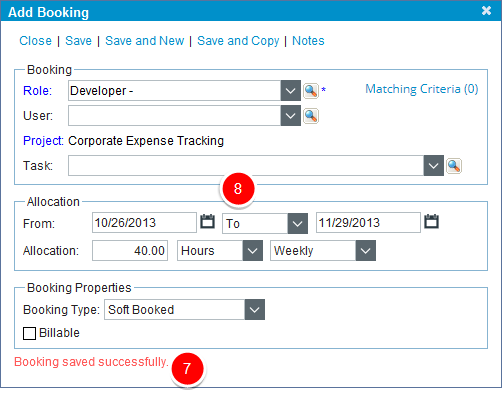
- You can now proceed with steps 3-8 to create a new Booking.