This article provides detailed instructions on how to allocate time and configure booking properties when adding a new booking. These steps ensure that the booking aligns with your project requirements, enabling accurate resource planning and efficient project management.
- From the Work Plan, click New and then select Booking.
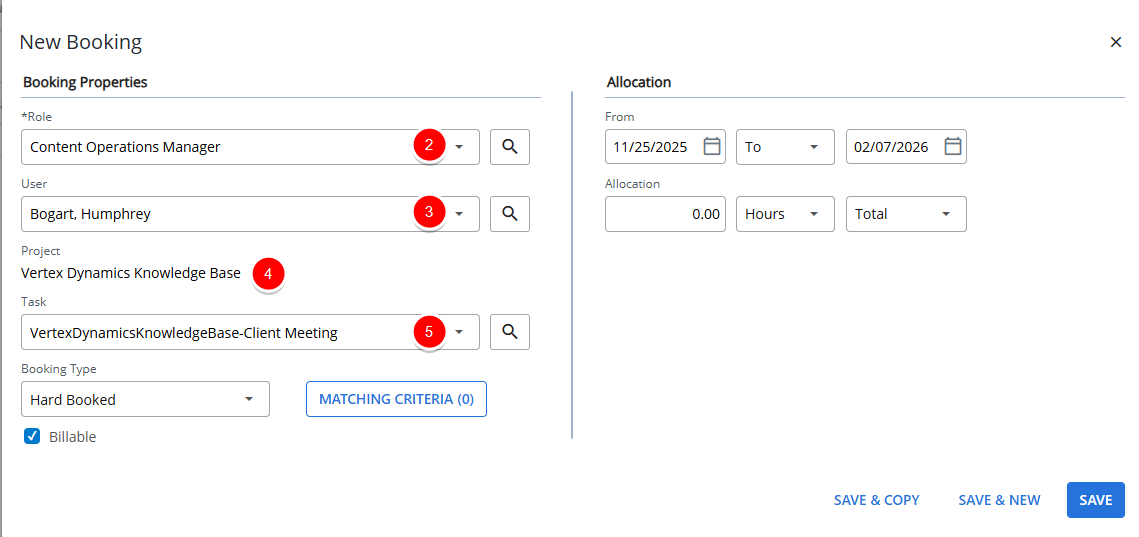
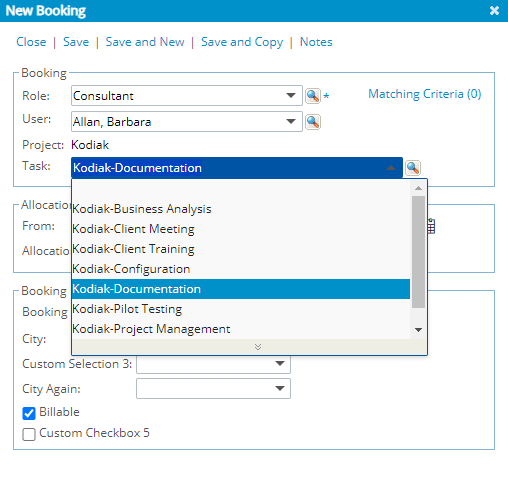
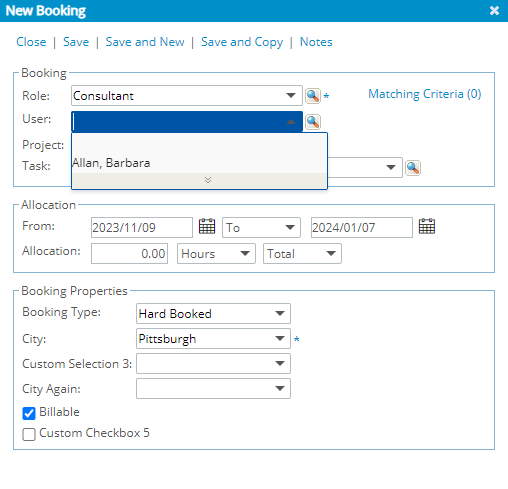
- Upon the New Booking dialog box displaying, select a Role.
- If applicable, enter or select a user from the User selection box.
- If applicable, enter or select a project from the Project selection box.
Note: When using the Project Work Plan, the Project field is pre-filled with the project currently being viewed and is read-only.
- If applicable, enter or select a task from the Task list.
The Task selection box will only be displayed if it is configured in the Booking Attributes Setup page. By default, the Task selection box displays only current tasks (with an End date of today or in the future).
Note: If you want to view all Tasks, excluding suspended ones, you can check the Show All Tasks option in the Task List dialog box while browsing for a Task. Once selected, all non-suspended tasks will appear in both the Task selection box and the Task List dialog box. Your selection will be remembered across all Work Plans and Views for the same browser, so you won’t need to adjust it repeatedly.
- Within the Allocation section, set the Allocation period dates:
- Based on From/To:
- In the From box, enter a date. An alternative is to click the Calendar
 button to the right of the From box and select a date.
 - In the To date box, enter a date. An alternative is to click the Calendar button to the right of the date box and select a date.

Note: The Allocation End Date automatically sets to the earlier of the Task End Date or the Resource's Offboarding Date.
 Example 1: Allocation End Date = Resource Offboarding Date
If a Task ends August 31 but your Offboarding Date is August 30, the Allocation End Date is set to August 30. This ensures the Booking does not extend beyond your availability.
Example 2: Allocation End Date = Task End Date
If a Task ends on August 25 and your Offboarding Date is August 30, the Allocation End Date is set to August 25. This ensures the Booking does not extend beyond the task itself.
- In the From box, enter a date. An alternative is to click the Calendar
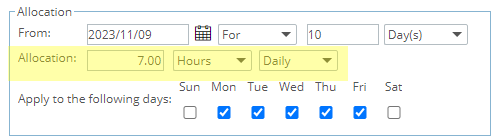
- Based on From/For:
- To the right of the From calendar button, click the To list and select For.
- Click the Day(s) list and select a period, Day(s), Week(s) or Month(s).
- In the box to the left of the period option, enter the corresponding value.

- Based on From/To:
- Set the Allocation:
- Click the Hours list and select the required unit:
- Hours: Specify the exact amount of time required
- FTE: (Full Time Equivalent) Represents the proportion of a full-time workload assigned to the booking. Use the FTE field to allocate time based on a fraction of a standard full-time schedule.
- In the box to the left of the unit option, enter the corresponding Allocation value.
- Click the list and select the applicable allocation intervals for the booking. The available options are:
- Total
- Daily. When Daily is selected you can select the specific weekdays. The Allocation Hours will be distributed and applied to the selected days.
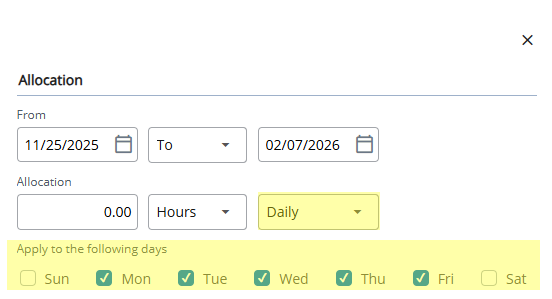
Note: The default selected weekdays are set within the Default Work Days section of the Workforce Planning System page (Setup > Workforce Planning > System).
- Weekly
- Monthly
- Click the Booking Type list and select either Hard Booked or Soft Booked.
- If applicable, select appropriate Booking Attribute(s).
- Click Save to save the booking, and automatically close the Add Booking dialog box and return to the Work Plan.
Tip: The saved booking line is highlighted in light blue for a few seconds. The highlight then fades back to the normal background color. This helps you quickly spot the booking.