Applying a Filter to the Project List
In project management, effectively navigating a long list of projects can be challenging without the proper tools. Applying a Filter to the Project List streamlines the process, allowing managersto quickly locate and focus on specific projects based on various criteria. This feature enhances efficiency, ensures better organization, and supports more informed decision-making by presenting only the most relevant information.
Note: For any Views that are set as Public; the Filter button within the Project List is available to those with the Modify right to the Public Project View permission. Note that the Public Project View permission allows user to modify and manage any Project Views that are Public. Applying a Filter to a Public Project View will also filter the View for all Users with the View permission to Public Project View.
This article details how to apply a Filter to the Project List.
- From the Icon Bar click Project List
 .
. - Click Filter
 to open the Filters dialog box.
 Caution: Applying a Filter to a Public Project View will also filter the View for all Users with the View permission to Public Project View.
- In the Filters dialog box click the Add
 button to add a new line item for the Filter you wish to create.
 - Select the required Filter Criteria from the lists. For further details refer to Available Filter Options.

Tip: You can move the Filter dialog box to a new position. Simply move your mouse to the header area, when your mouse pointer turns onto a move pointer
 , click and drag the dialog box to its new position.
 - Click Save
 .
. Note: If more then one Filter is added each Filter line item needs to be saved, otherwise the changes will be lost upon exit.
Tip: Additionally you can add a nested Filter which will allow for more complex filtering conditions. To learn more about nested Filters proceed to step 6 below.
- You can opt to add nested Filters which allow for more complex filtering conditions. To add a nested Filter:
- Click the New button located on the left of your existing Filter.
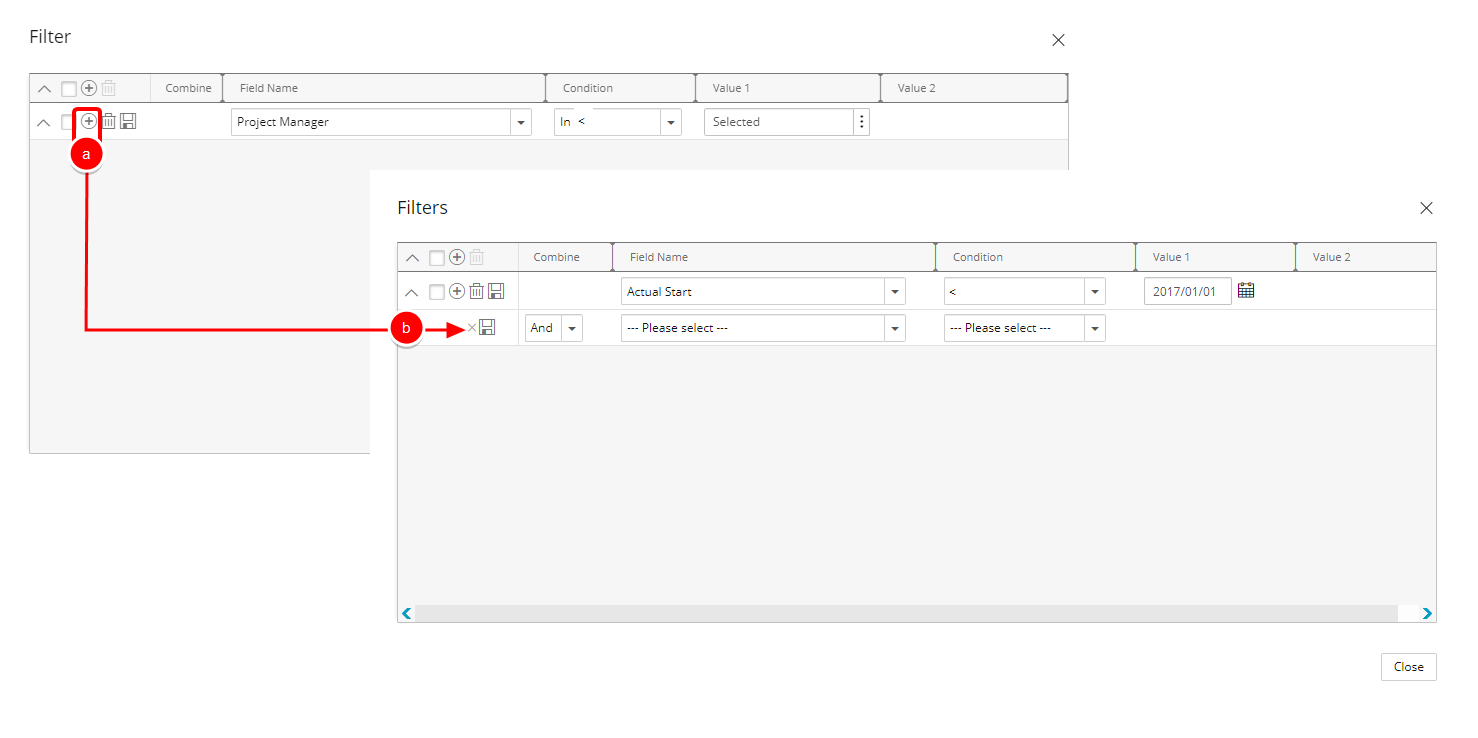
- A new nested Filter will be added on a new line below your existing Filter.
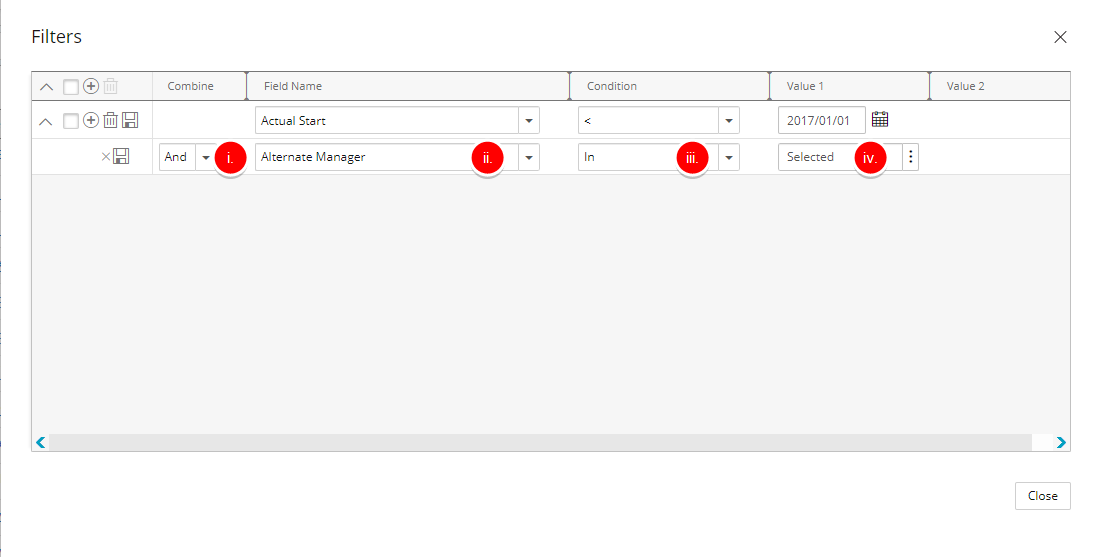
- Make a selection from the available Combine options: And, Or
- Select the desired field you want to use in the Field Name.
- Select the desired Condition from the available Condition options.
- If applicable select the desired Value from the available Value 1 and Value 2options.
Note: A tool tip is available when hovering over a Selected Value1/Value2 box. Each Selected Value is separated by a dash and a maximum of three lines are displayed. Clicking the Show More… link within this tool tip will open the corresponding List page where you can view your selections.
- Repeat steps 6 to add more nested Filters as required.
- Click Save .
- Click the New
- Click Close
 to return to the Project List page.
 - View filtered Project List page.
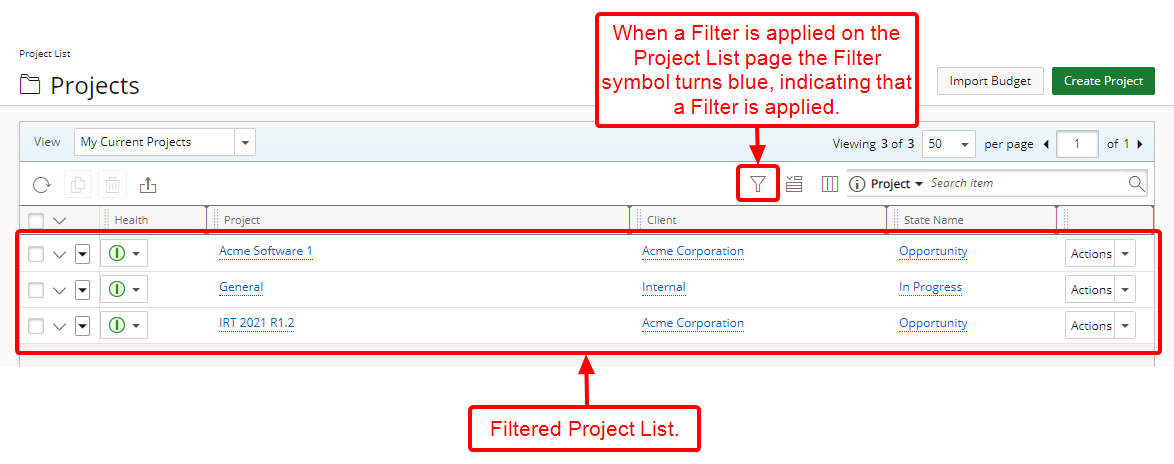
Note: When an on-page filter is applied in the Project List, the Filter button changes appearance — the button background turns blue, and the icon itself becomes white (
 ) — indicating that a filter is currently active.
For further details refer to: