Copying a project
The option Copy into existing Project allows you to choose a Project to copy into.
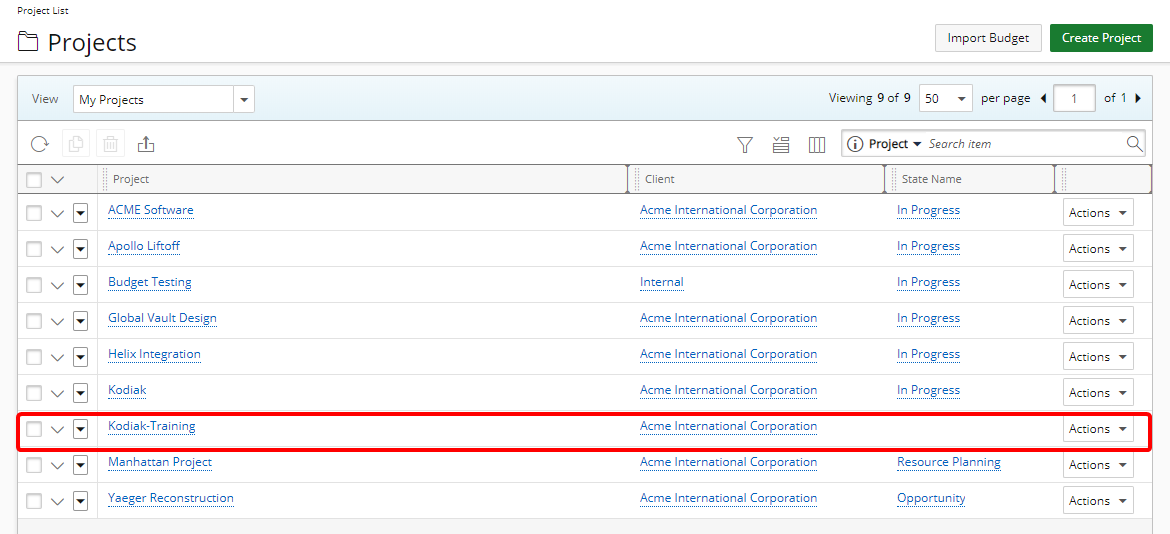
This article details how to Copy into a new Project from the Project List page.
Caution: To create a Project by copying an existing one you must have the Create right to Project (Setup > Organization > System > Security > Security Profile > Setup > Work).
- From the Icon Bar click Project List
 .
. - You can copy a project either by clicking the Copy
 button or by clicking the Copy option located within the Project context menu. For more information see steps 2.a and 2.b.
 Click the Copy button
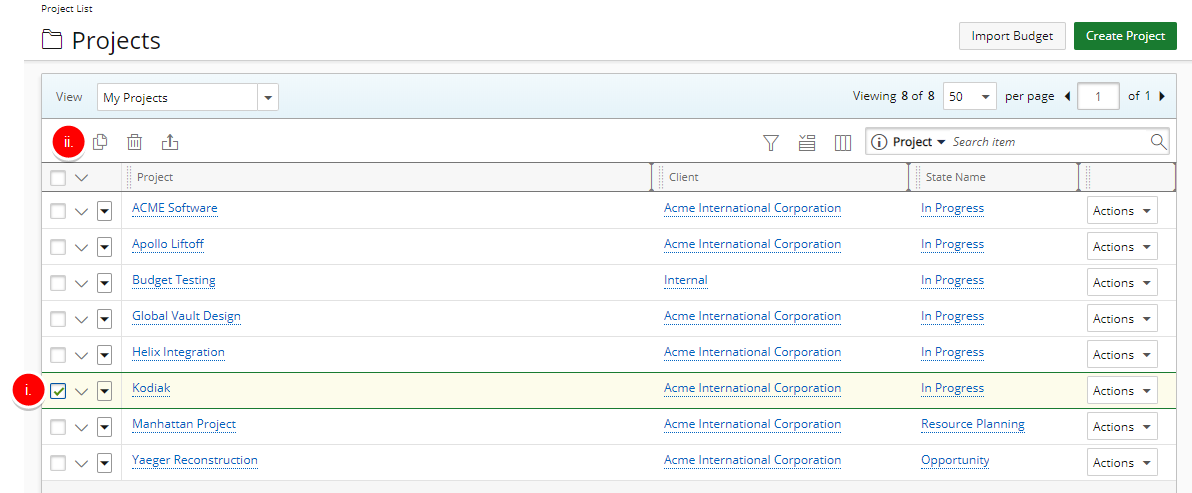
- Select the box to the left of the Project you wish to copy.
- Upon selecting a Project, the Project Copy button becomes available. Click it to copy the project
Note: Only one Project can be copied at a given time. If multiple Projects are selected the Copy
button remains unavailable.- Click Copy option
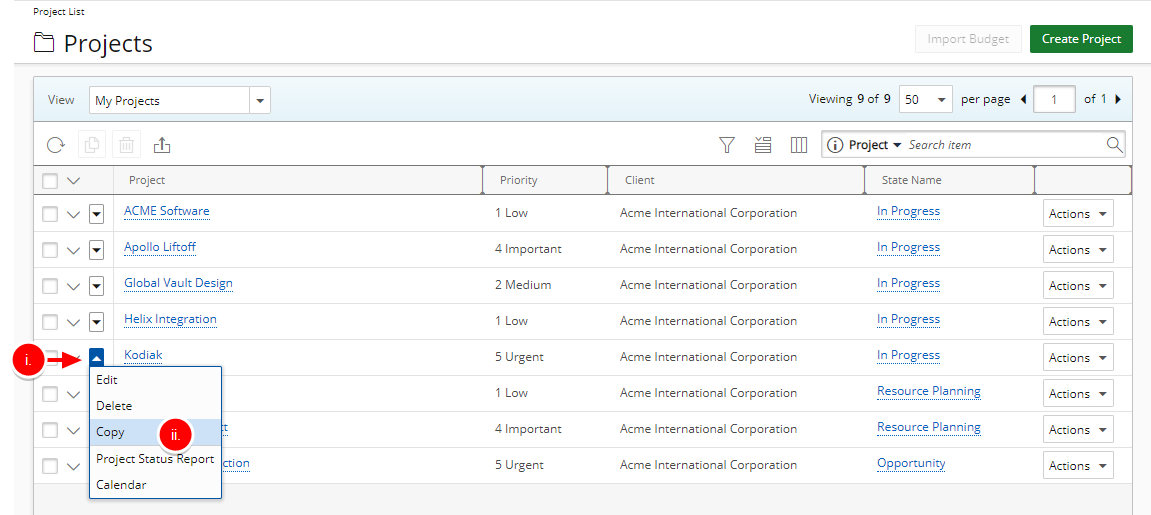
- Click the Project context menu button to expand it.
- From the available options click Copy.
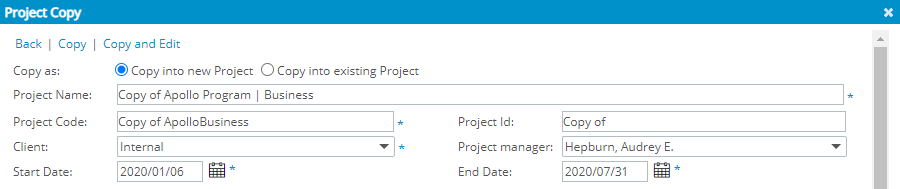
- In the Project Copy dialog box, select Copy into new Project.
- Then make the desired changes in the respective boxes:
- Project Name *: Enter the project name.
- Project Code *: Enter a prefix, no longer than 32 characters, that is to be assigned to all tasks associated with the project.
- Project Id: Enter a unique identifier assigned to the project (optional).
- Client *: Click the browse button to select the client, from the Client List page, to be associated with the project.
- Project Manager: Click the browse button to select the manager, from the User List page, to be assigned to the project.
- Start date *: Click the date picker to select the date that work on the project is to begin.
- End date *: Click the calendar icon to select the date of the last day of work on the project: if set up by the administrator, the system automatically suspends all project-related tasks after the end date is reached
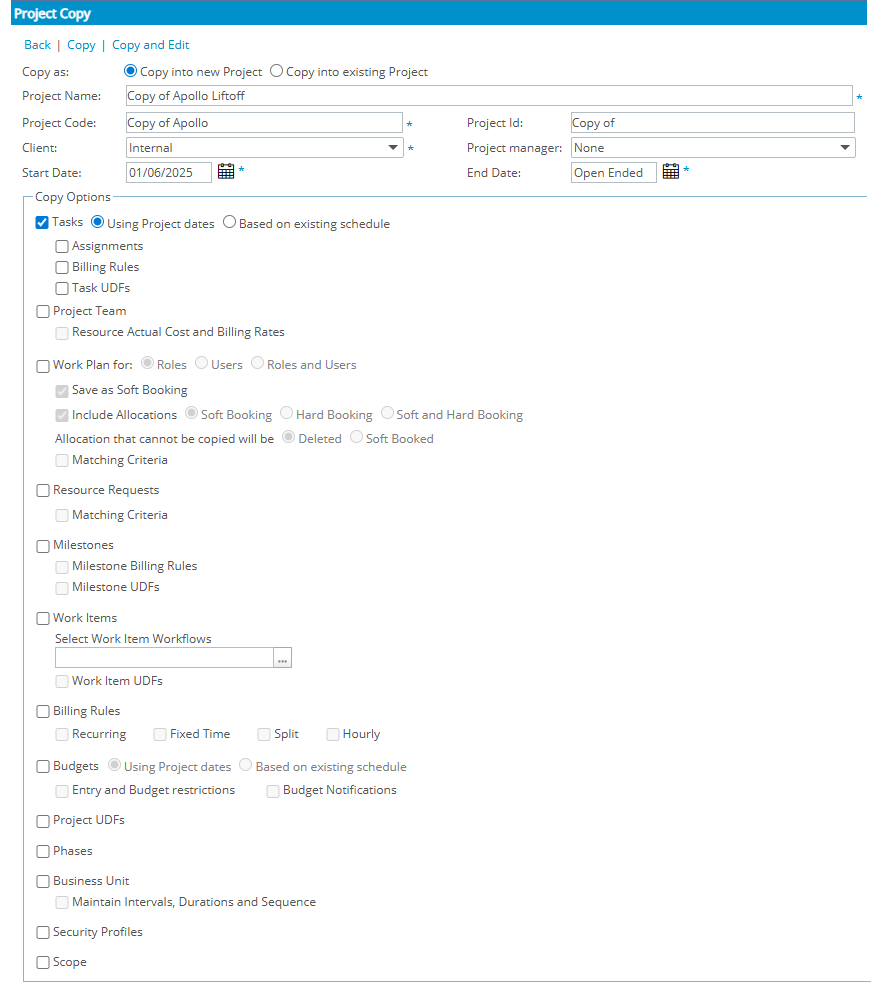
- The individual Copy Options will be available to you provided you have the Create right to the object.
As an example, if you do not have the Create right to Tasks, then the Tasks selection box will be unavailable to you.
Within the Copy Options section make your selections amongst the available options to:- Copy Tasks: when selected, you have the option to also copy:
- Assignments
- Billing Rules either Using Project Dates or Based on existing schedule.
Task UDFs
Note: When copying a Project, the Task names in the newly created Project adhere to the following format: NewlyCreatedProjectCode + <separator> + SourceTaskName.
These newly created Task names remain unaffected by any selected option for Default Task Name (Setup > Organization > System Setup > Task Preferences).
- Copy Project Team: when selected, you can also choose to copy the Resource Actual Cost and Billing Rates.
- Copy Work Plan for Roles, Users, or Roles and Users: You can then choose to:
- Save and Soft Booking
- Include Allocations and then select Soft Booking, Hard Booking or Soft and Hard Booking
- For Allocations that cannot be copied will be option choose either Deleted or Soft Booked.
- Select to copy the Matching Criteria.
Caution: Resource Requests are not copied when choosing to copy the Work Plan.
- Copy Resource Requests: When selecting to copy Resource Requests you can also Copy Task Attribute if you have chosen to Copy Tasks.
- Copy Milestones: When selected, you have the option to copy:
- Milestone Billing Rules.
Milestone UDFs
- Copy Work Items: When selected, you have the option to:
- Select the required Work Item Workflows.
- Copy Work Item UDFs
- Copy Billing Rules: When selected, you have the option to copy the Recurring, Fixed Time, Split and/or Hourly rules.
- Copy Budgets: Select to copy Budgets Using Project dates or Based on existing schedule. You have the option to also Copy Entry and Budget restrictions as well as Budget Notifications.
- Copy Project UDFs: When selected all associated User Defined Field values will be copied.
- Copy Phases: When selected all associated Phase(s) will be copied.
- Copy Business Units: When selected, you can also choose to Maintain Intervals, Durations and Sequence.
- Copy Security Profiles: When selected all associated Security Profiles will be copied.
- Copy Scope: When selected all associated Scope will be copied.
- Copy Tasks: when selected, you have the option to also copy:
-
Click Copy.
Tip: Click Copy and Edit to immediately edit the newly created project. For more information click here.
- View the copied project in the Project List page.
For further details refer to: