Importing Budget via Excel Spreadsheet
You can streamline project budget setup by importing budget data directly from an Excel file. This is especially useful for large or complex budgets that have already been prepared offline. The following steps guide you through accessing the Import Budget page, selecting your file, and initiating the import process. As the file is processed, you can monitor the progress in real time through the Import Status box.
Note: To ensure optimal performance and minimize the risk of timeouts or errors, it is recommended that Budget Import file be limited to 200 rows or fewer. If your dataset exceeds this, consider splitting the file into smaller batches before importing.
Caution: Importing multiple Baselines through the Budget Import functionality is not currently supported. If your Budget Import Template includes Baseline values, these will overwrite any existing baselines and automatically become the Active Baseline. As a result, all previously stored baselines will be deleted during the import process, and the imported baseline will be set as the new Active Baseline by default.
- From the Icon Bar click Project List
 .
. - Upon the Project List page displaying, click the Import Budget button to open the Import Budget page.
- Click the Ellipsis [...] button to open the Choose File to Upload dialog box, then select the Excel budget file to upload.
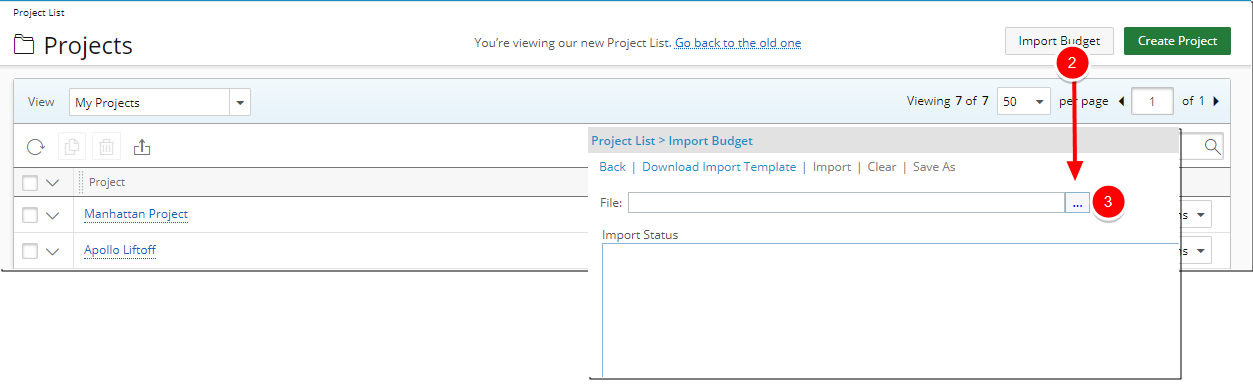
Note: The Import link is disabled until a file is selected.
- Click the Import link and then click Yes when the message The loading process can take several minutes, depending on the number of Excel transactions. To proceed click Yes is displayed.
Note: When the import process is initiated, the status of the imported file is displayed in the Import Status box. To clear or save the import status information displayed in the Import Status box, click the Clear or the Save As link respectively.