Through the Synchronize Integrations Automation Service, Any newly created Functional Groups and Security Profiles can be mapped to Upland Analytics User Roles. The newly added Synchronize Integrations Automation Service is enabled by default and synchronizes updates the information within UA when Security Profiles and Groups are created, updated (names and placeholder) or deleted within PSA.
This functionality facilitates the use of Upland Analytics and the sharing of Reports and Dashboards with Functional Groups and Security Profiles.
This article details how to access and run the Synchronize Integrations Automation Service.
Note: You must Execute the Synchronize Integrations Automation Service manually after the creation of new Security Profile(s)/Functional Group(s) to map them to Upland Analytics Role(s). Otherwise, the newly created Security Profile(s)/Functional Group(s) will only be available as Roles in Upland Analytics after the next automatic execution of the Service.
- From the Icon Bar click Setup
 .
. - From the Navigation Menu click Organization.
- From the menu click System.
- Click the Automation button to open the Automation Processing Options page.
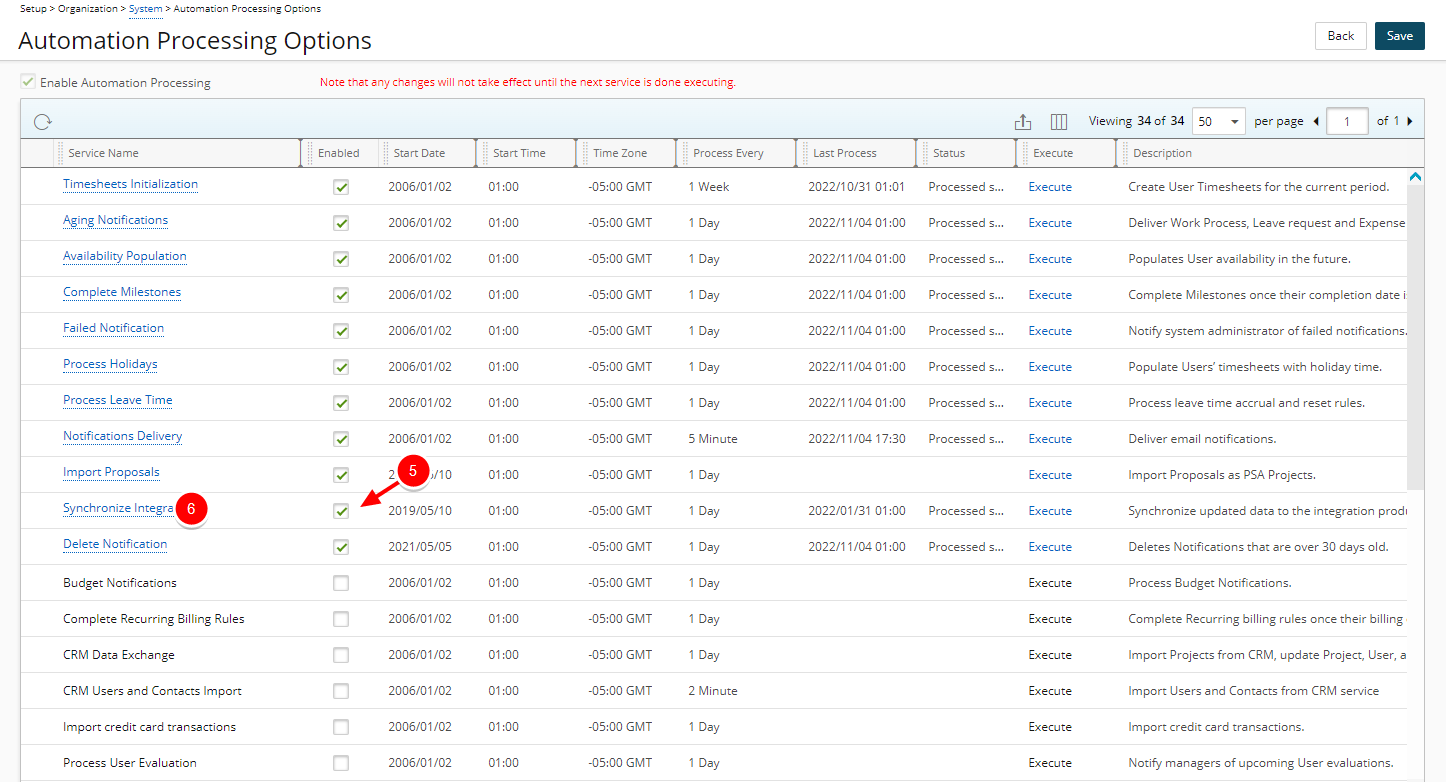
- Enable the Synchronize Integrations Automation Service.
- Click the Service Name to access the Automation Service Setup page.
- Click a Service Name to open the Automation Service Setup page and then configure the following for the selected service:
- Start Date: date the services starts the processing; by default, displays the date that the batch service was initialized through the Server Administration application
- Start Time: time the service starts the processing; by default, 01:00 is displayed.
Note: The time is entered in military time (24-hour notation); for example, 21:30 is entered for 9:30 PM.
- Time Zone: time zone of the processing time; by default, set to the server time zone.
Note: A user can override the time zone; the automation service translates the specified processing time from the user-defined time zone to the system time zone.
- Process Every: frequency the service is processed; by default, 1 Day is displayed.
Note: Available units include Minute, Hour, Day, Week, Month and Year.
- Last Process: date and time of the last automated background process
- Status: status of the last automated background process
- Description: description of the service.
- Enable Service: select or clear the box to enable or disable the automation of a service.
Note: The services can also be enabled or disabled directly from the Automation Processing Options page by selecting or clearing the Enabled box for a service.
- Click Save to apply your changes.
- Click the Execute link to execute the service.
- Click Back to return to the previous page.