Subscribe yourself and other users to receive refreshed report results by email on a schedule that you set. This article shows you how to subscribe to a dashboard or report, set a delivery schedule, and add recipients.
- From an existing report, click See more
 to access the context menu.
 - Click Subscription, and then click Create.
- Within the Subscription page, complete the available fields as follows:
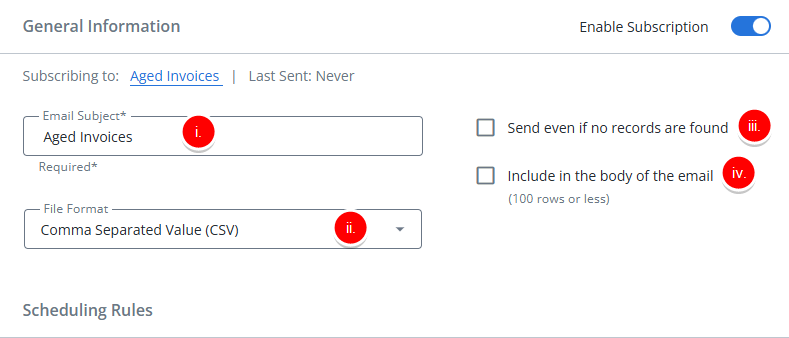
- General Information:
- Email Subject: Type a subject for your subscription. The default is the report name.
- File Format: Select one of the following file formats for the subscription:
- Comma Separated Value (CSV): Available for tables only
- Excel: Available for tables only
- Image: Available for charts and graphs only
- Portable Document Format (PDF)
- Send even if no records are found: Select this option to receive the report as an email attachment even if no records are found.
- Include in the body of the email: Include in the body of the email: Select this option to embed the report in an email. If the table exceeds 100 rows, it will not be embedded. It will be sent as an email attachment. Available for tables only.
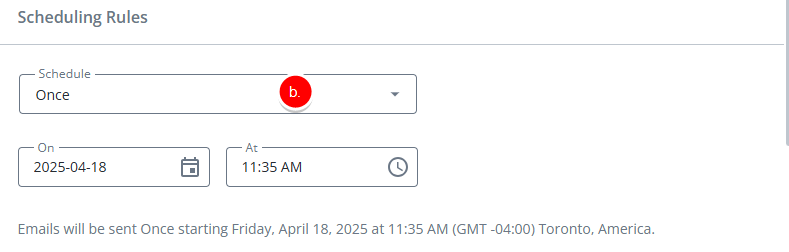
- Scheduling Rules: Select one of the following to Schedule when to send the report:
- Once: In the On field, select the send date and in the At field, select the time and click OK. After the report is run, the subscription will be deleted.
- Daily: In the Interval field, select one of the following:
- Once Per Day and in the At field, select the time and click OK.
- Every 12 Hours and in the From and To fields, select the times and click OK.
- Weekly: Select one of the following to schedule when to send the report:
- Once Per Day: In the At field, select the send time and click OK. In the Days of Week field, select the day(s) of the week.
- Every 12 Hours: In the From and To fields, select the times and click OK. In the Days of Week field, select the day(s) of the week.
- Monthly: Select one of the following to schedule when to send the report:
- Day of every month: Select a specific day of the month.
- First, Second, Third, Fourth, or Last and select a day of the week and time.
- Include On Page Filters: Select one of the following methods to manage on page filters:
- Do not include on page filters: Subscriptions will always be sent with the unfiltered report/dashboard.
- Include applied on page filters (Static): The subscription will use the on page filters that are currently applied on the report when you create it. These filters are locked in and won’t change, even if you update the on page filters later.
- Include saved on page filters (Dynamic): The subscription will always use the most up-to-date version of your saved on page filters. If you change your saved on page filters later, the subscription will reflect those changes the next time it runs.
Tip: If there are no saved on page filters, you can select Include saved on page filters (Dynamic) option as a placeholder so that when on page filters are saved in the future, they will be automatically included in the subscription.

- Delivery Method: Select one of the following to specify how the report/dashboard will be sent:
- Send by mail: Send by email.
- Upload via SFTP: SFTP (or Secure File Transfer Protocol) is an alternative to FTP that also allows you to transfer files, but adds a layer of security to the process.

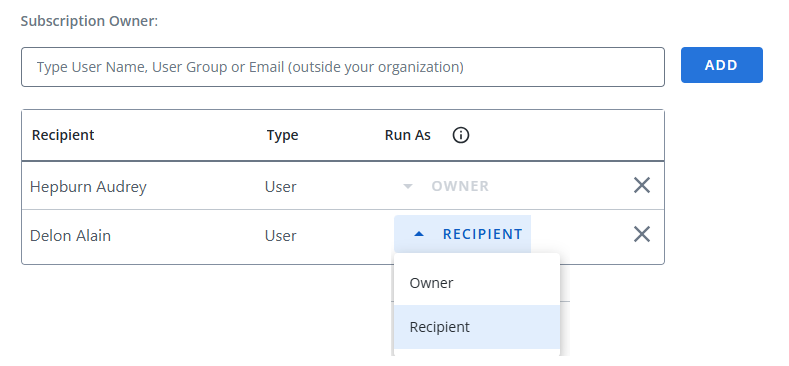
- Recipients Information:
- Subscriber Owner: Do one of the following:
- Type and/or select the Analytics email recipient from the available list. Click Add.
OR - Type the email address for the email recipient(s) outside of Analytics. Click Add.
- Type and/or select the Analytics email recipient from the available list. Click Add.
- Run As (Optional): To run the report with Owner or Recipient permissions, select the user from the dropdown list and then select the permission.
- Recipient: runs with the recipient’s permissions.
- Owner: runs with the report owner’s permissions.
- Subscriber Owner: Do one of the following:
- General Information:
- Click Save.
Examples
When setting up a subscription for a report or dashboard, it’s important to understand how on-page filters are handled. The behavior of the subscription can vary depending on whether filters are excluded, statically included, or dynamically included. Below are three examples that illustrate the different ways filters can be applied to a subscription, helping you choose the best option based on how you want the report to behave over time.
Do not include on page filters
Example Case: You have created a project budget report that’s used across multiple departments. Each team applies their own filters (e.g., project phase, department, or fiscal year) when reviewing the data. To keep the subscription generic and ensure everyone receives the full data set, you select Do not include on page filters when setting up the Subscription.
Include applied on page filters (Static)
Example Case: You have filtered a project tracking report to show only active infrastructure projects with budgets over $1 million. You want leadership to receive this exact filtered view in their weekly email, even if the on-page filters change later. By selecting Include applied on page filters (Static), the subscription always reflects the filters you applied at the time of setup.
Include saved on page filters (Dynamic)
Example Case: You manage multiple Client Projects and have a saved filter on the timesheet report that filters entries to show only Billable hours for external clients. As new clients are onboarded or project classifications change, you update the saved filter to include the latest criteria. By selecting Include saved on page filters (Dynamic), the subscription will automatically reflect those updates, ensuring the report always includes the most current set of billable hours.