IP Filters
The IP Filters function is a security function used to manage the IP addresses for systems that you want to access Upland Qvidian. You can manage these filters from the Administration > Application Settings > IP Filters dialog. The grid displays current IP filters that have been added. Only users originating from an IP included in the grid on the IP Filters screen will be granted access. By default, there are no filters applied. Your current IP address displays above the grid. IP filters are created with a paired network IP address and a subnet mask. Any connecting IP will then be compared against the filter to see if it is within the same subnet range.
Search
- To search for a record, enter text into the search box at the top right of the grid, and click the Search
 icon or Enter.
 - To re-display all records in the grid, delete the entire entry in the box by clicking the X.
Sort columns
- To sort columns chronologically or alphabetically, click the column header name. The records will display in ascending order.
- To switch from ascending to descending order, click the selected column header name again.
Select grid rows
- Select your desired grid row(s) using the checkboxes or by clicking the rows and using CTRL+CLICK or SHIFT+CLICK to select multiple records.
Default v Compact column mode
You can switch between the default and compact column modes. Unless updated, the grid will remain in default mode. Compact mode shortens the height of the grid rows.
- To switch between the modes, go to My Preferences within the header Profile menu and select the Default and/or Compact radio buttons.
Enable IP filtering
- Check the Enable IP Filtering box checkbox at the top right of the page (defaults to ON per the EnableIPFiltering global setting). With IP Filtering enabled, a user can enter several IP addresses. Only those IP addresses will be allowed. All other users will be blocked from those IP filters. When IP filtering is disabled, all users connecting will now be allowed bypassing the specified IP addresses.
Add a New IP Address
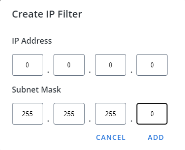
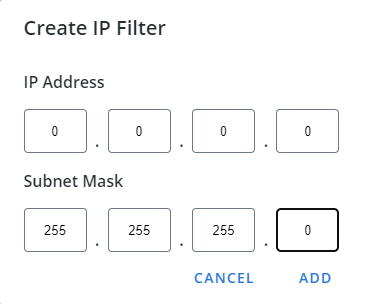
- Go to Administration > Application Settings > IP Filters and then click Create IP Filter. The "Create IP Filter" dialog displays.
- Enter the IP Address and Subnet Mask in the appropriate fields.
- To allow a range of IP Addresses access to Upland Qvidian, enter 0 in the last box field of the IP Address field. For example, entering the IP address 69.25.125.0 will allow all IP addresses beginning with 69.25.125.xxx to access the application
- To allow a range of IP Addresses access to Upland Qvidian, enter 0 in the last box field of the IP Address field. For example, entering the IP address 69.25.125.0 will allow all IP addresses beginning with 69.25.125.xxx to access the application
- Click Add.
Note: An IP address has two components: the network address and the host address. A subnet mask separates the IP address into the network and host addresses (<network><host>). Subnetting further divides the host part of an IP address into a subnet and host address (<network><subnet><host>). It is called a subnet mask because it is used to identify network address of an IP address by performing bitwise AND operation on the netmask.
Edit an IP Filter
- Use one of the following methods to edit an IP filter:
- Hover over the IP filter you would like to edit and click the Edit
 icon. The "Edit IP Filter " dialog displays.
 - Select the checkbox of the desired IP filter and click the Edit
 icon at the top of the grid. The "Edit IP Filter " dialog displays.
 - Double-click the row of the desired IP filter. The "Edit IP Filter " dialog displays.
- Hover over the IP filter you would like to edit and click the Edit
- Hover over the IP filter you would like to edit and click the Edit icon or select the row using the checkbox and click the Edit icon. The "Edit IP Filter " dialog displays.
- Edit the connection information as desired. See Add a New IP Address for more information.
- Click Save.
Delete an IP Filter
- Hover over the IP filter you would like to delete and click the Delete
 icon or select the row using the checkbox and click the Delete
  icon. You are prompted to confirm the deletion.
Note: To delete multiple IP filters at once, select the desired rows using the checkboxes and click the Delete icon. You are prompted to confirm the deletion.