Configure Upland Qvidian Integration Package in Salesforce
To configure the Upland Qvidian Integration Package, follow the tasks below.
- In Salesforce, do one of the following:
- Salesforce Classic: Click the + tab to open the All Tabs page.
- Salesforce Lightning: Open the App Launcher, then expand the All Items section.
- Click Qvidian Proposal Automation Settings. This option is only available to Salesforce Administrators. The Upland Qvidian Proposal Automation Settings Home page displays.
-
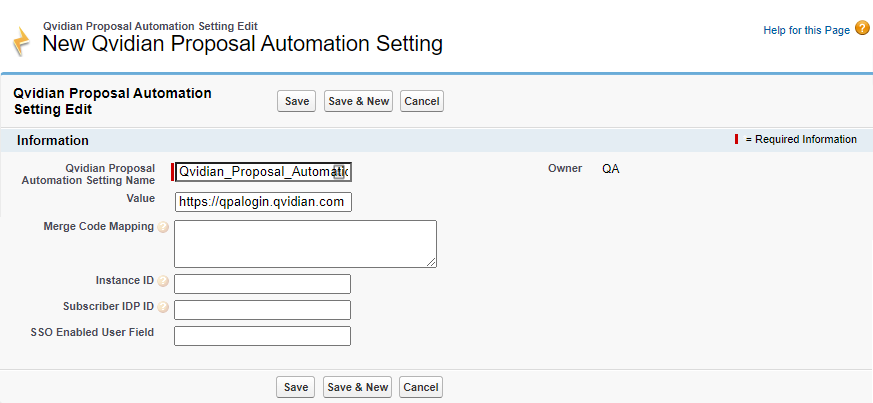
To add a new setting, click New. The New Upland Qvidian Proposal Automation Setting page displays.
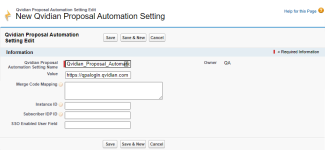
The New Upland Qvidian Proposal Automation Setting page in Salesforce Classic (first) and Lightning (second). Click to expand.
- Enter Qvidian_Proposal_Automation_URL in the Qvidian Proposal Automation Setting Name field.
- In the Value field, enter the full URL of the Upland Qvidian installation to integrate with Salesforce.
- For sites hosted in the Unites States: https://qpalogin.qvidian.com
- For sites hosted in the European Union: https://qpalogin.qvidian.eu
-
(Optional) If you are not using Upland Qvidian mapping, enter the Merge Code/SFDC field pairs into the Merge Code Mapping field. This data will be sent to Upland Qvidian when creating new documents and projects. The Merge Code and SFDC field pairs should be created as a comma separated list of pairs in the following format:
Copy<merge code1>:<sfdc field name1>,<merge code2>:<sfdc field name2>Example: To set the merge code
OpportunityStagewhen creating an Opportunity document or project in Upland Qvidian, the syntax would be:OpportunityState:StageName.If you are creating an Opportunity document or project, but need the Name field from the Account table, the format would be: CustomerLongName:Account.Name. Minimal error checking is performed. If a field cannot be found or the merge code cannot be located in Upland Qvidian, the data will not be passed or displayed.
Note: A prefix must be added to the SFDC field name if the field will be pulled from a related information table.
- Enter the Instance ID, used to uniquely identify this Salesforce instance to Upland Qvidian. This allows Upland Qvidian to know which Salesforce instance to update when multiple Salesforce instances are integrated with a single Upland Qvidian instance. This ID is arbitrary and must match the Salesforce Instance ID configured in Upland Qvidian. For more information, see Connection to Salesforce. The initial value for this field is blank for backward compatibility.
- Enter the Subscriber IDP ID, used to uniquely identify this user when using Single Sign-On from Salesforce to Upland Qvidian. This value is needed to determine the SSO IDP required to validate the user. This value must match what the QPA application has configured for SSO. This value should be blank for non-SSO integrations. If you are unsure about this value, contact your Customer Success Manager.
- (Optional) If you want to create a field that can be used to distinguish between users who can and cannot use SSO, such as employees versus contractors, enter the name of the field in the SSO Enabled User Field field. This field will display on the user’s record with a check box that can be selected or cleared to set the login requirement. This field is used in conjunction with the Subscriber IDP ID field. If this field in the user record evaluates to false, then the user will be prompted for credentials when connecting to the QPA application. It is only required for Salesforce to Upland Qvidian SSO customers that have a mixture of SSO and non-SSO Salesforce users.
- (Optional) Enter your Salesforce Community name. This field indicates that this Salesforce instance is a Community portal and needs special consideration when redirecting to and from the Managed package Visual Force page.
- Click Save. The Qvidian Integration Package is configured.

Tip: (Optional) Enter a Wait in seconds before redirecting time, to specify how long a redirection page is displayed after opening a Qvidian Documents or Projects link before it redirects back to the Salesforce object. The default value is 18. After a user clicks any link that causes a Upland Qvidian window or tab to open, this page displays briefly while their browser prompts the user to allow pop-ups. We strongly recommend you do not update this setting to allow users the chance to read the pop-up message.
Create a Salesforce Connected App
Once created, this can be used to integrate with Qvidian using OAuth. For more information, see Connection Information .
- Log into Salesforce as an administrator.
- Click the Setup link located at the top of the page.
- On the tree view under Build, click Create to expand the node.
- Select Apps.
- Click the New button within the Connected Apps section.
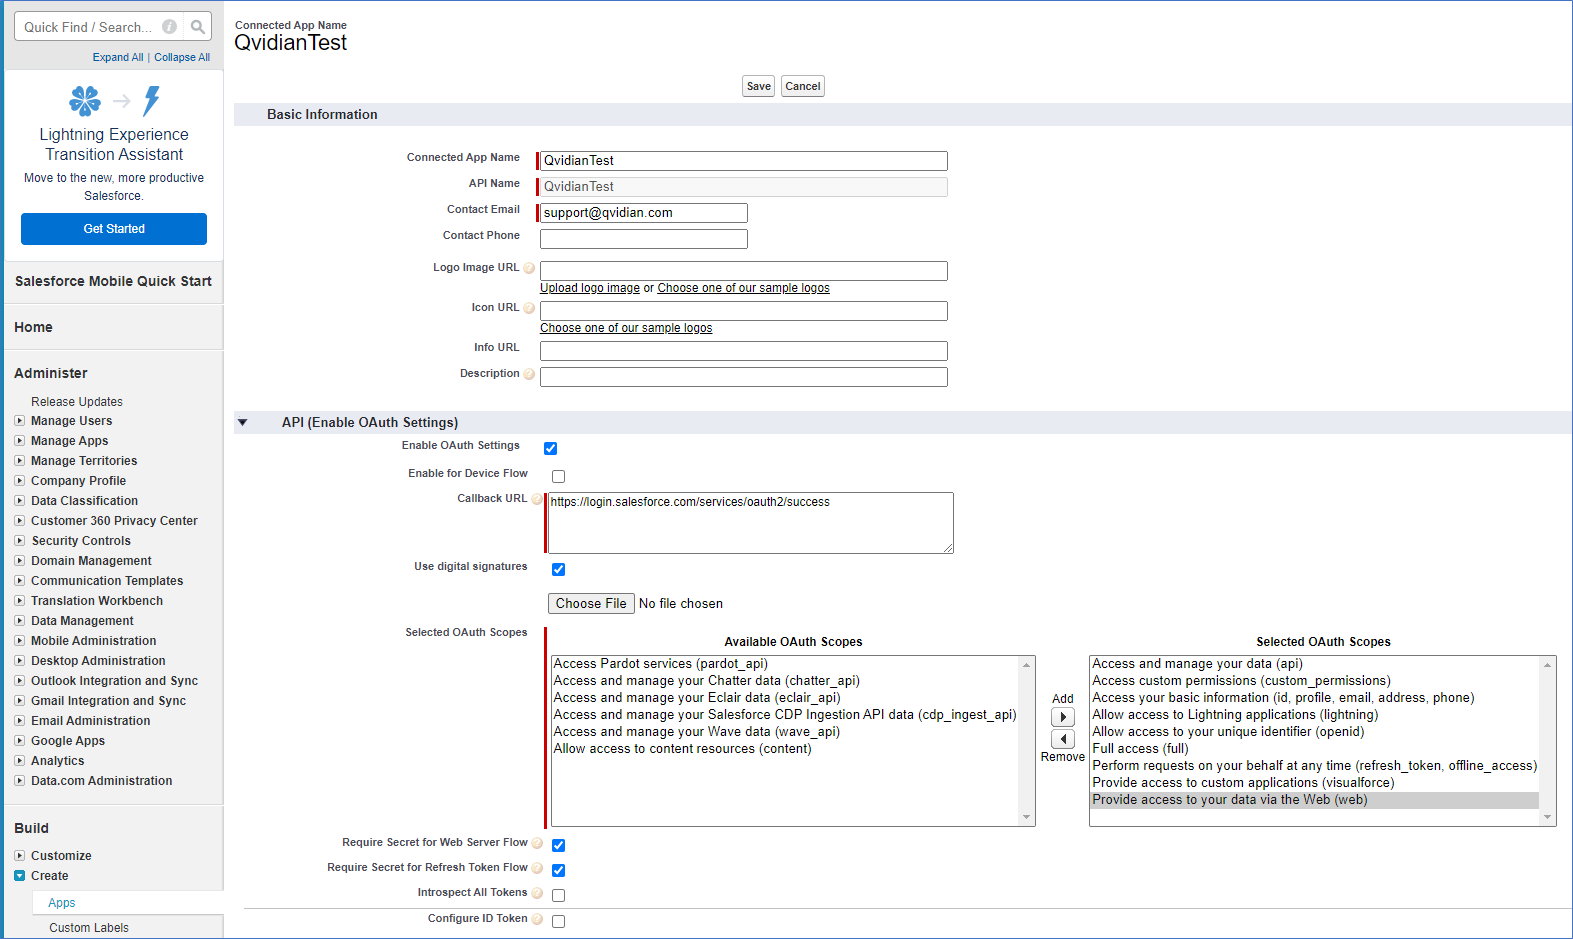
- Enter the following Basic Information:
- Enter the Connected App Name as appropriate for your system. This will automatically populate the API Name field.
- Enter the Contact Email. This will be: qvidian-support@uplandsoftware.com.
Note: The required fields will be noted with a red bar.
- Enter the following API (Enable OAuth Settings) information:
- Select the Enable OAuth Settings checkbox.
- Enter the following Callback URL: http://login.salesforce.com/services/oauth2/success.
- Select the Use digital signatures checkbox and click the Choose File button to upload a password protected server certificate file (e.g.: server.cer). A non-password protected copy of this server certificate will be required later on during the configuration process.
- Add the following OAuth scopes to the Selected OAuth Scopes field:
- Access and manage your data (api)
- Access custom permissions (custom_permissions)
- Access your basic information (id, profile, email, address, phone)
- Allow access to Lightning applications (lightning)
- Allow access to your unique identifier (openid)
- Full acess (full)
- Perform requests on your behalf at any time (refresh_token, offline_access)
- Provide access to custom applications (visualforce)
- Provide access to your data via the Web (web)
- Select the Require Secret for Web Serer Flow checkbox.
- Select the Require Secret for Refresh Token Flow checkbox.
Note: To create a password protected certificate file, please see the Salesforce DX Developer Guide: https://developer.salesforce.com/docs/atlas.en-us.sfdx_dev.meta/sfdx_dev/sfdx_dev_auth_key_and_cert.htm.
- Click Save. The “Connected App” properties page for the new app will be displayed.
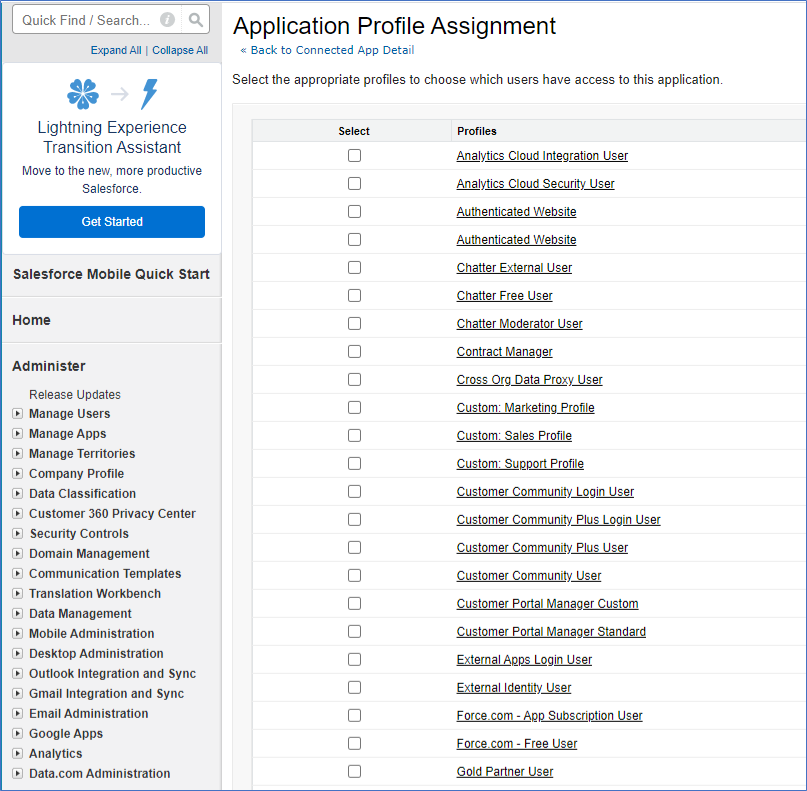
- Navigate to: Administer | Manage Apps | Connected Apps. Scroll down to the Profiles section and click Mange Profiles to display the Application Profile Assignment page.
- Select all the Profiles that you want to have access to the connected app.
- Click Save and return to the Connected App Detail page.
- Return to the Qvidian application and log in with a credential that has SFDC connection administrative permissions. For instructions on how to complete the configuration process, see Connection Information.
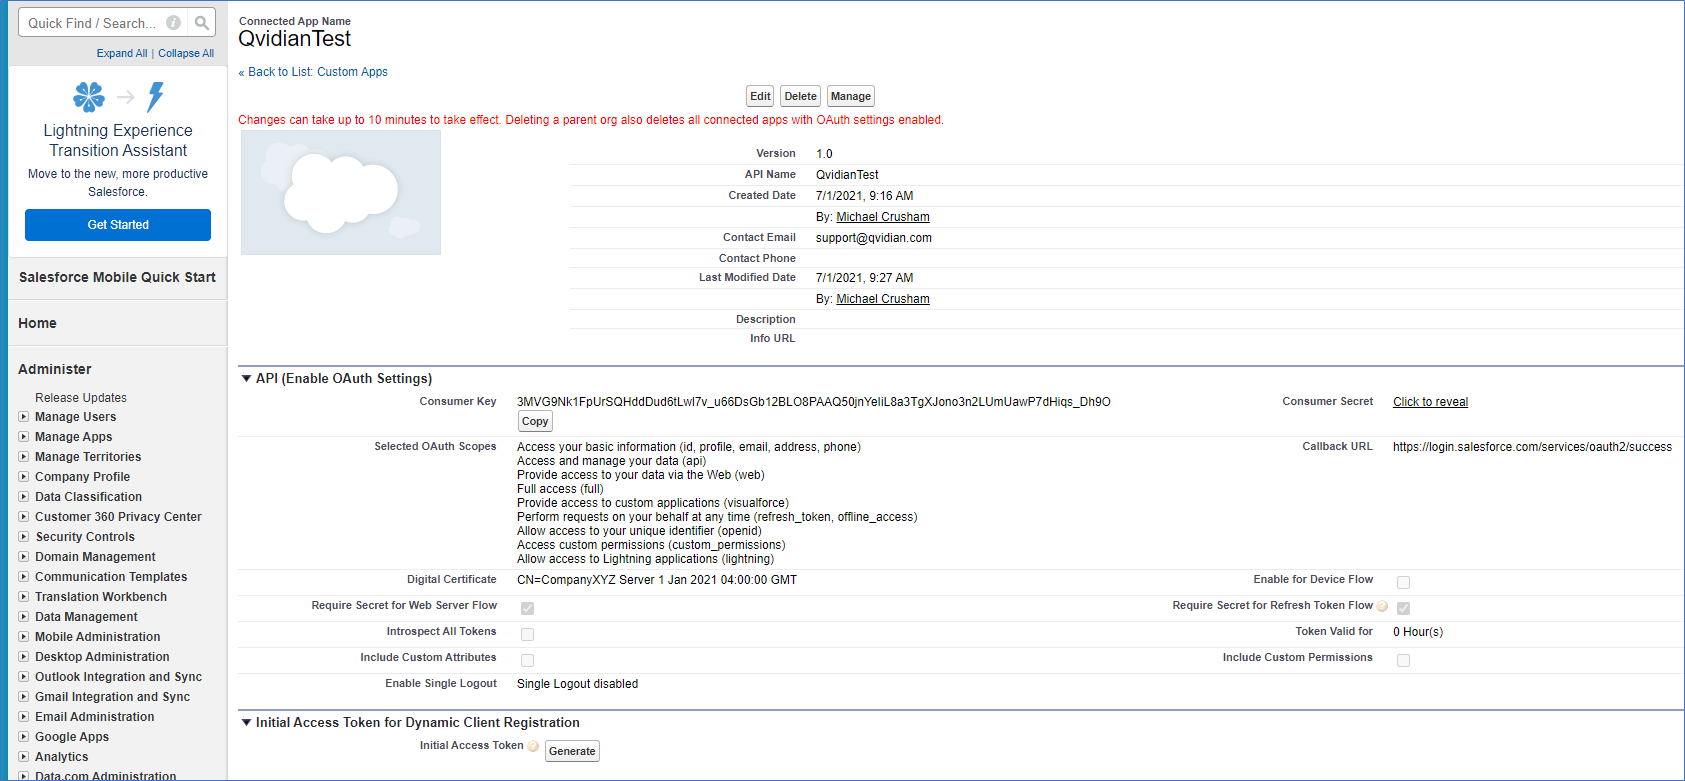
Tip: Please note the Consumer Key near the top of the API (Enable OAuth Settings) section. You will need to copy this key later on in the configuration process.
Custom Profile for Qvidian Minimum Security Requirements
We recommend creating a new profile to form a baseline collection of permissions and other settings associated with a user or a group of users. You can assign this same permission to multiple users.
Note: There are a number of standard profiles already defined. The permissions and settings to access Qvidian and associated objects are disabled for most profiles. This security setting ensures that access to Qvidian and its data is only explicitly granted to users. You can change object permissions in custom profiles, but not standard profiles.
Create the "Qvidian Minimum Security" Custom Profile
In the following tasks, you will create a custom profile in Salesforce that you can assign to users who need to access Qvidian and its custom objects.
- From Salesforce, navigate to: Setup | Manage Users | Profiles.
- Click the Standard User Profile Name.
- Select Clone, found next to the Profile Detail.
- Enter Qvidian Minimum Security into the Profile Name field.
- Within the Standard Object Permissions section, give Read permissions for: Account, Contacts, and Opportunities objects.
- Within the Custom Object Permissions section, give Full Access permissions to the QPCO_Shadow object to perform insert, update, and delete operations.
- Click Save.
Note: For QPA, the ID needs read access to any object that will be used as a merge code, in addition to read access to Accounts, Opportunities and Contacts.
Assign the "Qvidian Minimum Security" Custom Profile
Now you can assign the Salesforce user to this profile to be used for QPA / Salesforce synchronization, as follows:
- Click the View Users button on the Profile Detail page for the newly created "Qvidian Minimum Security" profile.
- Click New User.
- Complete the General Information section for each desired user and assign them the Qvidian Minimum Security Profile.