Updating Feedback
Note: The Data Management module is a managed feature. Should you need to make use of the tools within data management, please contact the Upland Rant & Rave support team.
Use the data management menu to update data within a date range.
To update feedback:
-
Open data management (from the dashboard, select the cog and open data management).
-
Select the + icon to create a new task.
-
On the task creation window:
-
Select updating from the action parameter dropdown.
-
Select feedback from the entity parameter dropdown.
-
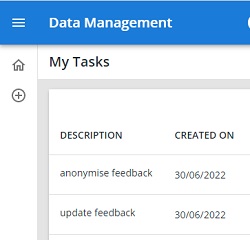
Provide a description for the task. This will be used to identify the task in the table on the homepage.
-
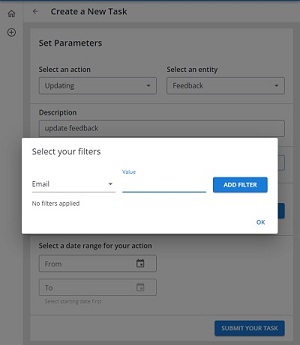
Apply any relevant filters, e.g. filter retrieved data for location = Atlantis.
Note: The values must be entered as they appear in the dashboard.
-
Select the field to update from the dropdown menu and enter a new value in the text box.
Note: The selected fields will appear as a list beneath the dropdown and can be removed by selecting the X icon next to the field.
-
Set a start and end date for your date range.
-
-
Use the submit your task button to save your changes.
-
In the data management window, select your update feedback task to open the task details.
-
Confirm the details are as you expect. If not, you can make changes using the edit task button. If the details are correct, use the start your task button to update your feedback.
Worked example - Update items by feedback ID
Create a new task and select Updating and Feedback for your parameters.
Enter a description, e.g. update agent first and full name and department.
Open filters and select the feedback ID field from the dropdown list.
Enter the value for the feedback ID as it appears in the dashboard.
Note: Provided each item of feedback will contain the same updated values, you can add multiple IDs by selecting the feedback ID field again and adding another value.
Select the agent first name field from the dropdown list and add a value for the agent, e.g. Annie.
Select the agent last name field from the dropdown list and add a value for the agent, e.g. Mayall.
Select the department field from the dropdown list and add a value for the agent, e.g. MarComms.
Note: Each agent will require a new task as you cannot update a field with multiple values.
Submit and run your task.
When the task is completed, check your changes in the dashboard.
Note: You can undo changes up to 30 days from the date the task was run.