Set up teams
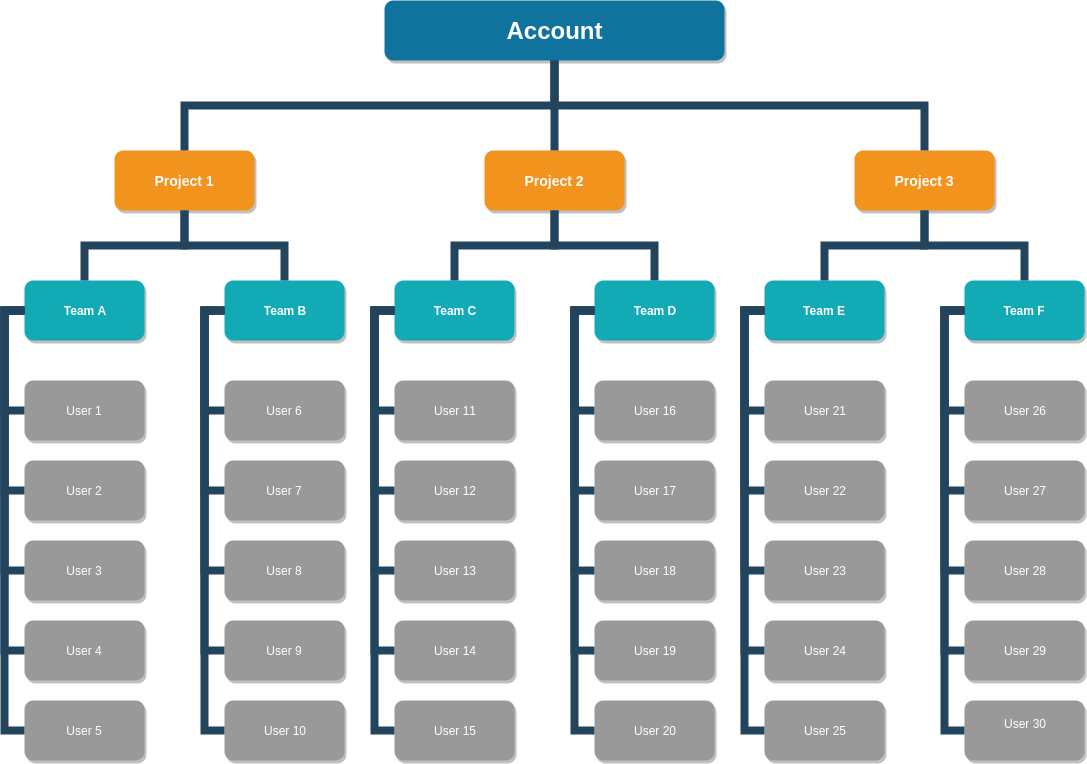
You can use teams to group together employees who all work on the same project, so you can keep the User Management module more organized. Teams only affect the list of users in the User Management module; they don't affect any other Rant & Rave modules.
How do teams work?
-
Users can exist at the project level without belonging to a team.
-
Users can't belong to more than one team at a time.
-
Users can belong to a team and also multiple different projects at one time.
-
There can be many teams to a project.
-
Client Administrators can only see users from the team they belong to.
-
Client Team Administrators can't be assigned to a team; they only exist at project level.
-
You can use teams to group together employees who all work on the same project (although an employee can’t be on multiple teams).
Note: Only client team administrators can manage team settings. If you’re not a client team administrator, you won’t see the settings you need to complete the following steps.
To see your list of teams:
-
Open the Rant & Rave Dashboard.
-
Click the System
 icon in the bottom-right, then click User management.
The User Management screen will open in a new window on a list of all users.
-
Click All teams. You'll see a list of all teams in the projects you're assigned to.
-
Click on the name of a team to edit it.
Add a team
-
Go to the User management screen.
-
Click All teams.
-
Click Add team.
-
Enter the team’s name, and a short description.
-
Add the Allowed user info values.
Example: If you have two contact centers in London and Stoke, you should enter “London, Stoke”.
-
Under Restricted user info keys, select the key which corresponds with the Allowed user info values you just entered.
Example: For “London, Stoke”, you’d select Location.
-
Click Save changes.
Next steps
Once you've set up your teams, you can add users to them.