Integrating RightAnswers with Cherwell Service Platform
The Cherwell Service Platform provides an IT Service Management (ITSM) solution, which includes a suite of applications, multiple service desk features, and configurable processes.
Following the steps documented, Cherwell users can integrate RightAnswers into their system.
Integrating RightAnswers with Cherwell
-
Login to Cherwell Administrator and apply the RightAnswers Integration blueprint/mApp into your Cherwell instance.
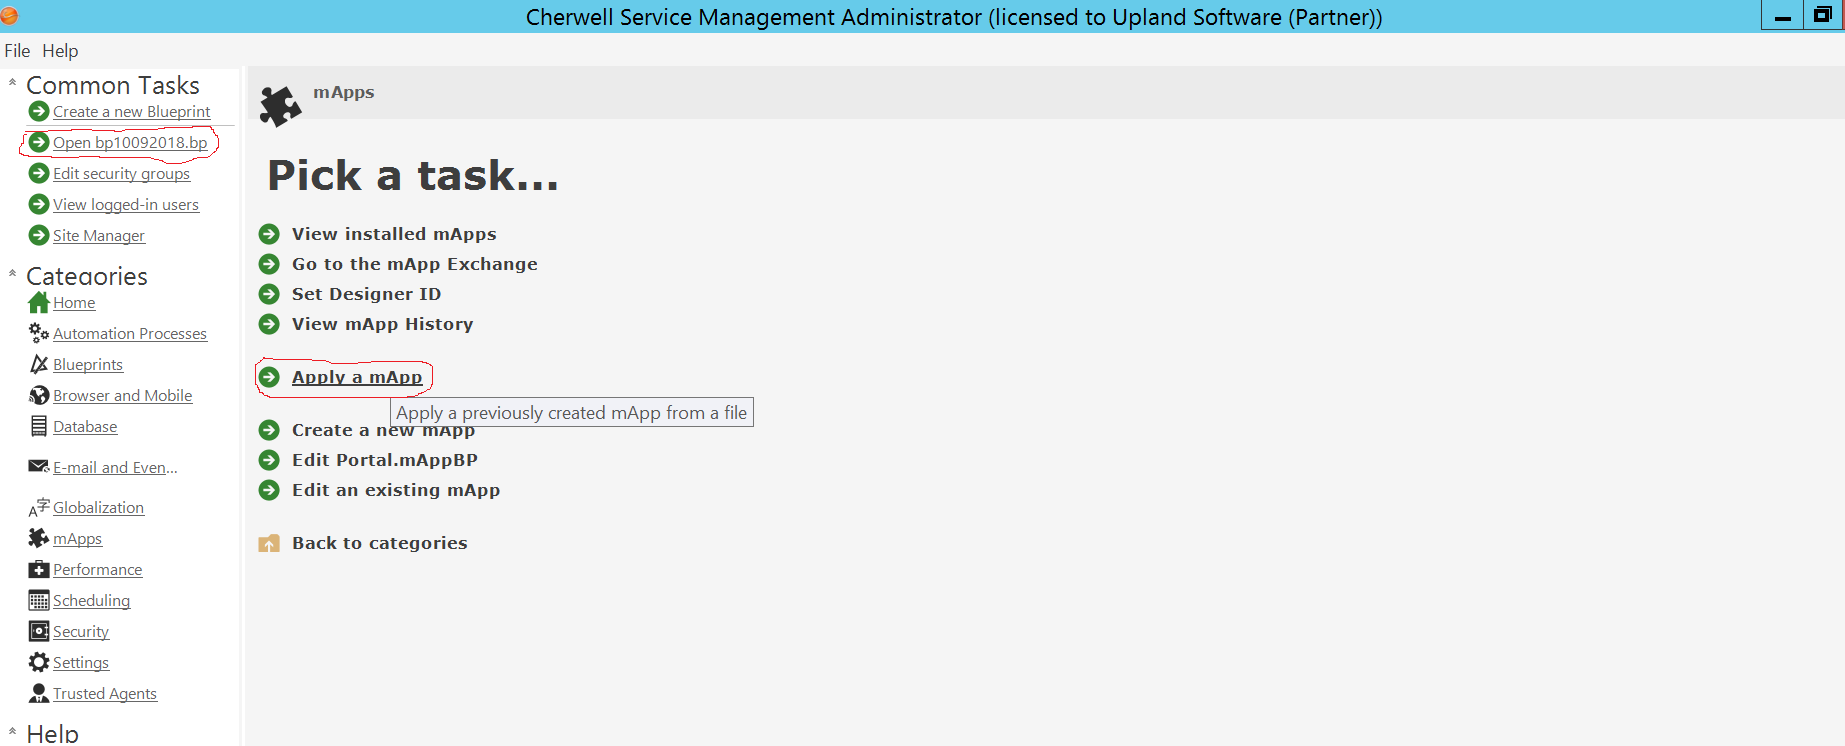
- Now browse to your respective .bp or .mAppBP file.
-
Login to the Cherwell admin instance as an administrator and configure the oAuth client:
- From the Main window, select Security.
- Click Edit REST API client settings.
- Click the plus (+) icon.
-
Enter these settings for the client ID:
Name: Provide a name for the client ID.
Culture: Select a language-specific culture.
Token Lifespan: Set the amount of time the access token will be active.
Refresh Token Lifespan: Set the amount of time the refresh token will be active.
API access is enabled: When selected, the client ID is enabled. When cleared, the client ID is disabled. Clear the check box to disable the client ID without deleting it.
Allow anonymous access: Select to make the REST API available to anonymous users.
- Copy and extract the Cherwell folder to the portal/app/customportlets folder.
-
Login to the admin portal and create the necessary settings by accessing the URL:
https://ra server/portal/app/customportlets/cherwell/setup8.jsp?CompanyCode=company code - Copy the client ID from step 3. Set it to the value of the admin setting CherwellClientId.
-
Set the values of other settings:
CherwellUrl: http://Cherwell server hostname or ip/CherwellAPI
CherwellUsername: CherwellUsername
CherwellPassword: CherwellPassword
CherwellClientId: RightAnswers App Client Id in Cherwell Instance (as per step 6)
CherwellParentBusObId: Object Id of incident BO
CherwellJRelationshipId: Relation id of relation between incident and journal BO
CherwellJBusObId: Object Id of Journal BO
CherwellJFieldId: Complete field id of the Journal field in which copyback is desired
CherwellRARelationshipId: Relation id of relation between incident and RA BO
CherwellRABusObId: Object Id of RA BO
CherwellRASolIdFieldId: Complete field id of the RA field Solution Id
CherwellRASolUrlFieldId: Complete field id of the RA field Solution Url
CherwellRAIncNoFieldId: Complete field id of the RA field Incident Number
CherwellRASolTitleFieldId: Complete field id of the RA field Solution Title
CherwellFileExtensionType: gif,png,jpg,jpeg,txt,cfg,config,err,doc,xls,log,rtf,docx,xlsx,PDF,ppt,pptx,avi,mp4
CherwellFileUploadSize: 4194304
CherwellResultLimit: 10
CherwellJournalCopyback: True if journal copyback is required, else false - Create a group named Cherwell SA and respective layouts (Inline and Desktop) in it. Set the value of the layout field SA Retrieve Solution URL: to /app/customportlets/cherwell/copysolution.jsp
- Create a user and assign the group Cherwell SA to it. Create the EPA of this user and set the parameters to the respective snippet in the Cherwell instance.
- Test the application using either the Cherwell Client interface or the following URL: https://(insert Cherwell server IP or hostname)/CherwellClient
Integrating Cherwell with RightAnswers
- Make sure you have RightAnswers Integration blueprint/mApp applied to your Cherwell instance.
- Login to the Cherwell administrator interface as admin, and apply the portal blueprint/mApp into your Cherwell instance as described in Integrating RightAnswers with Cherwell.
- Configure the permissions for the portal users and groups in the Common Tasks > Edit Security Groups.
- A Security Groups popup will open. Select each portal group and perform the following steps for each.
-
On the Business Object tab, grant these groups View, Add, and Edit permissions to the integration Business Objects viz: RightAnswers Search and RightAnswers Attached.

- Verify that the View and Edit permissions are applied to all the fields in the Business Object.
-
Copy the portal file listviewTemplate.html and add it on the Cherwell server at the following path \\Cherwell Browser Applications\Portal\dist\app\cardview\html.
 NOTE:
It is strongly recommended to take a backup of the file already existing there.
NOTE:
It is strongly recommended to take a backup of the file already existing there.
-
Copy the portal file AppBar.tpl.html and add it on the Cherwell server at the following path \\Cherwell Browser Applications\Portal\dist\Bundles\appBar\html.
NOTE:
It is strongly recommended to take a backup of the file already existing there.
-
To apply the integration to other portal forms, navigate to Document Reviewer. Check the changes to the Incident (Portal Default) form, and apply the similar changes to your respective form. RightAnswers Search Button and RightAnswers Results section are additions to this form.

- Test the integration by navigating to: https://(insert Cherwell server IP or hostname)/CherwellClient
Understanding the Cherwell Incident Form Flow
The following details the flow between the Cherwell Incident Form and RightAnswers (RA).
- The incident form sends a request to RA's REST API to search the Knowledgebase for the short description of the incident.
- RA searches the short description of the incident in the Knowledgebase and returns the knowledge articles back to the incident form.
- The user checks the articles returned by RA to determine a useful article and clicks Yes in the Did this help section of the article. A request is sent to RA to copy the solution back to the incident form.
- RA uses Cherwell's REST API to copy the RA solution fields to the incident form fields of the respective incident of Cherwell like RightAnswers Attached BO: Solution ID, Solution URL, Incident Number, Solution Title and Incident ID and Journal field of Journal BO.