Deactivate users
The Administrator can deactivate users to prevent access to the Self Service and Support Agent portals, Solution Manager and the Community portal. Deactivating a user will not delete the user. You can activate select users or users in bulk.
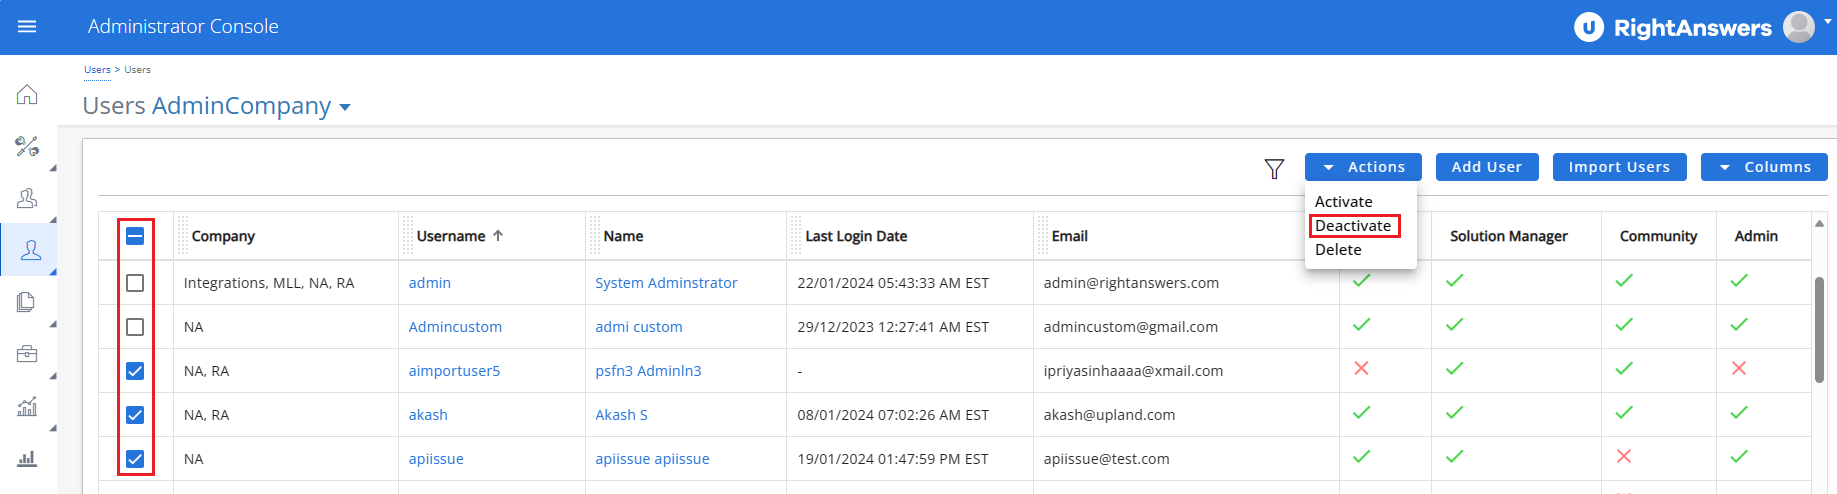
To deactivate select users:
- Navigate to Users > Users.
-
Select the required filters and columns to filter the users to be deactivated or deleted.

-
Select the checkbox beside the user(s) that you want to deactivate.
-
Click Action > Deactivate. The Deactivate Users popup window is displayed.

- Select the platform(s) (Portal, Solution Manager, Community User) for which you want to deactivate the user(s).
- Click Deactivate.
-
Perform the relevant step listed below, based on the login authentication used:
- For non-SSO users: Enter your password for authentication in the Password field and click Confirm.
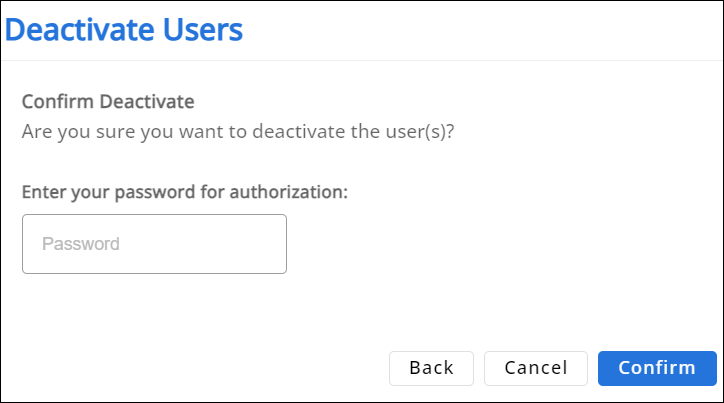
 NOTE: You can enable the appearance of the password confirmation field by setting
 PasswordConfirmationPopupto True in the Administrator Console.
For SSO users: Click Confirm.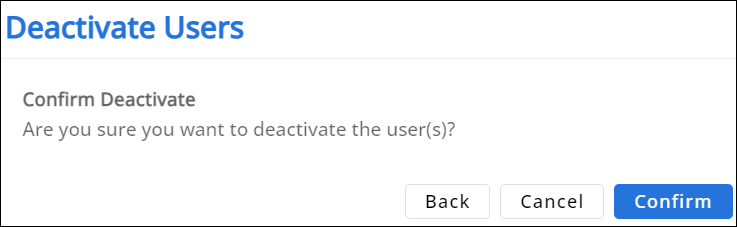
The message 'Selected User(s) Deactivated Successfully' will be displayed.
The user(s) will be deactivated on the selected platform(s) and the corresponding platform column in the Users page will display a red X mark for the deactivated user(s).
- For non-SSO users: Enter your password for authentication in the Password field and click Confirm.
To activate users in bulk
You can deactivate multiple users in bulk by selecting the checkboxes beside the users and selecting Actions > Deactivate. These bulk actions will be recorded in the Admin Audit Trail. This provides clear visibility into who made the changes and when. Additionally, the bulk user deactivation actions will be logged as individual records in the user history database tables, specifically in the PortalUsers_history and Authors_history tables.