There are several methods of producing reports using the RO Platform.
Generating Quick Reports
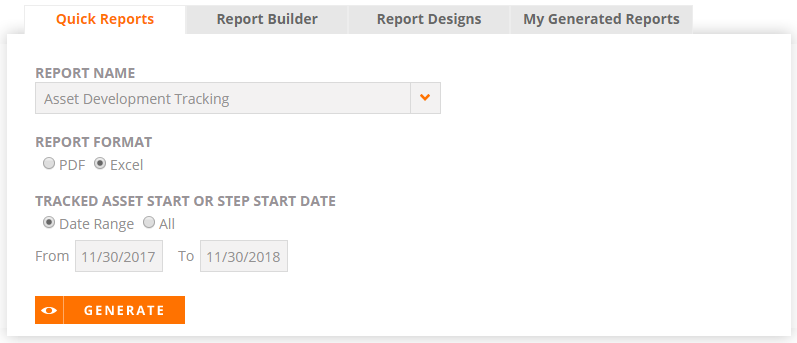
The Quick Reports tab gives you access to pre-defined system reports.
- Navigate to the Reports page.
- Click the Quick Reports tab.
- To create a report:
- Select a Report Name using the drop-down menu.
- Designate a Report Format.
- If applicable, select a date range for the report.
- Click Generate.
Note: You will be notified via email once the report is ready. You can click on the link in the email to access the report. Once ready, your report will also be available for download in the My Generated Reports tab. Queued Reporting is enabled for all RO Platforms.
Available Quick Reports
This is a list of standard Quick Reports. Other Quick Reports developed specifically for your company may also be visible on the Quick Reports menu.
Note: Quick Reports do not support HTML formatting for the fields.
Asset Management Quick Reports allow you to obtain details on Reference Activities and Content Assets.
| Report | Overview | Columns | Runs Date Range? | Other Filters |
|---|---|---|---|---|
| Asset Development Tracking | A summary table showing the amount of assets in each development stage, followed by a detailed table showing all assets in development. | Customer, Geography / Region, Country, Product Group, Industry, Asset, Asset Type, Account Owner, Asset Start Date, Current Stage, Tracking Step Start Date, Status Notes, Estimated Completed Date, Completion Date | Yes | No |
| Asset Ratings / Comments | Displays ratings and comments collected by internal users and external prospects. | Date, ID, Title, Status, Rating, Who Rated, Rater's Comments | Yes | Asset Type |
| Content Asset List | Provides a list of all content assets (blogs, videos, white papers, case studies, etc.) and the file name or URL from which they are sourced. | ID, Title, Location, Asset Type | No | No |
| Content Asset Summary | Count of all content assets by types. Assists in management of customer content library. First tab is the summary. | SUMMARY: Asset Type, Total, Active. DETAILS: Asset Type, Title, Description, Rating, Status, Posted By | No | No |
| Customer Quotes Added | Customer, Contact, Quote, Product(s), Related Asset, Related Asset Type, Date Added | Yes | No | |
| External Link Status | Validates all content links/URLs to determine if they are valid, invalid, or private, meaning restricted to internal company employees only. Empowers the reference team to remove or replace broken links, increasing the accuracy and reliability of their RO content distributed to prospects. | ID, Title, Location, Status, Posted By | No | No |
| Fast Facts Added | Customer, Date Added, Fast Fact, Asset Source, Type, Posted By | Yes | No | |
| Quote / Fast Fact Tracking Report | Shows a list of all quote and fast fact sheets that have been generated for a given time. | Report Type, User Name, Run Date, Sheet Title, Content Asset List | Yes | No |
| Sales Loss Report | Generates a list of Sales Losses submitted over a period of time. | The columns displayed are determined by the client. | Yes | No |
| Record Review Report | If the Record Review feature is enabled, report will display the changes made to the customer profile, who the changes were made by, and who approved the changes. | Customer, Area/Product, Updated By, Submitted Date, Field, Original Value, Updated Value, Disposition, Disposition Date, Approver | Yes | No |
| Reference Asset Summary | Shows a list of all managed and unmanaged reference assets (Participation assets and content assets). First tab is the summary. | SUMMARY: Participation, Content, Number of Reference Assets by Type. DETAILS: Customer, Contact, Reference Status, Asset, Status, Posted By | No | No |
| Tracked Assets in Progress | Track content development from initiation to completion, which enables configuration of the asset development process for your organization and determination of bottlenecks. | Tracked Asset, Asset Type, Customer, Step, Assignee, Started | No | No |
| Unmanaged Asset Download Activity | Captures each time an asset is opened and downloaded (not just viewed) by a user. | Date, Title, Asset Type, Customer, Downloaded By | Yes | No |
Customer Reference Pipeline Quick Reports allow you to gain an overview of Nominations, References for Customers, and Prospective Customers.
| Report | Overview | Columns | Runs Date Range? | Other Filters |
|---|---|---|---|---|
| Customers by Company Size (Segment) | Shows customers by size and relevant information about those customers. | Customer, Product Group, Interview Notes, Reference Use, Division Department, Division Address, Program Status, Lead Origination, Division Creation Date, Division ID, Implementation Status, Deal Size, Vertical List, Customer Segment, Company Size, Geography - Region, Industry, Willing To Do, Contact Country, Actual Close Date, Unit of Measure, Operating System, Quantity, Role, Contact Address, Flex Tags, Actual Closed Revenue, Net Promoter Score, Usage Details, Customer Website, Partner/Reseller, Social Network, Product Group, Products, Network Security, Number of Locations, Product Suite, Customer Since, Company Size (Revenue - USD), Support Level, Spoken Language | No | No |
| Customers by Geo |
Shows customers by geographical region and relevant information about those customers. |
Customer, Product Group, Interview Notes, Reference Use, Division Department, Division Address, Program Status, Lead Origination, Division Creation Date, Division ID, Implementation Status, Deal Size, Vertical List, Customer Segment, Company Size, Geography - Region, Industry, Willing To Do, Contact Country, Actual Close Date, Unit of Measure, Operating System, Quantity, Role, Contact Address, Flex Tags, Actual Closed Revenue, Net Promoter Score, Usage Details, Customer Website, Partner/Reseller, Social Network, Product Group, Products, Network Security, Number of Locations, Product Suite, Customer Since, Company Size (Revenue - USD), Support Level, Spoken Language | No | No |
| Customers by Industry |
Shows customers by industry and relevant information about those customers, such as percentage of and number of customers by industry. |
Customer, Product Group, Interview Notes, Reference Use, Division Department, Division Address, Program Status, Lead Origination, Division Creation Date, Division ID, Implementation Status, Deal Size, Vertical List, Customer Segment, Company Size, Geography - Region, Industry, Willing To Do, Contact Country, Actual Close Date, Unit of Measure, Operating System, Quantity, Role, Contact Address, Flex Tags, Actual Closed Revenue, Net Promoter Score, Usage Details, Customer Website, Partner/Reseller, Social Network, Product Group, Products, Network Security, Number of Locations, Product Suite, Customer Since, Company Size (Revenue - USD), Support Level, Spoken Language | No | No |
| Customers by Solution Category | Shows customers by solution category and relevant information about those customers. | Customer, Product Group, Interview Notes, Reference Use, Division Department, Division Address, Program Status, Lead Origination, Division Creation Date, Division ID, Implementation Status, Deal Size, Vertical List, Customer Segment, Company Size, Geography - Region, Industry, Willing To Do, Contact Country, Actual Close Date, Unit of Measure, Operating System, Quantity, Role, Contact Address, Flex Tags, Actual Closed Revenue, Net Promoter Score, Usage Details, Customer Website, Partner/Reseller, Social Network, Product Group, Products, Network Security, Number of Locations, Product Suite, Customer Since, Company Size (Revenue - USD), Support Level, Spoken Language | No | No |
| External Rewards Links | Shows each customer link to external rewards page. | Company, URL | No | No |
| Nomination Activity | A chart of recent nominations by approved and in-progress nominations. Includes a detailed table of each nomination. | Date, Prospect, Nomination Status, Resolution Date | Yes | No |
| Pipeline Report | Status of reference contacts for each customer. Rows are set by each customer reference contact (not grouped by customer). | Customer, Reference Manager, Contact Name, Reference Status | No | No |
| Reference Summary | Summary chart by reference status and count. Includes a detailed table of customers and associated reference. | Customer, Customer Status, Contact, Reference Status, Created, Reference Manager | Yes | No |
| Reward Activity by Customer | Shows point summary of all rewarded points grouped by customer. | Customer, Date, Activity, Earned By, Redeemed By, Earned, Expiration, Redeemed, Balance | Yes | No |
| Rewards | List of customers showing the activity they performed and the rewards points they gained from each activity. Rows are set by each individual activity (not grouped by customer) Another table on report shows rewards points redeemed. | POINTS EARNED: Customer, Contact, Date, Activity, Opportunity, Points Earned. POINTS REDEEMED: Customer, Contact, Date, Activity, Redeemed | Yes | No |
Reference Request Activity Quick Reports focus on Reference Requests and provide metrics on customer references.
| Report | Overview | Columns | Runs Date Range? | Other Filters |
|---|---|---|---|---|
| Managed Asset Activity | Customers and contacts requested for a reference activity, and the disposition status: Confirmed, Substituted, Approved. | Date, Asset Type, Prospect, Customer, Contact/Content, Status | Yes | No |
| Request Activity | One bar chart showing count of Requests by Status (completed, in progress, new, etc.) and one pie chart showing count of Requests by Type (speak with analyst, accept phone call, etc.). View the Managed Asset Activity report to see the disposition detail of each activity requested. | Requested, Status, Account Name, Deadline, Completed, Request Type, Deal Size | Yes | No |
| Request Confirmation Status | Status of requested references (confirmed, did not participate, etc.) and each reference type(accept phone call, host a site visit, etc.) and contact name. | Requested, Completed, Asset Type, Status, Customer, Contact | Yes |
Confirmation Status |
Spotlight Activity Quick Reports indicates how your customers are using Spotlights.
| Report | Overview | Columns | Runs Date Range? | Other Filters |
|---|---|---|---|---|
| Additional Questions Asked | Displays feedback from 'Additional Questions?' link on Spotlight page. This is also emailed to the sender of the Spotlight. | Date, Prospect, Spotlight Title, Concerning, Question | Yes | No |
| Interview Topics Accessed | For RoD hosted interviews, helpful in identifying the most viewed interview topics. | Interview, Topic, Views, Unique Visitors | Yes | No |
| Spotlight Activity | Displays the details of visited Spotlights, including assets that were viewed. | Prospect, Prospect's Email Address, Spotlight Title, Invited By, Created Date, Expiration Date, Visited, Visit Dates, Sent From SFDC, Sent From RV, Assets Viewed | Yes | No |
| Spotlight Asset Usage | Shows number of downloads for Spotlight assets. | Asset, Downloads, Unique Downloaders | Yes | No |
| Spotlight Executive Summary | Overall view of Spotlights created the prospects invited to view the Spotlight, how many visits, how long the average person views Spotlights. | TRAFFIC STATS: Number of Spotlights Created, Number of Prospects Invited, Number of Prospects Responding, Number of Prospect Companies, Number of Invitations Issued, Number of Spotlight Visits, Number of Spotlights Sent From SFDC, Number of Spotlights Sent from RV. TIME STATS: Average Session Length, Longest Session Length | Yes | No |
| Spotlight Feedback | This is a configuration in RoD Settings that can be turned on to "Show 'please give us your feedback' link". This will pop up after a user exits the Spotlight page. | Title, Date, Prospect, Helped to Understand value, Helped to make purchase decision, Additional information I wish were included in this Spotlight, Suggestions for improvement and additional comments | Yes | No |
| Spotlight Revenue Influence | Shows detailed Spotlight information as well as the associated opportunity, opportunity value, and sales stage. Directly links Spotlight visitation to revenue impact. | Spotlight Title, Spotlight Site Title, Spotlight Sender, Spotlight Created Date, Expiration Date, Spotlight Sent Date, Opportunity Close Date, Opportunity Account, Opportunity Name, Sales Stage, Total Opportunity Value, Assets, Invitees, Company, Visits, Assets Visited?, Unique Visitors, Total Minutes | No | No |
| Spotlight Visit Detail | Displays details of how long a prospect had a spotlight page open. | Prospect Name, Prospect Email, Prospect Company, Original Invitee, Invitee Company, Spotlight Title, Invited By, Start Date/Time, End Time, Total Minutes, Sent from SFDC, Sent From RV, Message | Yes | No |
User Metric Quick Reports audit how and when your users are logging in and adopting the RO Platform.
| Report | Overview | Columns | Runs Date Range? | Other Filters |
|---|---|---|---|---|
| Tile Usage | Provides a list of the most often clicked/used tiles. | Tile Clicked Date, Tile Names, Clicks, User Email | Yes | Yes |
| User Experience survey Report | Provides a list of all the feedback and comments shared by the users in the RUX platform for searches, nominations and requests. | Area, Total Activities, Surveys, Positive, Negative | Yes | No |
| Field Detail and Location | Provides a list of all Fields in the RO Platform and the screens on which they appear. | Field, Control Type, SFDC Column, Appears on | No | No |
| Login Audit | Indicative of system usage, showing when users logged in. Report logs access from RV directly as well as salesforce.com. | Date, Time, First name, Last name, Email | Yes | No |
| Login Exceptions | Displays attempts of users to unsuccessfully log into system. This can be due to mistyped password or issues from salesforce.com | Date, Time, Login name | Yes | No |
| Monthly Usage by User | Provides a list of how many times users access the RO Platform on a monthly basis. | Last Name, First Name, Email, User Role, Registered, Last Access, Month-Year, Total | Yes | No |
| User Adoption | First tab is the summary and provides the number of new users that logged into RV for the first time in the specified date range. Details tab shows user role and cumulative number of logins. | First Name, Last Name, Email, User Role, First Login, Cumulative | Yes | No |
| User List | Total user count is shown at the top. Report displays the last time a user logged in and their user status (Active, Inactive, Logged Out). Can compare to Login Audit to see which users have never logged in. Users that have never logged in are considered "Inactive". | First Name, Last Name, Email, User Role, Last Login | No | User Role |
| User Role Change Audit | Report displays changes in user roles and who the changes were made by. | User Name, User Email, Action, User Role, Date, Modified By Name, Modified By Email | Yes | No |
| Program Activity | Gives an overall view of the use of the RO Platform by user by month. Shows the number of requests, searches, and nominates there were and includes a line chart indicated by month. | Logins, Nominations submitted, Requests Created, Searches | Yes | No |
Building & Running Reports
The Report Builder tab allows you access to build your own custom reports and save them for future use. The Report Builder, for which data is refreshed daily, allows you to: create ad-hoc reports, share reports with other users, build and save your own report layouts, and report on specific queries or all records. You can build reports with data from any of the following RO Platform areas: customers, contacts, content and usage, reference activity, email activity, request activity, nomination activity, rewards and gifts, customer profile data, and platform users.
Note: Report builder supports HTML formatting for the fields.
- Navigate to the Reports page.
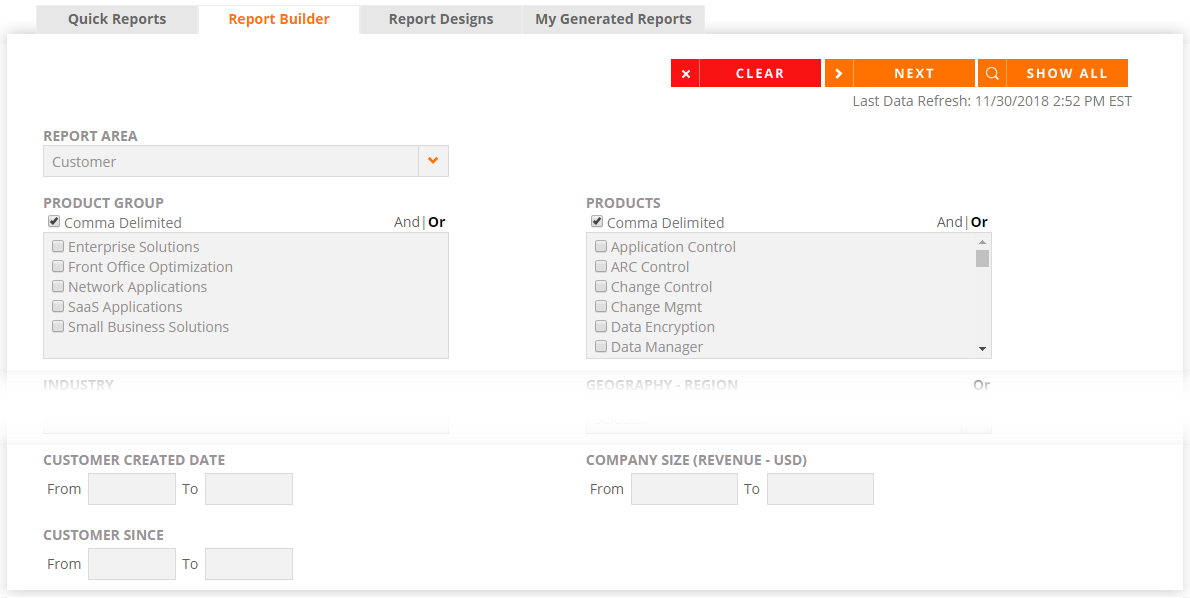
- Click the Report Builder tab.
- Select the Report Area from which to pull data fields.
- Select the appropriate report criteria checkboxes.
- (Optional) Click the Show All button to generate a report showing all the criteria.
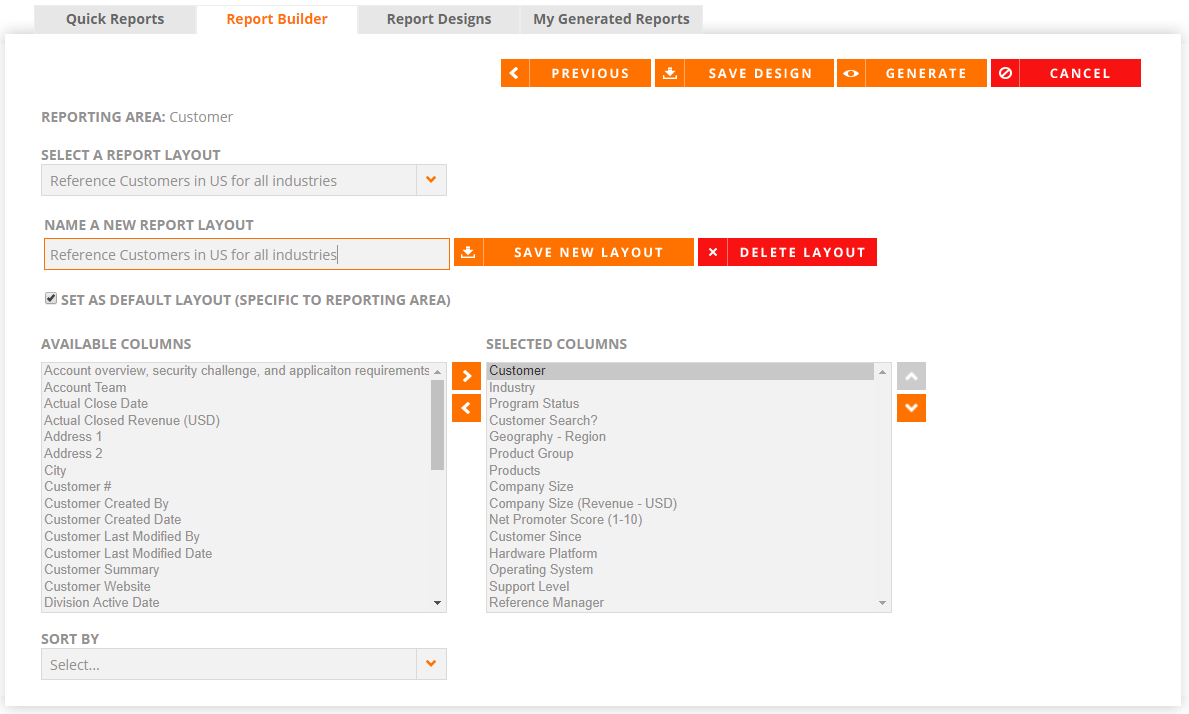
- Once you've selected all of the criteria, click the Next button. You will be directed to the "Report Output" page.
- Use the Select a Report Layout dropdown menu to use an existing layout or to save a new report format (i.e. the columns selected to be imported into the report):
- Enter a name into the Name A New Report Layout field.
- Click the Save New Layout button.
- To make this layout the default, select the Set as Default Layout (Specific to Reporting Area) checkbox.
Note: To re-use this output format, select it from the Select a Report Layout dropdown menu.
- Determine which columns will appear in your reports by moving them from the Available Columns to Selected Columns.
- (Optional) Reorder the Selected Columns using the
 and
and  buttons.
 - (Optional) Sort the report results by selecting an option from the Sort By dropdown menu.
- To generate the report:
- Click the Generate button.
Note: You will be notified via email once the report is ready. Click the link in the email to access your report. Once ready, your report will also appear in the My Generated Reports tab.
- To save the report design in its entirety (i.e. both the search criteria and the output format):
- Click the Save Design button. You will be directed to the "Add a Saved Design" page.
- Enter a report design Title.
- Select the user roles with which to share the report. If you share a report with a certain user group, those users can only generate the report and will not possess editing privileges.
- Click Save.
Note: If the "Roles that can share saved reports" setting is applied to your user role, once saved, the Saved Report tab will appear where you can run the report by clicking the Excel icon, edit the report by clicking the Pencil icon, or delete it by clicking the Trash icon. Clicking on the report Title will direct you to the pre-populated Report Builder.
Note: All report data is updated nightly. Contact RO Support if you require a data update sooner than the next evening.
Note: Selecting the Comma Delimited checkbox will put all of the data from the selected field into the same row of the exported report; if it isn't selected, each item will appear in its own row. The And/Or option indicates whether you would like to include any or all of the selected fields. When And is selected, the report will include all of the fields. When Or is selected, the report will include any of the selected fields. I
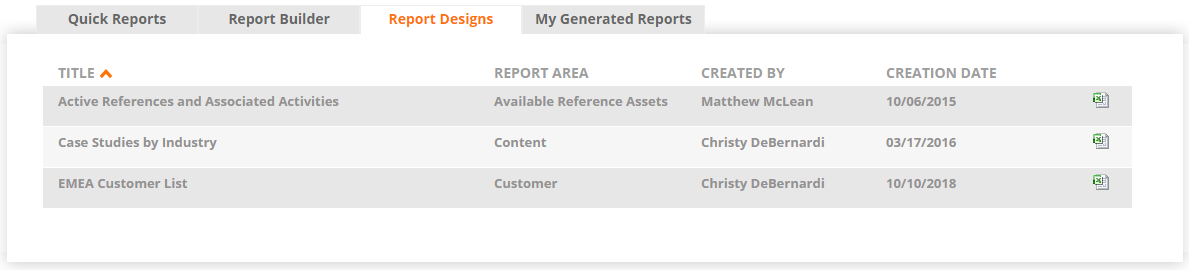
Editing Report Designs
The Report Designs tab allows you to edit your saved custom report designs.
- Navigate to the Reports page.
- Click the Report Designs tab.
- Click the desired report Title.
- Edit the report as desired. For more information, see Building & Running Reports.
Note: If you share a report with a certain user group, those users can only generate the report and will not possess editing privileges.
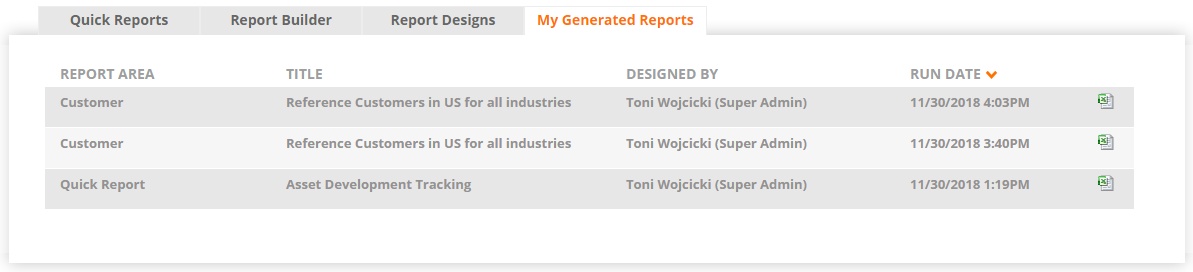
Viewing Generated Reports
- Navigate to the Reports page.
- Click the My Generated Reports tab.
- Click the report Title or Excel icon to view your generated reports.