Add, edit, and perform other actions associated with Reference Requests.
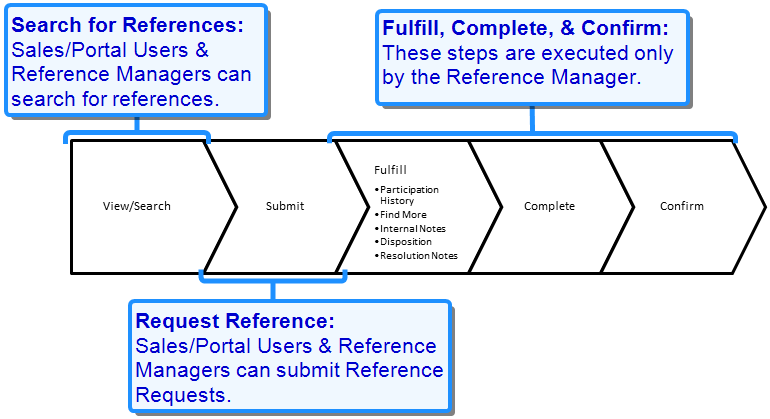
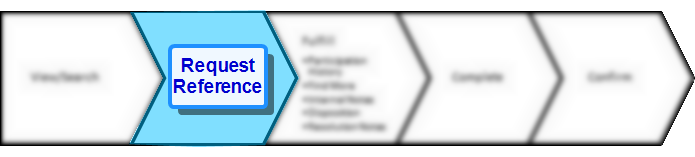
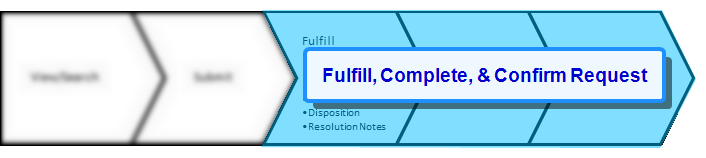
Reference Requests Workflow
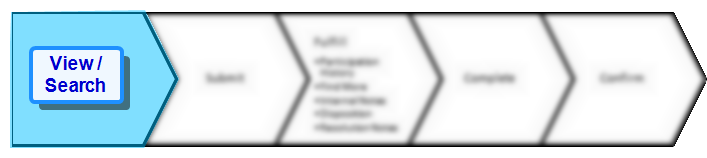
Viewing References
Reference Managers can search for references on behalf on the requester.
Note: For information on how Sales/Portal Users search for references, see Requesting References .
- Navigate to the Requests page.
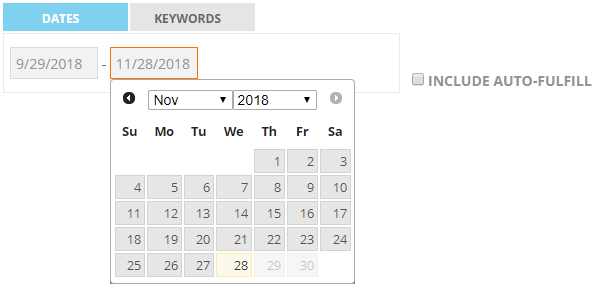
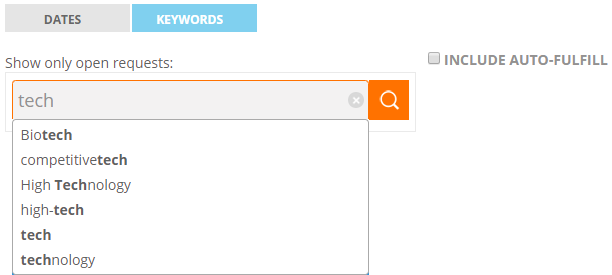
- (Optional) Filter the displayed requests by:
- Dates: Select the filter dates using the calendar.
- Keywords: Enter the keyword and click the Search button or Enter.
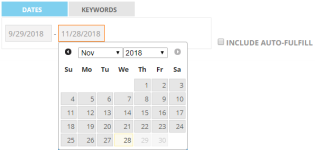
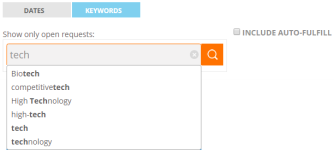
Note: Select the Include Auto-Fulfill check box to include auto-fulfill requests in your filter. Auto-fulfill facilitates information exchange between the requester and account owner without the use of the Reference Manager. Account owners must be identified in SFDC for each customer.
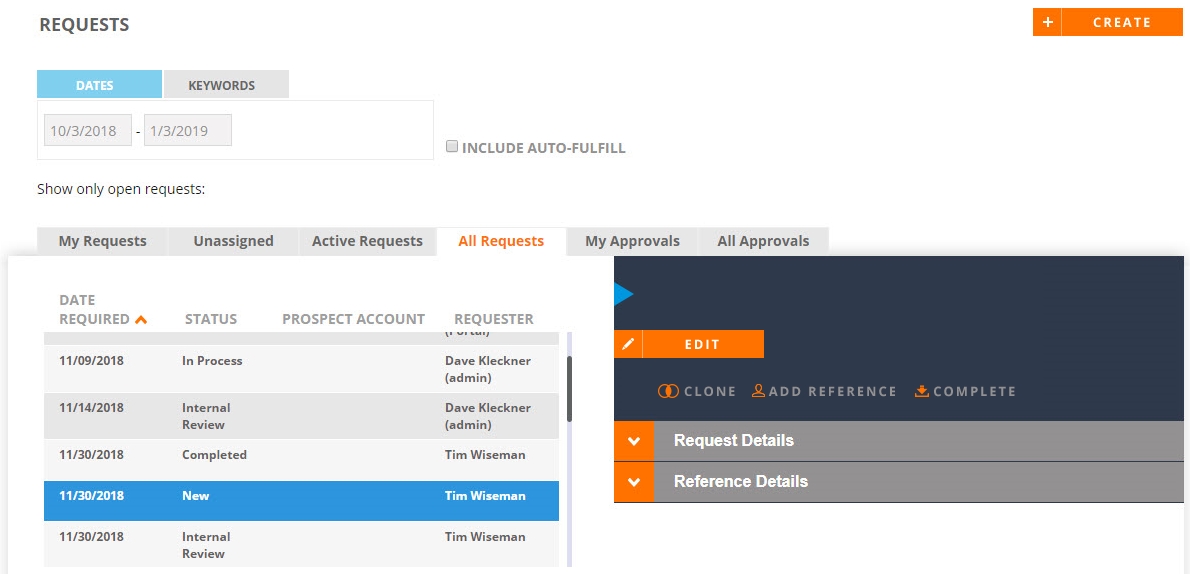
- Select one of the following views:
- My Requests: Requests that I have submitted or that are assigned to me.
- Unassigned: Requests that have not been assigned to anyone.
- Active Requests: Requests submitted by all users that are New or In Progress.
- All Requests: All requests in the system (Approved, Not Approved, New, In Progress, Completed).
- My Approvals: Pending requests requiring your approval.
- All Approvals: All pending requests that require approval from a reference customer's Account Owner.
Note: Requests that are assigned to you will migrate from the "My Requests" to "All Requests" view once they are marked as "Completed". Those that are submitted by you will remain in the "My Requests" view even after processing.
- Click a row to view request details on the right side of the screen.
- Click the column headers (e.g. Date, Status, Prospect Name) to sort your requests.
Note: For information on how to fulfill, complete, or confirm Reference Requests, see Fulfilling, Completing, & Confirming Reference Requests.
Note: Please reach out to our support team @ roinnovation-support@uplandsoftware.com or your Client Success Manager (CSM) to ask for information about turning on the new full page Request Grid in your company’s Shimbonda (test) site. This is currently and ‘opt-in’ feature that you will proactively need to have our team turn on in your Shimbonda site. Once your team has tested in Shimbonda and is comfortable with the new grid; you can reach back out to our support team to have them enable it in your Production RO site as well.
- Navigate to the Requests page using the navigation bar icon,
 .
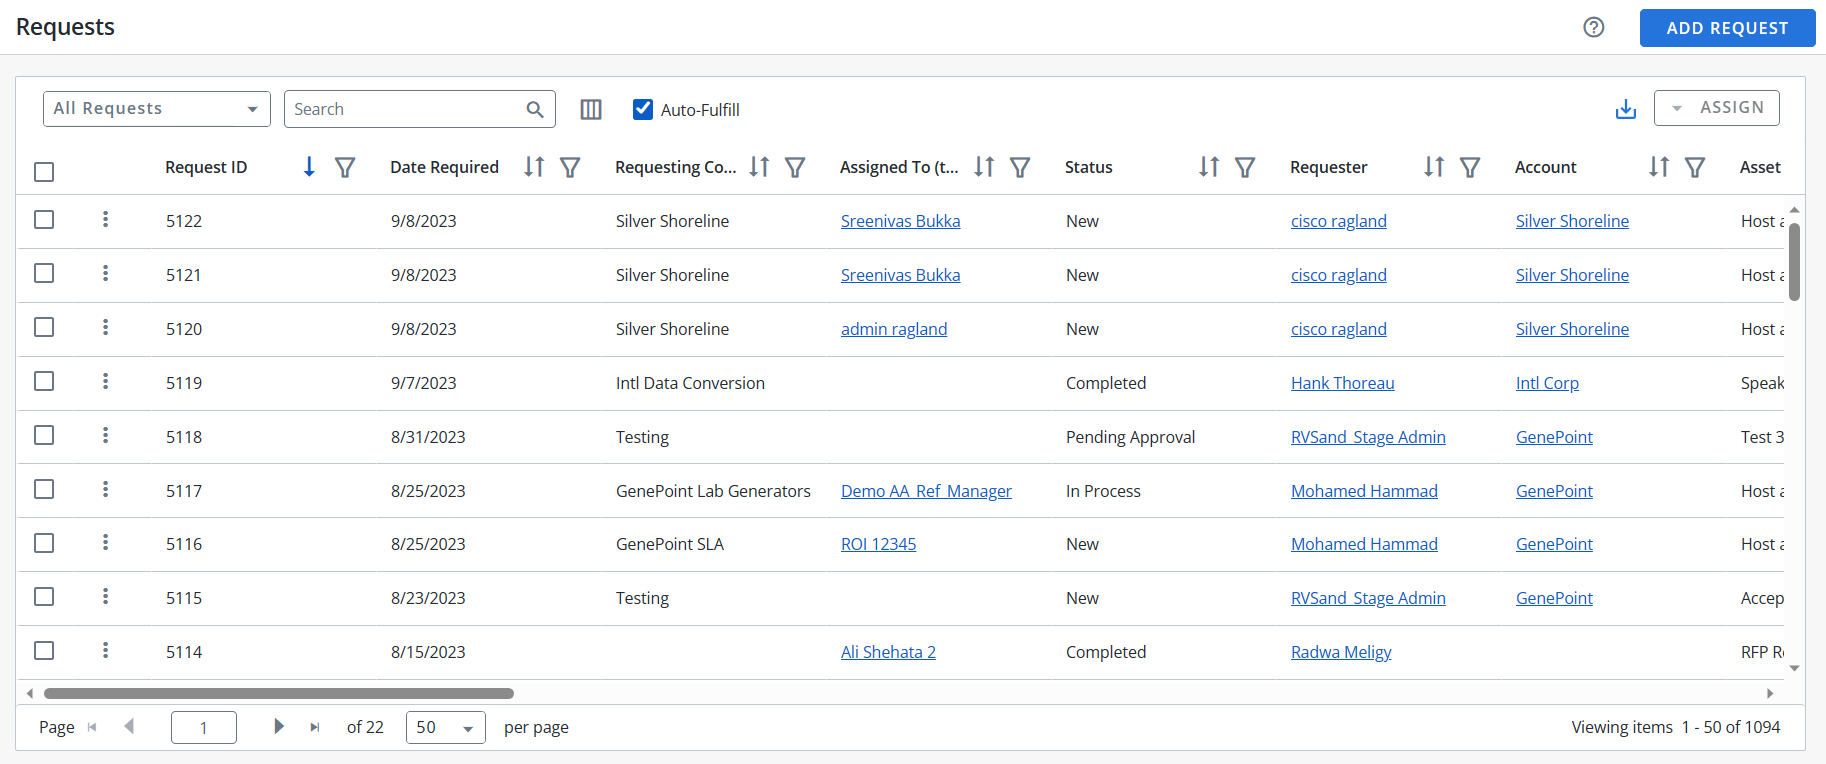
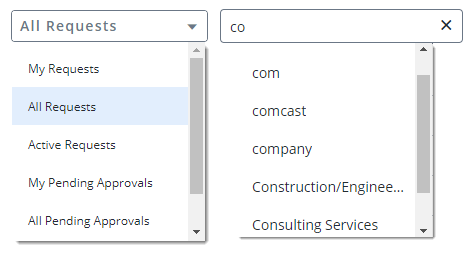
. - (Optional) Select a preferred View:
- My Requests: Requests that I have submitted or that are assigned to me.
- All Requests: All requests in the system (Approved, Not Approved, New, In Progress, Completed).
- Active Requests: Requests submitted by all users that are New or In Progress.
- My Pending Approvals: Pending requests requiring your approval.
- All Pending Approvals: All pending requests that require approval from a reference customer's Account Owner.
- Unassigned Requests: Requests that have not been assigned to anyone.
Note: Requests that are assigned to you will migrate from the "My Requests" to "All Requests" view once they are marked as "Completed". Those that are submitted by you will remain in the "My Requests" view even after processing.
Note: The RO Platform will remember your View selection. The next time you open the Requests grid, your selected View will be displayed as the default.
- To perform a search, enter two or more characters into the search bar and click the
 button or Enter. Results begin populating below the search bar once text is entered. Click the X to clear your search bar.
 - (Optional) Click the
 button next to the column headers to sort the column from either top-to-bottom or bottom-to-top: chronologically for dates, sequentially for numbers, alphabetically for text, and from Approved to Rejected for Status. Your sort selections will be remembered as your default preference.
 - (Optional) Click the
 button next to the column headers (e.g. Status, Assigned To, Requester, Asset Type, etc.) to filter what appears in the columns. To save the filters, refer to Using the Saved Filter.
 - (Optional) Click the
 button to export all the records or the filtered records to excel. The exported records will follow the sorting order and the columns customized in the grid.
 - (Optional) Use the page scrolling controls at the bottom left of the grid to view Requests on other pages. To go to a specific page, click in the field, type the page number, then press Enter or Tab. Select the number of rows you want to display in the grid.
- Click a row to view request information on another page. Click the Details tab to view request details, click the References tab to view references, click the Approvals tab to view approvals, and Notes to view notes. Click X to return to the Requests Overview page.
Note: If multiple words are entered into the search, the RO Platform treats them as phrases and only returns results that contain the entire search phrase. Wildcards and quotation marks are not recognized by the search.
Note: Select the Auto-Fulfill check box to include auto-fulfill requests in your filter. Auto-fulfill facilitates information exchange between the requester and account owner without the use of the Reference Manager. Account owners must be identified in SFDC for each customer.
Note: The RO platform will remember your Filter selection even if you leave the Requests page and return to it later.
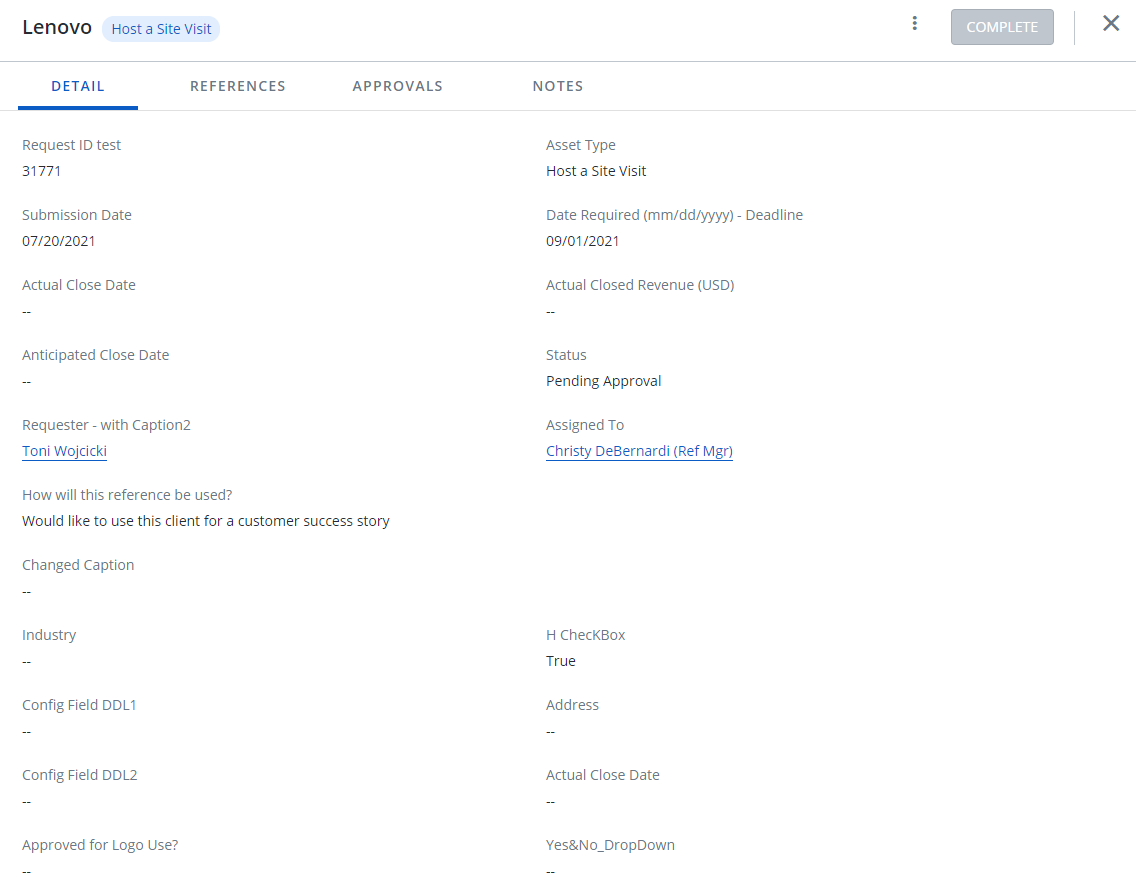

From left to right: Request Detail tab, Request References tab, Request Approvals tab, and Request Notes tab
Note: Click the More Actions button, ![]() , and select Edit from the menu, Clone or select Copy Link to copy the request link and send to other Reference Managers or Administrators. Click Add Reference to add a reference directly from this page.
, and select Edit from the menu, Clone or select Copy Link to copy the request link and send to other Reference Managers or Administrators. Click Add Reference to add a reference directly from this page.
Note: For information on how to fulfill, complete, or confirm Reference Requests, see Fulfilling, Completing, & Confirming Reference Requests.
Users can filter the columns based on their requirements and save the filters for future use. This allows users to quickly access the information they need and eliminates the need to manually filter columns every time they use the grid.
To create a saved filter:
-
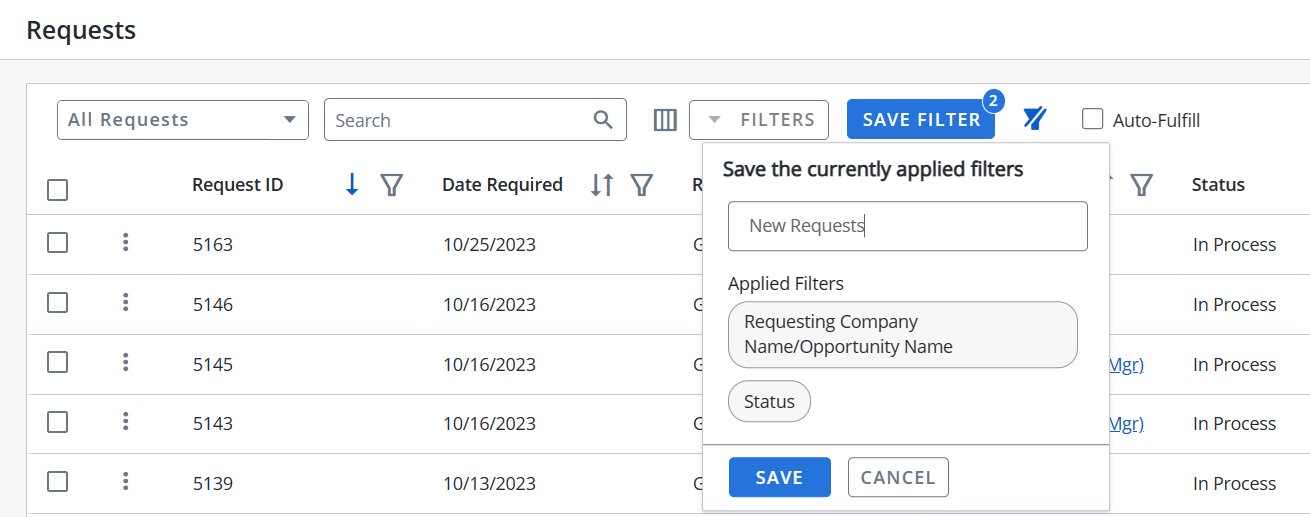
Filter the columns in the grid as desired. The Save Filter button is displayed next to Filters along with the number of filters applied.
- Click Save Filter and enter a filter name. This dialog displays the column names of the applied filters.

- Click Save to save the filter.
Note: The "Clear All Filters" button,
 , will display once a filter has been applied. Click the icon to clear all applied filters.
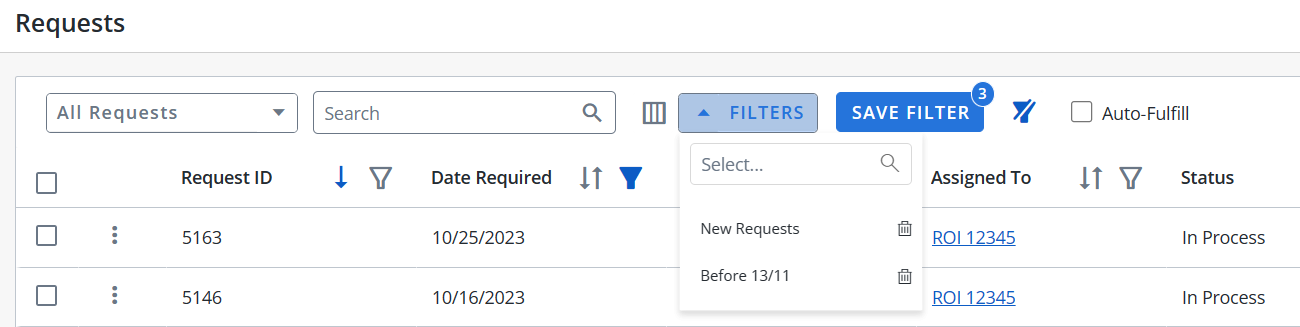
 - To find the saved filter, open the Filters drop-down menu and select the desired saved filter.
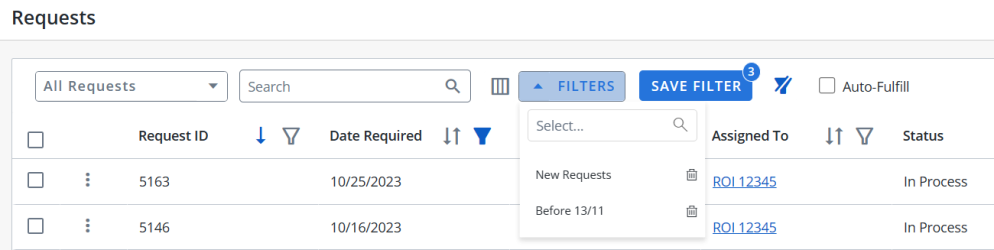
- To delete the saved filter, open the Filters drop-down menu and click
 icon.
icon.
Note:
-
It is not possible to create saved filters with the same filter name.
-
The RO platform will remember your Save Filter selection even if you leave the page and return to it later.
Submitting Reference Requests
Reference Managers can submit Reference Requests on behalf on the requester by either using the Search or the Requests page.
Note: For information on how Sales/Portal Users request references, see Requesting References .
Reference Managers can submit Reference Manager directly from the Requests page.
Note: This reference request does not include assets or customers. Because there is nothing attached to this request references and assets that meet the request criteria can be added later.
- Navigate to the Requests page.
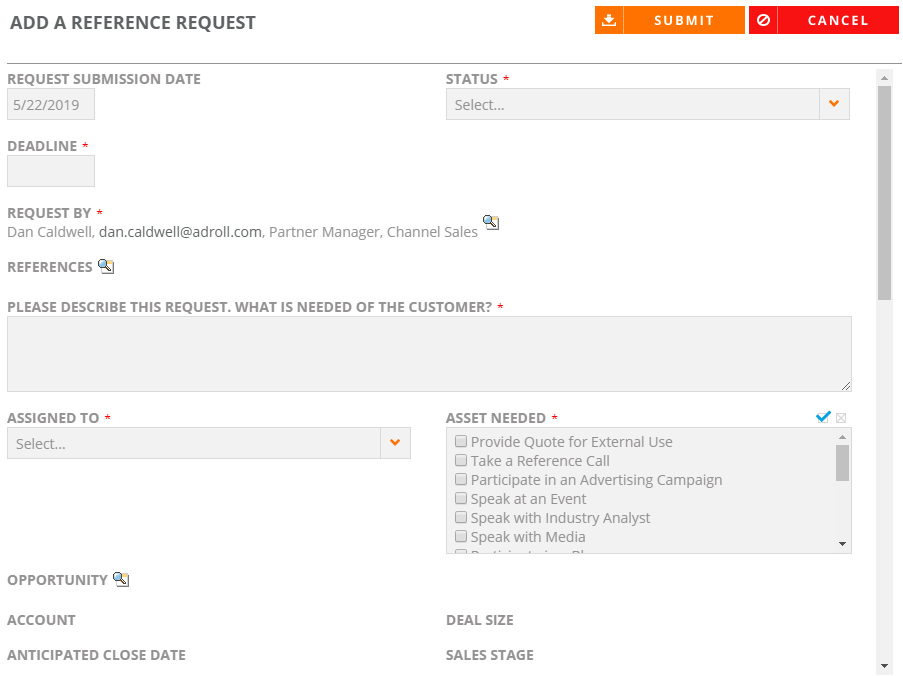
- Click Create. The Add a Reference Request page will appear.
- Add your request details. For more information on adding request details, see Submitting Reference Requests Using Search.
- Click Submit. Your newly created request will appear in the My Requests page.
Note: The "Allow Contact Lookups from Add Reference" setting must be enabled in order for Reference Managers and Admins to look up reference customers from the Requests page. For more information on adding reference customers from the Requests page, see Looking up Reference Customers when adding Reference Requests.
Note: Please reach out to our support team @ roinnovation-support@uplandsoftware.com or your Client Success Manager (CSM) to ask for information about turning on the new full page Request Grid in your company’s Shimbonda (test) site. This is currently and ‘opt-in’ feature that you will proactively need to have our team turn on in your Shimbonda site. Once your team has tested in Shimbonda and is comfortable with the new grid; you can reach back out to our support team to have them enable it in your Production RO site as well.
Reference Managers can submit Reference Manager directly from the Requests page.
- Navigate to the Requests page.
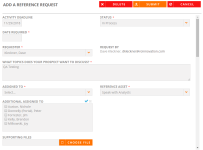
- Click Add Request. The Add a Reference Request dialog will appear.
- Add your request details. Fields marked with an asterisk are required.
- Status: Select New if entering a new request.
- Requester: Enter the name of the Requester for whom you are completing the request.
- Request By: This displays the name of the Reference Manager that is requesting the reference on behalf of the requester.
- How will this reference be used: Provide as much detail as possible to help the reference manager fulfill the request with the appropriate reference.
- Assigned To: This is always the reference manager who is assigned the request.
- Reference Asset: Select the reference activity needed for the request.
- Opportunity Name: If this is a sales request and your reference system is integrated with a CRM, search for the applicable opportunity.
- Original Requester Name: This is the name of the sales rep that submitted the request.
- Original Requester Email: This is the email address of the sales rep that submitted the request.
- (Optional) Marketing Requests: If this is a marketing request complete any related marketing fields.
Note: The "Allow Contact Lookups from Add Request" setting must be enabled in order for Reference Managers and Admins to look up requesters. For more information on adding requesters, see Looking up Requesters when adding Reference Requests.
- Click Submit. Your newly created request will appear in the Requests page.
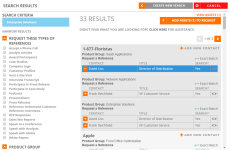
- Perform a search to find customers that match similar attributes as your opportunity.
- After locating your desired customer within the Search Results:
- Click
 to request a particular customer for a reference activity.
 - Click
 to remove a particular customer for a reference activity.
- Click
- Click Create Request. The Add a Reference Request page will appear.
- Add your request details. Fields marked with an asterisk are required.
- Status: Select New if entering a new request.
- Requester: Enter the name of the Requester for whom you are completing the request.
- Request By: This displays the name of the Reference Manager that is requesting the reference on behalf of the requester.
- How will this reference be used: Provide as much detail as possible to help the reference manager fulfill the request with the appropriate reference.
- Assigned To: This is always the reference manager who is assigned the request.
- Reference Asset: Select the reference activity needed for the request.
- Opportunity Name: If this is a sales request and your reference system is integrated with a CRM, search for the applicable opportunity.
- Original Requester Name: This is the name of the sales rep that submitted the request.
- Original Requester Email: This is the email address of the sales rep that submitted the request.
- (Optional) Marketing Requests: If this is a marketing request complete any related marketing fields.
Note: The "Allow Contact Lookups from Add Request" setting must be enabled in order for Reference Managers and Admins to look up requesters. For more information on adding requesters, see Looking up Requesters when adding Reference Requests.
- Click Submit. The request will be submitted to the reference team for processing.
Note: We recommend creating all requests from search results as your search criteria will carry through the request and aid you later in finding more reference assets.
Looking up Reference Customers when adding Reference Requests
Enabling the "Allow Contact Lookups from Add Reference" setting allows Reference Managers and Admins to look up reference customers on existing requests, view all available contacts, and add contacts directly into the request that is not already a named contact in RO. When the Reference Manager selects and adds a contact to the request, the contact becomes a reference customer; they are written into the customer record with an associated participation record which is then used to process the request. This feature is especially helpful for programs in which the Reference Team cannot fulfill a request with the reference contact that was listed in the original request and need to identify an alternative contact for that reference customer.
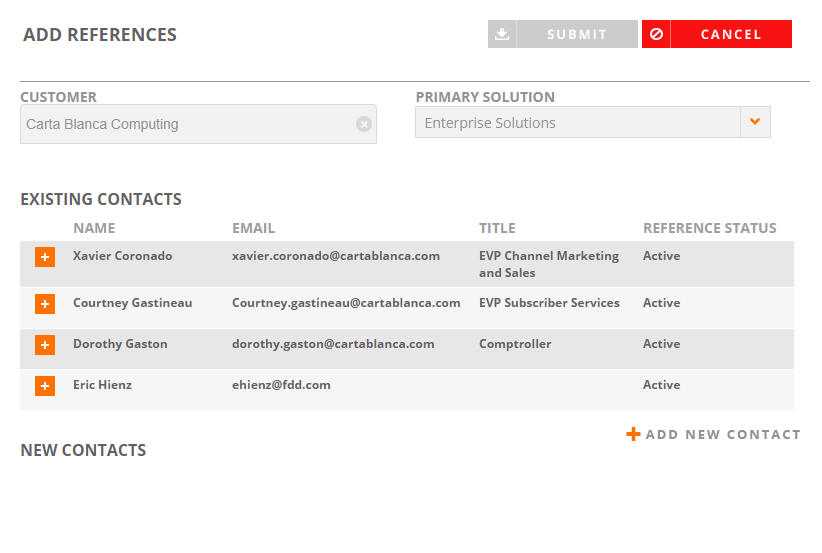
- On the Add a Reference Request dialog, click the References look-up icon,
 . The Add References dialog will appear.
 - Begin entering the Customer name and select the desired customer when it appears. A list of Existing Contacts will appear.
- (Optional) Select your Primary Solution to filter which Existing Contacts will appear.
- Existing Contacts: All existing contacts that are shown here have been created in the RO Platform for a particular customer.
- Click to add an existing contact.
- Click to remove an existing contact.
- Click
- New Contacts: If you don't see a contact that you want to use, you can add a new contact directly to this request.
- Click Add New Contact to add a new contact to your request. The Add New Contact dialog will appear.
- Enter contact details.
- Click Save. Once saved, your contact is written into the customer record.
- Click Submit.
Note: If you are integrated with a CRM, you will see the Available CRM Contacts option. These are contacts associated with the customer, but haven't been added to the RO Platform yet. Once added, the CRM contact is written into the customer record.
Looking up Requesters when adding Reference Requests
Enabling the "Allow Contact Lookups from Add Request" setting allows Reference Managers and Admins to look up reference customers on existing requests, view all available contacts, and add contacts directly into the request which may or may not already be a named contact in RO. When the Reference Manager selects and adds a contact to the request, the contact becomes a customer reference; they are written into the customer record with an associated participation record which is then used to process the request. This feature is especially helpful for programs in which the Reference Team cannot fulfill a request with the reference contact that was listed in the original request and need to identify an alternative contact for that reference customer.
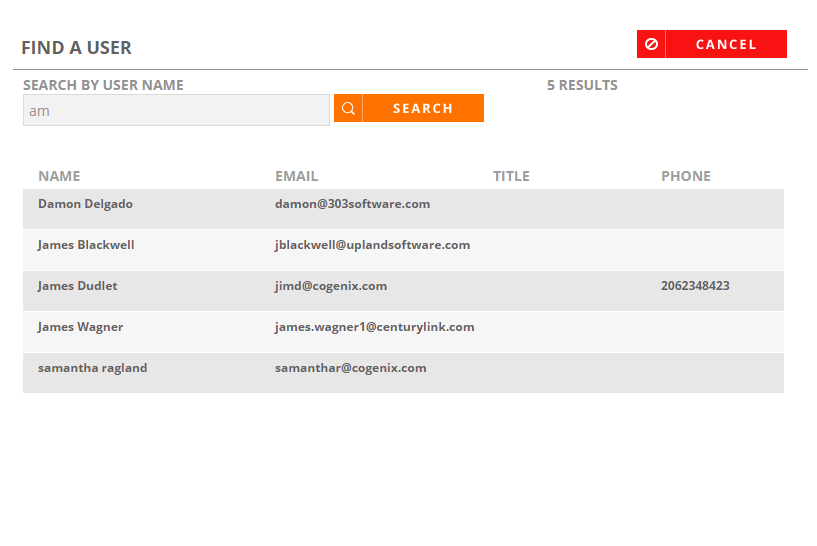
- On the Add a Reference Request dialog, click the Requester look-up icon, . The Find a User dialog will appear.
- Begin entering the User Name name and click Search. A list of existing users will appear.
- Select your desired requester. You will be directed back to the Add a Reference Request dialog.
Note: Reference managers will receive an email notification letting them know that a request has been submitted. The requester will receive an email notification confirming their submission.
Fulfilling, Completing, & Confirming Reference Requests
These steps are executed only by the Reference Manager.
- Navigate to the Requests page to view your existing requests.
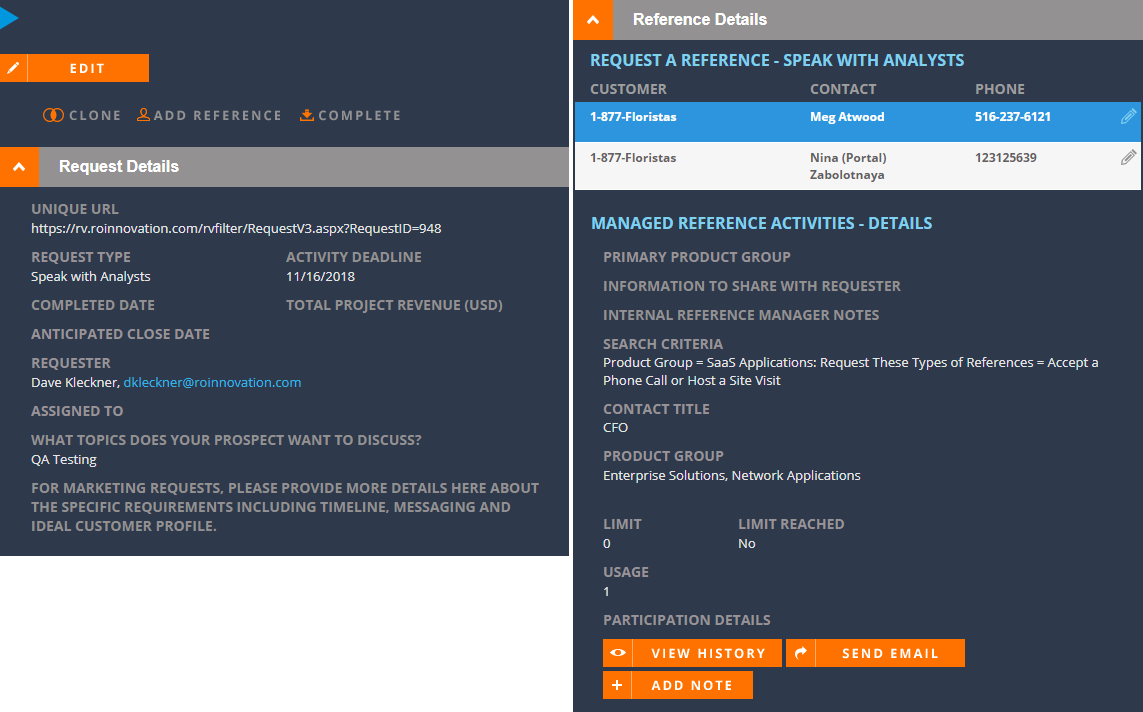
- Once you locate the request you are going to process, click the row to view request details on the right side of the screen.
- Perform one of the following actions:
- Edit: Update the status or any other details of the request here.
- Click the Edit button.
- Edit your request details. Fields marked with an asterisk are required. For more information on Reference Request fields, see Submitting Reference Requests using the Requests page.
- Click Save.

- Clone: Use an existing request as a template for creating new Reference Requests.
- Click the Clone button.
- Edit your request details as desired. Fields marked with an asterisk are required. For more information on Reference Request fields, see Submitting Reference Requests using the Requests page.
- Click Submit. Your newly created request will appear in the My Requests tab.
Note: Reach out to your CSM to turn On the Clone option in order to be displayed in the grid.
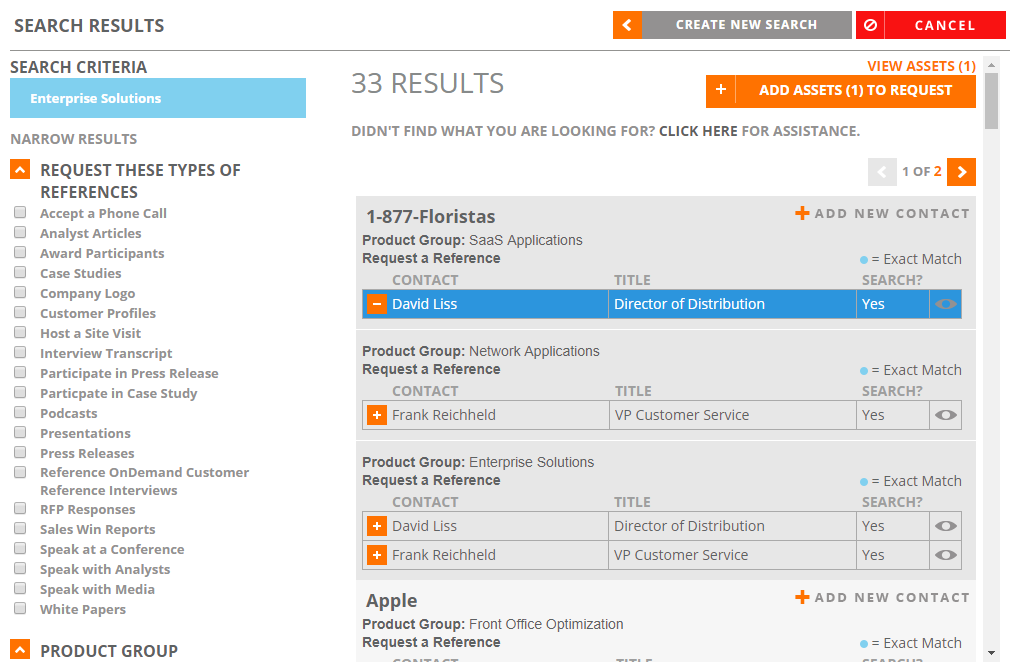
- Add Reference: Marketing users submit reference requests for a variety of needs, like speaking engagements and case studies. As the right reference contacts are identified by the Reference Manager, the contacts can be added directly to the request form from the Add Reference link. This is where you can add additional reference contacts to a request, even after the original request has been made.
- Click the Add Reference button. You will be directed to a search screen. For more information on searching, see Searching.
- After you have selected your search criteria, click Search to locate reference contacts that exist in both the RO Platform and your CRM system.
- Add your desired available contacts:
- Click to add an available contact.
- Click to remove an available contact.
- Click
Note: If your RO Platform is not integrated into an external CRM system, you can add new contacts on-the-fly. If enabled, you will see the Add New Contact button, which allows you to add a contact and select the products they would be referenced for. If your system is not integrated into an external CRM system, you can add a new contact manually.
- Click Add Assets to Request to add your selected assets into the Reference System (for future use) and update their participation history.
- Click Save. The new reference contact(s) will appear in the Reference Details section.
- Complete: Complete Reference Requests here.
Note: For more information, see Completing and Confirming Reference Requests.
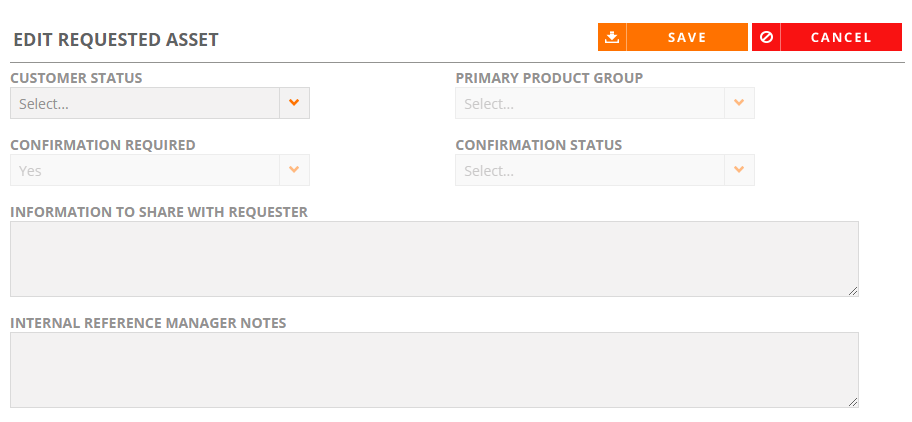
- Edit Asset: Set a disposition status for your Reference Requests contact(s) here. A disposition status, which every contact requires, identifies if a reference contact will take part, or has taken part in the reference activity and will update the reference contacts participation history.
- Expand the Reference Details section of the request.
- Locate the desired contact and click the Pencil icon.
- Edit any desired information pertaining to the reference contact.
- Customer Status: Select the reason for your disposition.
- Confirmation Required: Determine whether confirmation is required when editing a requested asset. This setting indicates if you want to confirm that the reference activity occurred, before participation history for the selected reference contact is updated. It is recommended that this setting is enabled.
- Confirmation Status: Determine the status of the requested asset. If reference event surveys are enabled, the reference event for the contact will be automatically confirmed when the survey is completed and submitted by the requester. It is recommended that this is set to Not Confirmed.
- Information to be shared with Requester: Enter information about the reference request that you want to share with the requester. These notes will be passed to the requester’s My Requests screen once the reference request has been Completed.
- Internal Notes: Use this field to keep track of your outreach to reference contacts for each reference request. This information will stay with the reference request record.
Note: When the Confirmation Status is Confirmed and Customer Status is Complete, the check mark icon will appear next to the contact for this request and the reference contact's reference participation history will be incremented by 1 for that specific reference activity.
- Click Save.
Note: Click on the customer name to edit a customer record, review internal notes, or confirm that a reference status is Active. For more information, see Editing Customer Information.
- View History: View your request history here.
- Expand the Reference Details section of the request.
- Click the View History button.
- View the information found on the Reference Participation & History and Contact History tabs.
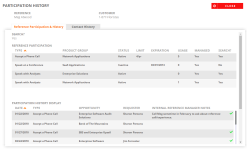
Note: Participation History entries contain icons indicating the status. The
 icon indicates that the participation was confirmed and the reference was used for that activity. The
  icon indicates that the participation was confirmed, but the reference was not used for that activity. A
  icon indicates that the reference was selected for an activity, but is unconfirmed on whether the reference activity has occurred. A Participation History entry without an icon means that a reference is being considered for use, but has not yet been selected.
 - Send Email: Send an email to your reference contact here. This option appears only if the "Email Templates" feature has been enabled in your system.
- Expand the Reference Details section of the request.
- Click the Send Email button.
- Select the email Template and Send Method using the drop-down menus.
- Click Send Email.

- Add Note: Add any notes pertaining to your request here (e.g. Bill unavailable, call on Tues between 2-4 PM). This note will be added to the Notes tab within the Customer Record.
- Expand the Reference Details section of the request.
- Click the Add Note button.
- Add your note details. Fields marked with an asterisk are required.
- Click Save.
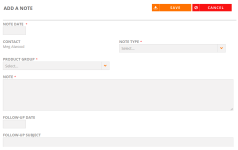
Note: If the Follow-Up Date and Follow-Up Subject fields are not populated, the note will be associated with the customer account but will not appear in the Tasks List.
- Edit: Update the status or any other details of the request here.


Note: Please reach out to our support team @ roinnovation-support@uplandsoftware.com or your Client Success Manager (CSM) to ask for information about turning on the new full page Request Grid in your company’s Shimbonda (test) site. This is currently and ‘opt-in’ feature that you will proactively need to have our team turn on in your Shimbonda site. Once your team has tested in Shimbonda and is comfortable with the new grid; you can reach back out to our support team to have them enable it in your Production RO site as well.
- Navigate to the Requests page to view your existing requests.
- Select the checkbox from any desired row and perform any of the following actions directly from the Requests page: Assign, Edit, Clone, Copy Link, and Add Reference.
- Assign: Click the Assign dropdown menu at the top of the Request grid. A search menu will appear. Enter two or more characters into the search bar and click the button or Enter. Results begin populating below the search bar once text is entered. Click the X to clear your search bar. Select the desired assignee.
- Edit: Click the More Actions button,
 , and select Edit from the menu. or select Copy Link to copy the request link and send to other Reference Managers or Administrators. Click Add Reference to add a reference directly from this page.
 - Clone: Use an existing request as a template for creating new Reference Requests.
- Click the More Actions button, , and select Clone.
- Edit your request details as desired. Fields marked with an asterisk are required. For more information on Reference Request fields, see Submitting Reference Requests using the Requests page.
- Click Submit. Your newly created request will appear in the My Requests tab.
- Click the More Actions button,
- Copy Link: Click the More Actions button, , and select Copy Link to copy the request link and send to other Reference Managers or Administrators.
- Add Reference: Click the More Actions button, , and select Add Reference to add a reference directly from this page. Marketing users submit reference requests for a variety of needs, like speaking engagements and case studies. As the right reference contacts are identified by the Reference Manager, the contacts can be added directly to the request form from the Add Reference link. This is where you can add additional reference contacts to a request, even after the original request has been made.
- Click the Add Reference button. You will be directed to a search screen. For more information on searching, see Searching.
- After you have selected your search criteria, click Search to locate reference contacts that exist in both the RO Platform and your CRM system.
- Add your desired available contacts:
- Click to add an available contact.
- Click to remove an available contact.
- Click
- Click Add Assets to Request to add your selected assets into the Reference System (for future use) and update their participation history.
- Click Save. The new reference contact(s) will appear in the Reference Details section.
Note: If your RO Platform is not integrated into an external CRM system, you can add new contacts on-the-fly. If enabled, you will see the Add New Contact button, which allows you to add a contact and select the products they would be referenced for. If your system is not integrated into an external CRM system, you can add a new contact manually.
Note: Please reach out to our support team @ roinnovation-support@uplandsoftware.com or your Client Success Manager (CSM) to ask for information about turning on the new full page Request Grid in your company’s Shimbonda (test) site. This is currently and ‘opt-in’ feature that you will proactively need to have our team turn on in your Shimbonda site. Once your team has tested in Shimbonda and is comfortable with the new grid; you can reach back out to our support team to have them enable it in your Production RO site as well.
- Navigate to the Requests page to view your existing requests.
- Once you locate the request you are going to process, click the row to view request information on another page.
- The following actions are available on each tab via the More Actions button, :
- Edit: Update the status or any other details of the request here.
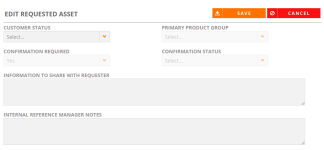
- Click the More Actions button, , and select Edit from the menu. The Edit Requested Asset dialog will appear.
- Edit any desired information pertaining to the reference contact.
- Customer Status: Select the reason for your disposition.
- Confirmation Required: Determine whether confirmation is required when editing a requested asset. This setting indicates if you want to confirm that the reference activity occurred, before participation history for the selected reference contact is updated. It is recommended that this setting is enabled.
- Confirmation Status: Determine the status of the requested asset. If reference event surveys are enabled, the reference event for the contact will be automatically confirmed when the survey is completed and submitted by the requester. It is recommended that this is set to Not Confirmed.
- Information to be shared with Requester: Enter information about the reference request that you want to share with the requester. These notes will be passed to the requester’s My Requests screen once the reference request has been Completed.
- Internal Notes: Use this field to keep track of your outreach to reference contacts for each reference request. This information will stay with the reference request record.
Note: When the Confirmation Status is Confirmed and Customer Status is Complete, the check mark icon will appear next to the contact for this request and the reference contact's reference participation history will be incremented by 1 for that specific reference activity.
- Click Save.
- Click the More Actions button,
- Copy Link: Click the More Actions button, , and select Copy Link to copy the request link and send to other Reference Managers or Administrators.
- Add Reference: lick the More Actions button, , and select Add Reference to add a reference directly from this page. Marketing users submit reference requests for a variety of needs, like speaking engagements and case studies. As the right reference contacts are identified by the Reference Manager, the contacts can be added directly to the request form from the Add Reference link. This is where you can add additional reference contacts to a request, even after the original request has been made.
- Click the Add Reference button. You will be directed to a search screen. For more information on searching, see Searching.
- After you have selected your search criteria, click Search to locate reference contacts that exist in both the RO Platform and your CRM system.
- Add your desired available contacts:
- Click to add an available contact.
- Click to remove an available contact.
- Click
- Click Add Assets to Request to add your selected assets into the Reference System (for future use) and update their participation history.
- Click Save. The new reference contact(s) will appear in the Reference Details section.
Note: If your RO Platform is not integrated into an external CRM system, you can add new contacts on-the-fly. If enabled, you will see the Add New Contact button, which allows you to add a contact and select the products they would be referenced for. If your system is not integrated into an external CRM system, you can add a new contact manually.
- Add Note: Add any notes pertaining to your request here (e.g. Bill unavailable, call on Tues between 2-4 PM). This note will be added to the Notes tab within the Customer Record.
- Click the More Actions button, , and select Add Note from the menu. The Add Note dialog will appear.
- Add your note details. Fields marked with an asterisk are required.
- Click Save.
Note: If the Follow-Up Date and Follow-Up Subject fields are not populated, the note will be associated with the customer account but will not appear in the Tasks List.
- Click the More Actions button,
- Complete: Complete Reference Requests here.
- Edit: Update the status or any other details of the request here.
- Use the Detail, References, Approvals, and Notes tabs to edit your request as desired.
- Detail: Use this tab to view, edit, and complete requests.
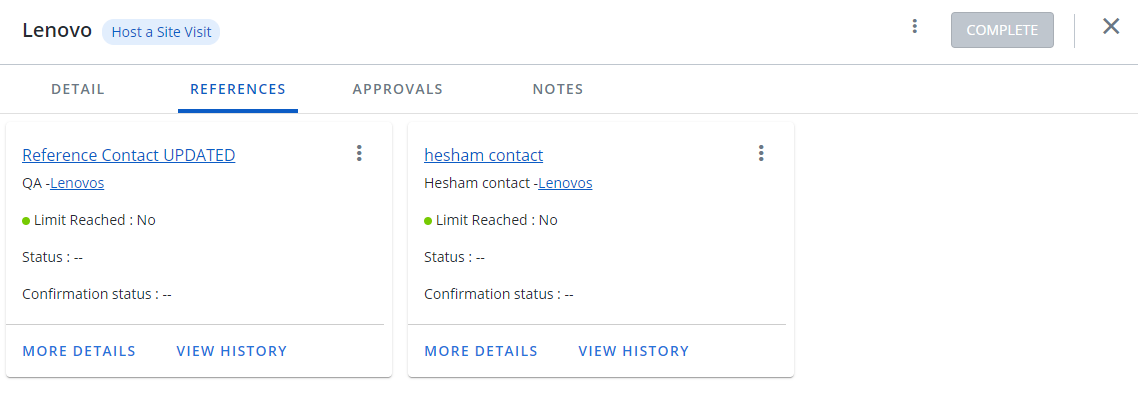
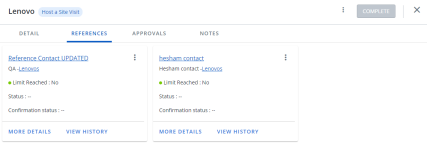
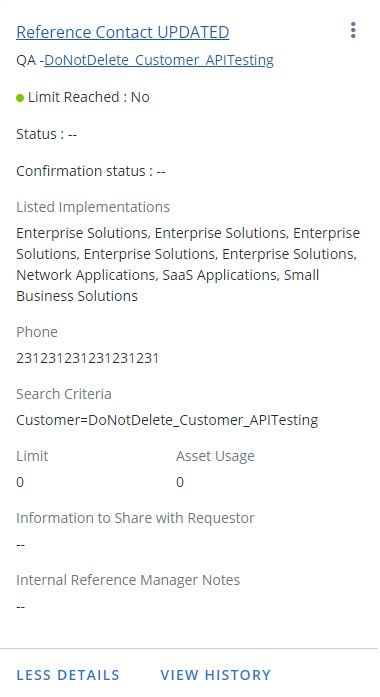
- References: Use this tab to view, edit, add notes, and send emails to references
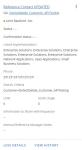
- More Details: Click the More Details link to see further information about each reference. This card indicates whether a request limit has been reached, with a green, yellow, or red dot. Click the Less Details link to collapse the card.
- View History: View your request history here.
- Click the View History link.
- View the information found on the Reference Participation & History and Contact History tabs.
Note: Participation History entries contain icons indicating the status. The
icon indicates that the participation was confirmed and the reference was used for that activity. The icon indicates that the participation was confirmed, but the reference was not used for that activity. A icon indicates that the reference was selected for an activity, but is unconfirmed on whether the reference activity has occurred. A Participation History entry without an icon means that a reference is being considered for use, but has not yet been selected. - Edit: Update the status or any other details of the request here.
- Click the More Actions button, , on the desired Reference card, and select Edit from the menu. The Edit Requested Asset dialog will appear.
- Edit any desired information pertaining to the reference contact.
- Customer Status: Select the reason for your disposition.
- Confirmation Required: Determine whether confirmation is required when editing a requested asset. This setting indicates if you want to confirm that the reference activity occurred, before participation history for the selected reference contact is updated. It is recommended that this setting is enabled.
- Confirmation Status: Determine the status of the requested asset. If reference event surveys are enabled, the reference event for the contact will be automatically confirmed when the survey is completed and submitted by the requester. It is recommended that this is set to Not Confirmed.
- Information to be shared with Requester: Enter information about the reference request that you want to share with the requester. These notes will be passed to the requester’s My Requests screen once the reference request has been Completed.
- Internal Notes: Use this field to keep track of your outreach to reference contacts for each reference request. This information will stay with the reference request record.
Note: When the Confirmation Status is Confirmed and Customer Status is Complete, the check mark icon will appear next to the contact for this request and the reference contact's reference participation history will be incremented by 1 for that specific reference activity.
- Click Save.
- Click the More Actions button,
- Add Note: Add any notes pertaining to your request here (e.g. Bill unavailable, call on Tues between 2-4 PM). This note will be added to the Notes tab within the Customer Record.
- Click the More Actions button, , on the desired Reference card, and select Add Note from the menu. The Add Note dialog will appear.
- Add your note details. Fields marked with an asterisk are required.
- Click Save.
Note: If the Follow-Up Date and Follow-Up Subject fields are not populated, the note will be associated with the customer account but will not appear in the Tasks List.
- Click the More Actions button,
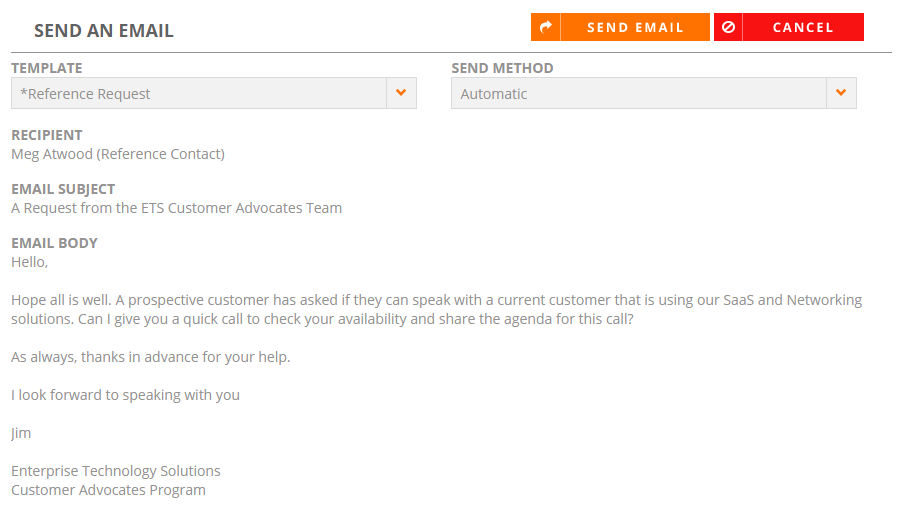
- Send Email: Send an email to your reference contact here. This option appears only if the "Email Templates" feature has been enabled in your system.
- Click the More Actions button, , on the desired Reference card, and select Send Email from the menu. The Send An Email dialog will appear.
- Select the email Template and Send Method using the drop-down menus.
- Click Send Email.
- Click the More Actions button,
Tip: The following functions can all be performed from the References tab: Edit, Copy Link, Add Reference, Add Note, and Complete. For more information, see the Detail: Use this tab to view, edit, and complete requests. tab.
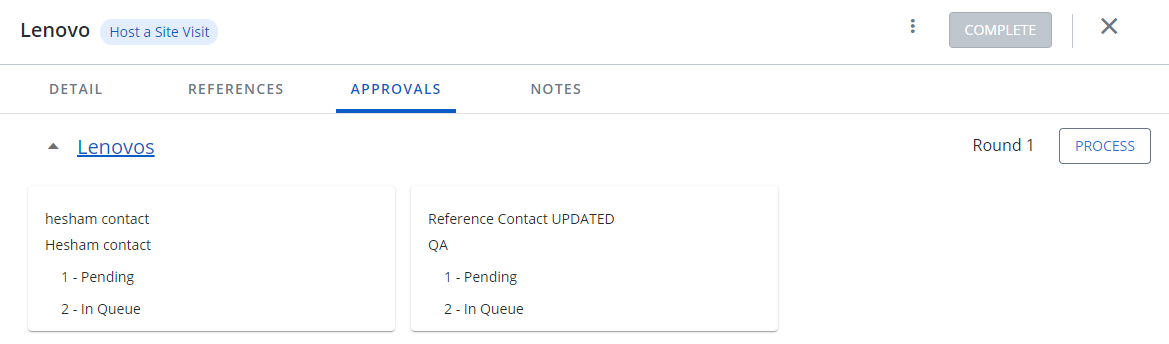
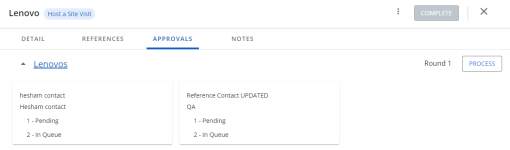
- Approvals: Use this tab to view approval details and process approvals.
- View Approval(s): View different approval processes, by clicking the desired approval process. Once clicked, the approval process will expand to display which each step of the approval process and each approver involved. Active approvals will display which round of the process they are currently on. Once an approval process is completed, click the View Details button to see further information and any notes for each step and requester.
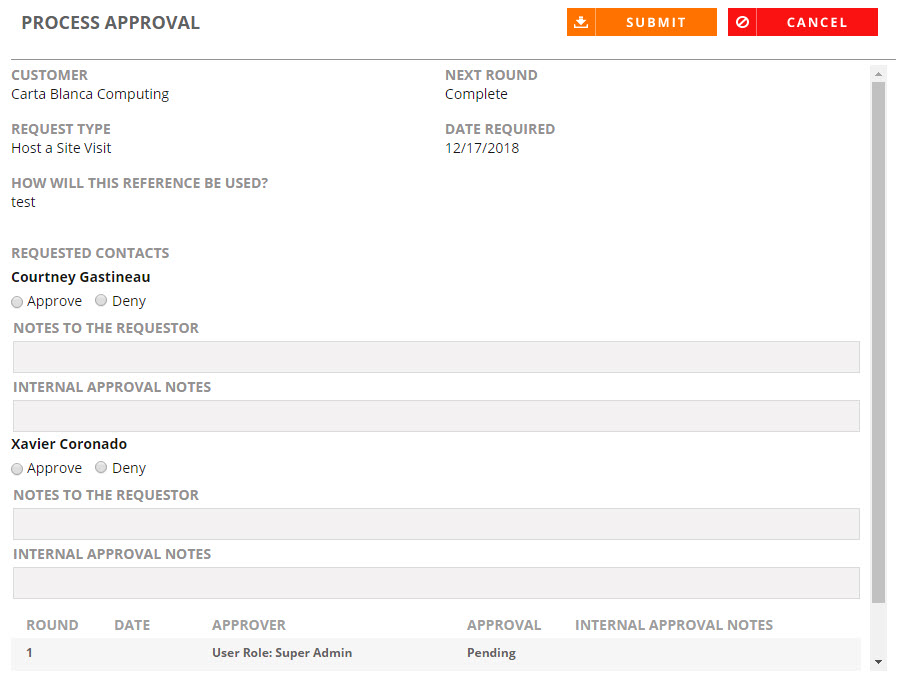
- Process Approval(s): This is where Account Owner(s) can approve or deny reference requests.
- Click the Process button, which is displayed next to the current round the approval process is on.
- Select Approve or Deny next to each Requested Contacts.
- (Optional) Enter any additional Notes for each requested contact.
- Click Submit. A system generated email will be sent to the requester stating that the request has been reviewed.
- If Approved: The requester will receive an email with a link to the approved request, allowing them to view any contact details and additional notes.
- If Denied: The requester will receive an email with a link to the denied request. Contact details and additional notes associated with the denied request will not be visible to the requester.

Note: Once submitted, you will be redirected to the All Pending Approvals filtered grid of the Requests page. If configured, an Event Feedback Survey will be sent to the requester, which must be completed in order to fulfill the request.
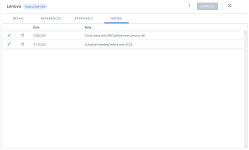
- Notes: Use this tab to view and add notes to the request.
- Add Note: Add any notes pertaining to your request here (e.g. Bill unavailable, call on Tues between 2-4 PM). This note will be added to the Notes tab within the Customer Record.
- Click the More Actions button, , and select Add Note from the menu. The Add Note dialog will appear.
- Add your note details. Fields marked with an asterisk are required.
- Click Save.
Note: If the Follow-Up Date and Follow-Up Subject fields are not populated, the note will be associated with the customer account but will not appear in the Tasks List.
- Click the More Actions button,
- Edit Note: Click the
 icon to edit any existing notes.
 - Delete Note: Click the
 icon to delete any existing notes.
- Add Note: Add any notes pertaining to your request here (e.g. Bill unavailable, call on Tues between 2-4 PM). This note will be added to the Notes tab within the Customer Record.
- Click the X icon to return to the Request grid.
Note: For more information, see Completing and Confirming Reference Requests.
- Navigate to the Requests page.
- Once you locate the request you are going to process, click the row to view request details on the right side of the screen.
- Edit the request as desired. For more information, see Fulfilling and Editing Reference Requests.
- Confirm the request status using the Customer Status and Confirmation Status drop-down menus. For more information, see Fulfilling and Editing Reference Requests.
- Click the Complete button.
- If desired, assign reward points to your customer. For more information, see Editing Customer Information. Your system may be set up to automatically assign rewards points when a Reference Request is completed and the reference event is confirmed.
Note: If "Event Feedback" functionality has been enabled, the requester will automatically receive surveys via email to confirm participation. If "Event Feedback" functionality has NOT been enabled, you will need to manually confirm participation. This is done by manually sending an email to the requester.
Note: Once marked Complete, your request will no longer be displayed in the Active Requests tab. It will be displayed in both the My Requests and All Requests tabs.
Note: Please reach out to our support team @ roinnovation-support@uplandsoftware.com or your Client Success Manager (CSM) to ask for information about turning on the new full page Request Grid in your company’s Shimbonda (test) site. This is currently and ‘opt-in’ feature that you will proactively need to have our team turn on in your Shimbonda site. Once your team has tested in Shimbonda and is comfortable with the new grid; you can reach back out to our support team to have them enable it in your Production RO site as well.
- Navigate to the Requests page.
- Once you locate the request you are going to process, click the row to view request information on another page.
- Use the Detail, References, Approvals, and Notes tabs to edit your request as desired. For more information, see Fulfilling and Editing Reference Requests.
- Click the Complete button. Once completed, you will be redirected to the My Requests filtered grid of the Requests page.
- If desired, assign reward points to your customer. For more information, see Editing Customer Information. Your system may be set up to automatically assign rewards points when a Reference Request is completed and the reference event is confirmed.
Note: If "Event Feedback" functionality has been enabled, the requester will automatically receive surveys via email to confirm participation. If "Event Feedback" functionality has NOT been enabled, you will need to manually confirm participation. This is done by manually sending an email to the requester.
Note: Once marked Complete, your request will no longer be displayed in the Active Requests tab. It will be displayed in both the My Requests and All Requests tabs.
The Account Owner will be the point of contact for Reference Requests regarding their approval or denial for the following Referenceable Activities: Reference Sales Call, RFP, and Site Visit.
Note: Your system may or may not be set up to support request-for-approval workflow from the Account Owner.
- Navigate to the desired Process Approval using one of the following methods:
- Via Email:
- Locate the system generated email in your inbox. The subject will read: "Request Approval Required for (Customer Name)".
- Click the link in the email. You will be directed to the Requests Process Approval dialog.
- Via Requests Page:
- Navigate to the Requests page.
- Click the My Approvals or All Approvals tab.
- Once you locate the request you are going to process, click the row to view request details on the right side of the screen.
- Click Process.
- Via Email:
- Select Approve or Deny.
- (Optional) Enter any additional Notes.
- Click Submit. A system generated email will be sent to the requester stating that the request has been reviewed.
- If Approved: The requester will receive an email with a link to the approved request, allowing them to view any contact details and additional notes.
- If Denied: The requester will receive an email with a link to the denied request. Contact details and additional notes associated with the denied request will not be visible to the requester.
Note: Once submitted, you will be redirected to the My Approvals tab, where the approved request will no longer appear. If configured, an Event Feedback Survey will be sent to the requester, which must be completed in order to fulfill the request.
Note: Please reach out to our support team @ roinnovation-support@uplandsoftware.com or your Client Success Manager (CSM) to ask for information about turning on the new full page Request Grid in your company’s Shimbonda (test) site. This is currently and ‘opt-in’ feature that you will proactively need to have our team turn on in your Shimbonda site. Once your team has tested in Shimbonda and is comfortable with the new grid; you can reach back out to our support team to have them enable it in your Production RO site as well.
The Account Owner will be the point of contact for Reference Requests regarding their approval or denial for numerous referenceable activities.
Note: Your system may or may not be set up to support request-for-approval workflow from the Account Owner.
- Navigate to the desired Process Approval using one of the following methods:
- Via Email:
- Locate the system generated email in your inbox. The subject will read: "Request Approval Required for (Customer Name)".
- Click the link in the email. You will be directed to the Requests Process Approval dialog.
- Via Request grid:
- Once you locate the request you are going to process in the Request grid, click the row to view request information on another page.
- Open the Approvals tab.
- Click the Process button, which is displayed next to the current round the approval process is on.
- Select Approve or Deny next to each Requested Contacts.
- (Optional) Enter any additional Notes for each requested contact.
- Click Submit. A system generated email will be sent to the requester stating that the request has been reviewed.
- If Approved: The requester will receive an email with a link to the approved request, allowing them to view any contact details and additional notes.
- If Denied: The requester will receive an email with a link to the denied request. Contact details and additional notes associated with the denied request will not be visible to the requester.
Note: Once submitted, you will be redirected to the All Pending Approvals filtered grid of the Requests page. If configured, an Event Feedback Survey will be sent to the requester, which must be completed in order to fulfill the request.
- Via Email: